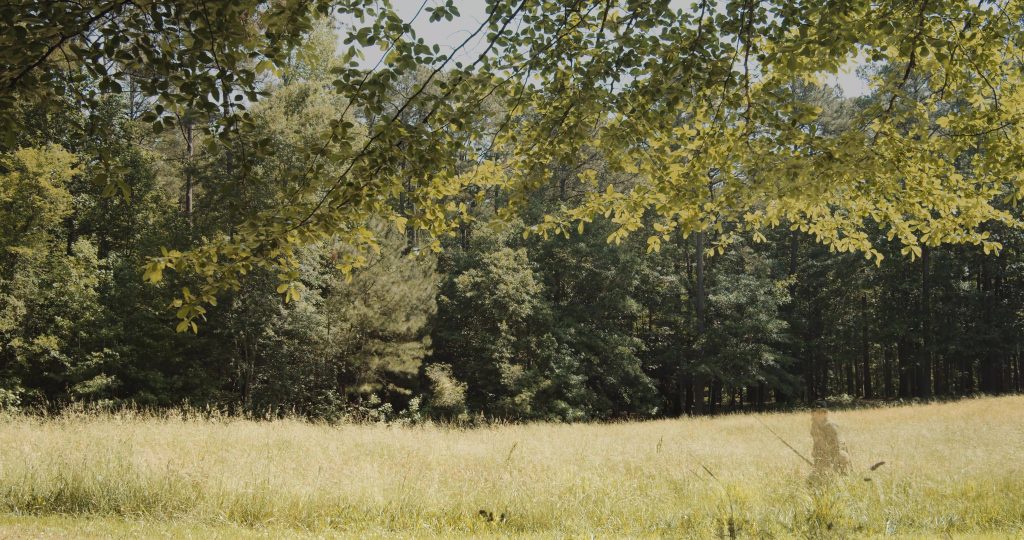
This past weekend, my new film Drum-Taps premiered at the Walt Whitman 200 Festival here in Washington, D.C. on the poet’s actual 200th birthday, complementing the half-hour video essay I recently posted here via whitmanonfilm.com. For this one-person shoot (besides the actor), the Blackmagic Pocket Cinema Camera 4K enabled an efficient and high-performance workflow over the course of three half-days in Virginia, from rural to urban. Blackmagic RAW (BRAW) 5:1 gave me lots of valuable latitude in post-production, for the composite effect used throughout its running time: a classic double-exposure technique, using the Soft Light blend mode on the top layer with talent on-screen, and 50% opacity on the bottom layer with that talent removed, always locked down on a tripod without any panning or tilting (so that the shots would match). The codec’s inherent efficiency kept the whole shoot under 500 GB using a single connected Samsung T5 SSD, which is extraordinary for RAW performance.
Using Autokroma’s plug-in for Premiere, the BRAW footage played back faster even than ProRes, let alone common H.264-based codecs like AVCHD and XAVC-S. This was the first major project I had taken on using entirely the BRAW Studio plug-in, after creating the above tutorial that remains the most comprehensive guide available. This added even more confidence that BRAW Studio is a real solution for using the codec in Premiere; perhaps it’ll become one of those things Adobe can’t resist buying out, from a third-party developer, like they did with virtual reality effects from Mettle that are now native, and Lumetri color altogether that is now so deeply ingrained into every Premiere workflow.
As for the color grade, since I still refuse to round-trip out to DaVinci Resolve (avoiding generation loss), I’m still experimenting with the unpredictable difference between dumping Lumetri and FilmConvert onto the clips at the Source level using Effect Controls, versus later “stacking” of color correction onto sequences at the Timeline downstream. In general, I’m seeing benefits to avoiding color tweaks using the BRAW Studio controls at all; putting Lumetri next in the stack; then finally letting FilmConvert take care of both the LUT conversion from log, and of course film emulation simulation. But if the shots had included more complicated motion, requiring keyframed changes to color parameters, I would have had to do all of my color work downstream in the Timeline for sure.
I appreciated the native DCI aspect ratio for cinema presentation (especially now that film festivals increasingly prefer DCP presentation at DCI aspect), which is the one mode on the BMPCC4K that uses the whole sensor (whereas the UHD recording mode is actually windowed). And the camera’s four-microphone array did a fine job at capturing footsteps and other ambient sounds that surprisingly obviated the need for using any secondary audio.
As a mostly outdoor shoot, always with daylight color temperature, ND filtration was critical, and that actually caused problems. Two solid brands of variable ND filters actually vignetted badly at times, proving that the BMPCC4K’s sensor is making more use of Micro Four Thirds glass, straight to the farthest edges (whenever at the widest focal lengths). This makes sense when you consider the crop factor of the BMPCC4K is about 1.9, a little lower than the typical MFT sensor. That partly explains the better light sensitivity, and the extra pixels offered, from the native DCI aspect dual ISO sensor.

Given the run-and-gun nature of the shoot too, I opted for zoom lenses most of the time for fastest re-framing/composition. Nothing deluxe there, just my two workhorses: the Panasonic Lumix 12-35mm f/2.8, and the Olympus 12-100mm f/4.0. Because of the composite nature of the simpler wide angles here, depth of field wasn’t a big part of the equation, but where I did need to narrow that down, I hooked on the cheapo Panasonic 25mm f/1.7 prime and it performed just fine. We’re talking 4K video here, not still photography.
There are just two drone shots in the film, using what remains the best drone available for prosumers, that ironically isn’t being sold anymore (DJI Phantom 4 Pro V2.0). The second shot was a nice excuse to try out the new Content Aware Fill tool in After Effects, to create a second layer to enable the soldier’s semi-opacity. It goes by quickly enough, that it did the job (if you don’t notice the street bricks looking weird)! But just like Morph Cut, it’s really hit-or-miss after the honeymoon period’s over.
In all, while this kind of smaller and more independent production continues to rise in standards and audience reach, tools like the Blackmagic Pocket Cinema Camera 4K fill an increasingly important niche, acting as the central filmmaking tool. Put another way: it’s not just a toy after all. I have better gear back at the studio, but for this shoot, I couldn’t have done better. And it all fit in a backpack.
Leave a Reply