Full confession: this “blog” (is that a word anymore?) has been practically abandoned for a really long time, after years of forging new ground in this sector of independent filmmaker technology when there were less — and usually much more credible — sources of information. Now, it’s a traffic jam of clickbait and corporate influence from amateurs and lonely dudes.
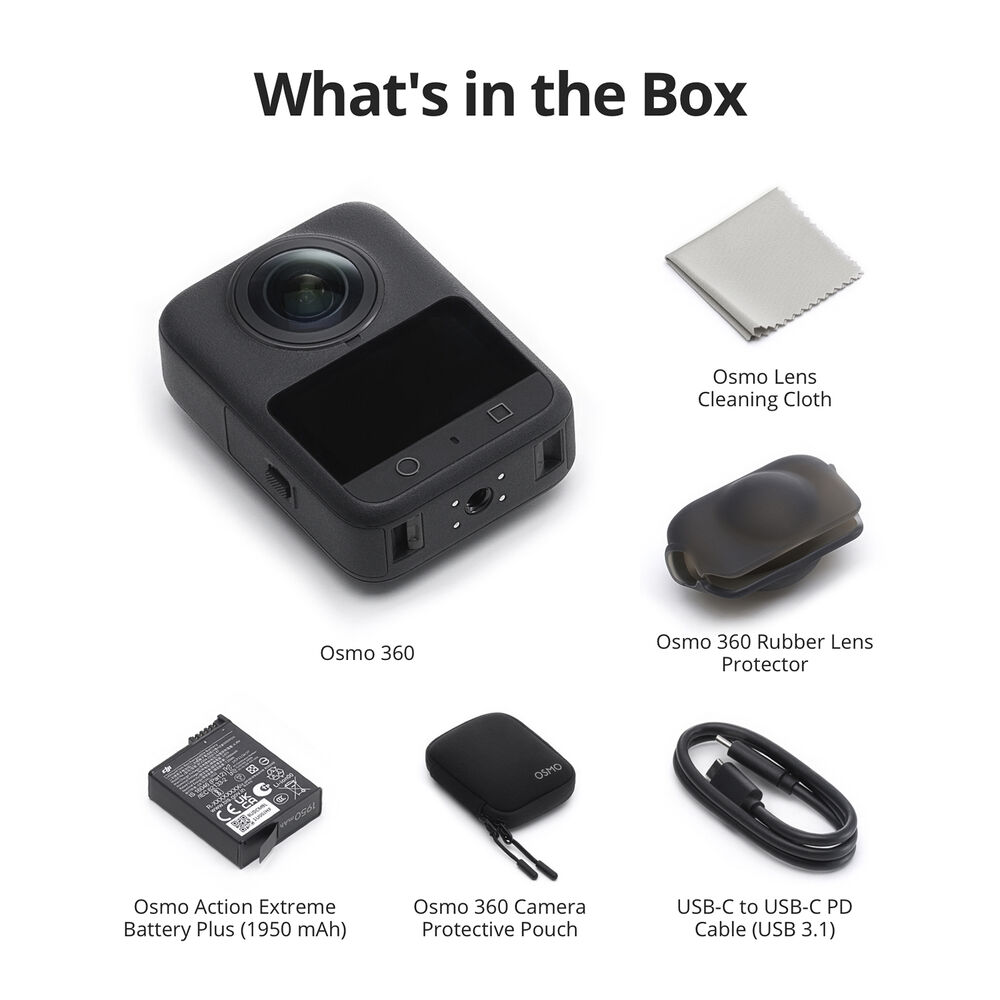
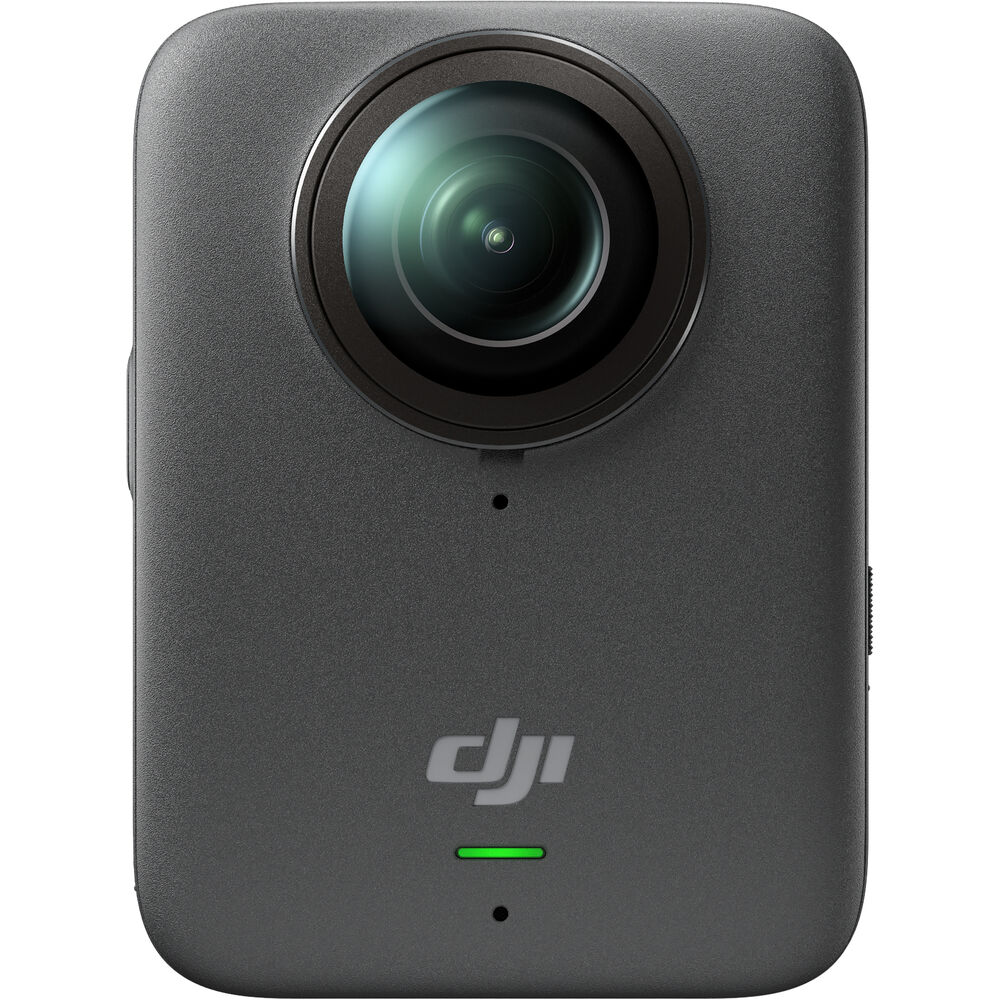
But every once in a while, something comes into my kit that inspires me (oddly, it’s been a while). When DJI entered the virtual reality space recently by announcing its Osmo 360 8k camera, it surprised no one: the market had petered down to mostly just Insta360 (yet, remember those Kandao and Samsung flying saucers, or GoPro’s Omni cube of stacked Hero4 cameras?), and I previously wrote here about my adventures with the Insta360 EVO, which cleverly combined VR360 and VR180 tech into one tiny versatile product. After the CES/profit-driven hysteria of virtual reality half a decade ago — selling the fiction that we’d soon consume all media with headsets strapped on — the industry waned, and its best candidate for engagement, VR180 with its three-dimensional immersion capability (and acceptance that nobody really cares about looking backwards anyway), all but died.
 To an extent, so did the “action cam” industry, even if GoPro keeps chugging, and DJI has staked its spot with Osmo. Hungry corporate executives figured it out: the best way to salvage VR marketing for this gap period is to sell VR as drone-adjacent, ever more capable action cams. Here comes DJI.
I doubt that they expect any more than 1% of Osmo 360 buyers will actually wear headsets to watch what they make! That’s an amazing development to consider.
What excited me about diving back into this tech, was the ability to “fly” like a drone into settings without the fuss and stress (and increasing illegality) of UAV. What’s more, one of the places where I live, Washington, D.C., simply bans drones anywhere within a 15-mile radius of the White House. This regulation has always egged me on, as a Washingtonian: and given the militarization of the District these days by you-know-who, it’s evermore a dramatic restriction.
No matter the blemishes on my city’s reputation, Washington, D.C. is a beautiful place. Fun fact: it was designed by the landscape architect/city planner of Paris, Pierre L’Enfant, dating back to the early days of this country and its bromance with France. Nothing compares to the city’s open spaces, height limitations (12 stories maximum, no exceptions besides the Washington Monument!), and classical architecture.
I love the clever tech of 360 cameras, in that any stick holding it up becomes invisible due to overlapping fields-of-view from two opposite-facing ultra-wide angle lenses. Forgiving the shadow of the stick that’s cast by the sun, it’s truly a magic trick. I also love how the complete sphere of vision enables jaw-droppingly good image stabilization, paired with gyroscopic metadata that always knows where the relative flat earth is. It therefore becomes irresistible to mount a 360 camera onto the back of a bicycle, suspended almost uncomfortably high into the air, enough to look like a personal drone valet is dedicated to my ride without any need for interaction or guidance. It just works.
Problem is, the supporting gear isn’t ubiquitous, and even the VR camera manufacturers are slack in marketing what’s needed. So I turned to a cheapo import option, actually better than anything offered by DJI or Insta360: for stability (and peace-of-mind/security), the goal is to mount a rigid stick to the back of your bicycle with not just one, but two hefty clamps (one to the seat pole, another to the seat itself). For about fifty bucks, Amazon delivered it the next day, private-labeled by a gibberish company called “KOQEIEY.” Instead of needing to use/repurpose a “selfie stick” (I didn’t own one, and never would be caught dead walking around with one, and remember the apocalyptic period when tourists actually dared to try!), “KOQEIEY” includes a durable telescoping pole in the kit — while DJI and Insta360 do not, despite charging twice as much.
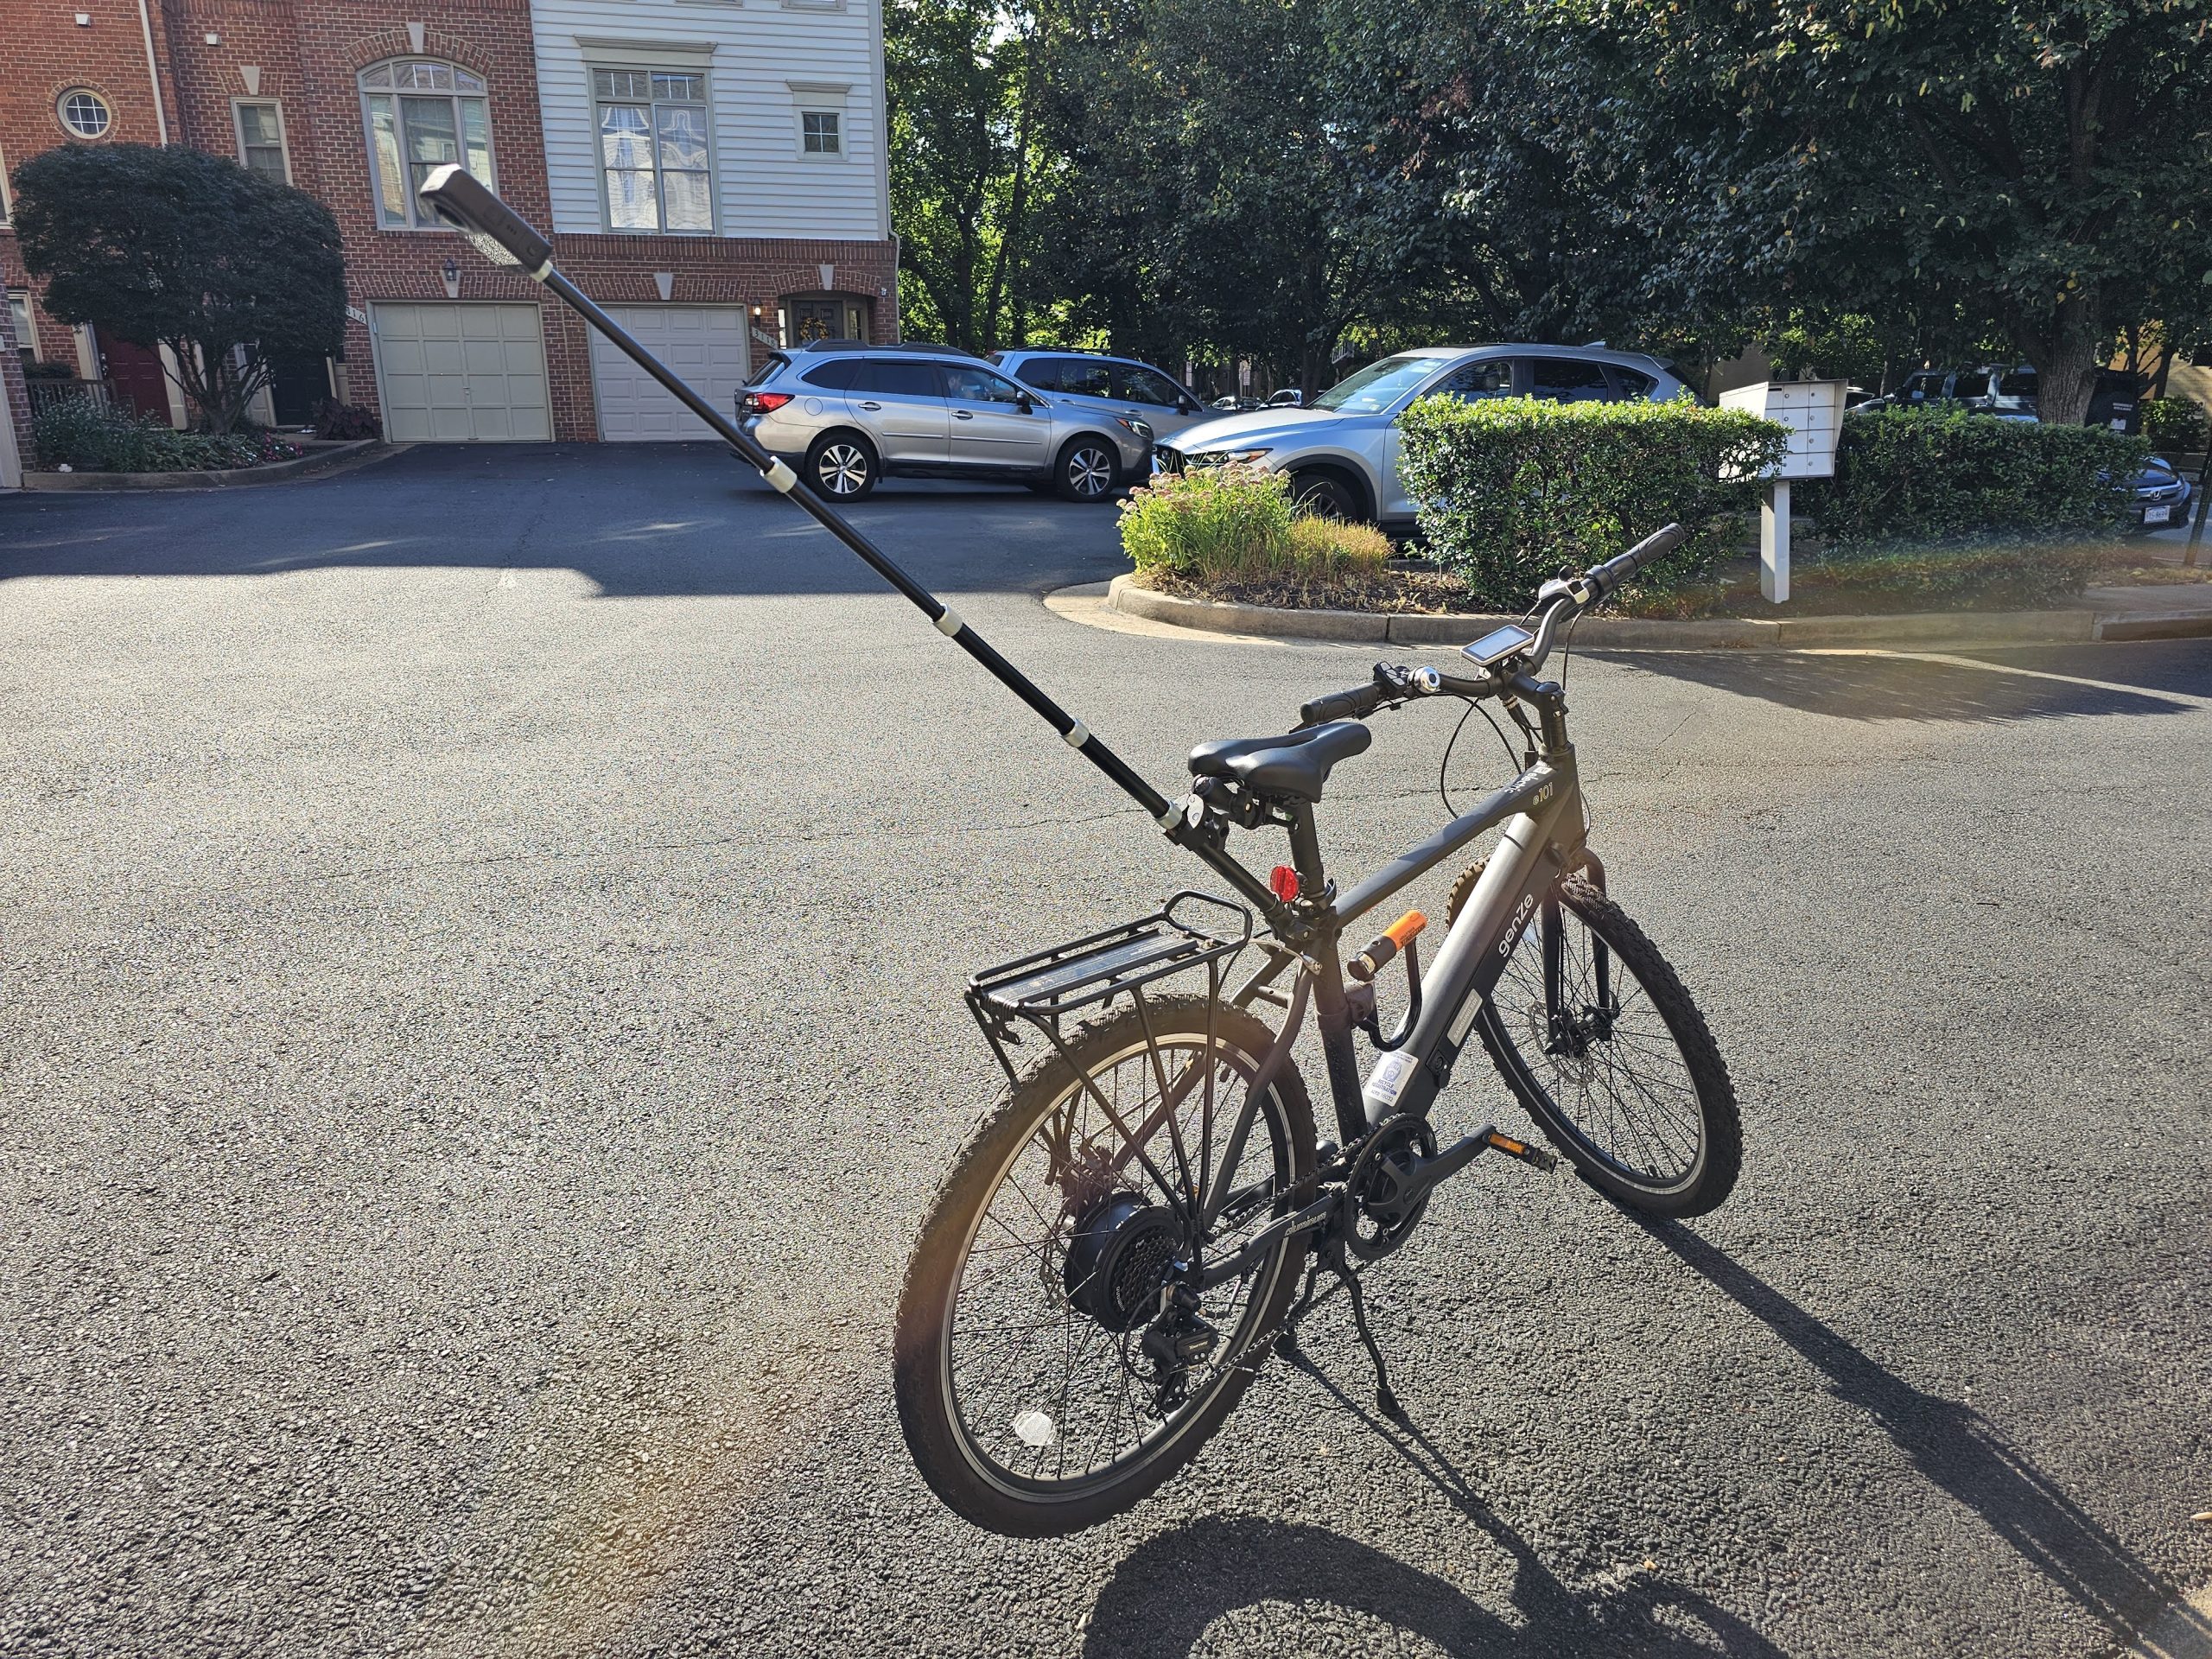
With this rig seen here, I was up and running/riding. (The bike is my trusty GenZe, dating way back to when Mahindra got into the e-bike biz, and I loathe the day when I’ll need to replace it.) But I had another idea: wouldn’t it be cool to also see my actual location on a map, alongside the camera footage? As it turns out, DJI skimped on integrating any ability to collect GPS data during recording. They should have; by now, GPS tracking is cheap and universal tech. Briefly, Sony was including GPS metadata collection into its point-and-shoot cameras; then, too many camera snobs bitched about how GPS is useless for “pros” (barf) who want maximum battery life (even though you could always turn it off). This is the same boomer mentality you hear about cars “from the good old days that had less bells and whistles to break down.” And thus, poof, GPS in cameras never came back. Manufacturers LOVE not having to spend an extra dime or two on silicon guts if they can get away with it.
 But it is possible to tether-feed continuous GPS data via Bluetooth into the Osmo 360 via an accessory, and while DJI makes their official doodad costing one Benjamin, cheap imports on Amazon strike again: I got what I needed from another no-name private label that looks like a randomly generated password (this time, “GAEKOL”) for under fifty bucks. At first, it didn’t go well: acquiring active GPS geolocation takes longer than your typical phone, about a minute or more. And if it’s not collecting when you start recording, you’re probably out of luck. Also, extracting that GPS metadata into something useful is amazingly primitive in 2025. Worst of all, DJI’s own apps fail to reliably recognize location data using the “Dashboard” feature on their mobile Mimo or desktop Studio — even so, their rendering of maps and other GPS metadata is rudimentary and “action bro”-simplified. DJI hasn’t even bothered to enable Windows editing for Adobe Premiere, currently just feeding Macheads. The biggest target market for these features is an InfoWars species you could call “shredders,” after all.
Enter, then, the heroic open-source donationware community. After reeling from the sticker shock of a bloated option called Telemetry Extractor from a Spanish entrepreneur, I found a simple app from donationware author Dean Zwikel and tried out his converter from .osv files (the video files created by the Osmo 360 with embedded GPS metadata) into .gpx files that can be imported into platforms like Google Earth. At first, it mostly didn’t work: his initial beta version had just launched August 15, and some files worked, others didn’t, with errors or with no GPS metadata detected. I helped Dean by feeding him examples of every outcome both positive and negative, and from that control set, he cleverly engineered a perfectly functioning version 2 that totally delivers. Please support his work at this link and look for OSV2GPX with its pertaining Google Drive directory and instructions.
Now, I was ready: on a bright and sunny day in downtown Washington, D.C., I rode around for a couple of hours, practically forgetting about the rig, just hitting some highlights in my beloved city. I started after finishing a meeting on 14th Street in the Logan Circle neighborhood and headed south. I stopped at my optometrist for a checkup, then hit Pennsylvania Avenue and its majestic boulevard approach to the Capitol building in a smartly-planned center bicycle lane. I swung around back to the Mall and stopped in at the Smithsonian National Museum of American History to grab a shot for a documentary I’m making, then drove around the Washington Monument past the Tidal Basin and World War II Memorial, onward to the Ellipse and then the front, and back, of the White House, onward to Freedom Plaza (and its embedded map of downtown DC beautifully visible from the air), ending at the World War I Memorial recently added to Pershing Park. The tech was remarkably maintenance-free, and basically automated.
So also, in fact, was the process of turning that collected GPS metadata into an animated overhead map of the journey using Google Earth Pro. It used to be a paid service until recently, and Google simply lets you download and use it for free. They’re trying to migrate (like everything else) into a cloud-only service, but at this time, Google Earth Studio (Web-only) lacks many features of the desktop app. For example, it can’t import a .gpx file and create a film of that journey in real time to match the pertaining GPS time-and-speed metadata.
That said, Google Earth Pro is a dinosaur of coding, hardly updated in years, and typical of Alphabet’s lackadaisical Bay Area attitude. It crashes constantly, runs slowly even on a beefed up workstation, and renders out glitches randomly. You’ll see in my headlining video here that the location pointer jitters almost constantly, and randomly changes size a few times. But beggars can’t be choosers, and all of Alphabet’s evils help pay for this otherwise amazing technology. I still can’t get over how the photorealistic buildings from overhead move in true three-dimensional space, shadows, perspective and all. After I figured out how to wrangle the primitive interface and customize the look for minimalist output, the “Movie Maker” feature delivered great 4K video automatically.
I lined it up in DCI-4k aspect alongside the Osmo 360 panoramic video set to “Asteroid” rendering mode. Naturally, I maxed out the video settings, and why not? My 512gb microSD had plenty of room, and the Osmo 360’s clever sensor design efficiency avoided overheating even in exposed warm temperature for long half-hour stretches. Specifically, I shot in D-Log M and converted using DJI’s new LUT, in 10-bit color, at 8K resolution in 30 frames per second, with the bitrate set to “Maximum.” I rendered out from DJI Studio to a square 2160p video file, cropping out the edges because it was Asteroid format anyway. Similarly, the Google Earth Pro output is cropped at the edges, with little compromise because the center tells you where I am.
The resulting film, lasting three-quarters of an hour, isn’t exactly entertainment, but I find it super entertaining to watch. We simply never see cities this way, yet we think about these things all the time. Nobody is immune from those childhood awakenings to maps and atlases, that sense of wonder combined with logical sorting of useful information, as old as the ancient or even Polynesian cartographers. I couldn’t resist sharing. It’s been a while.