• Blog
    • Latest Posts
    • News
    • Featured Videos
    • Deals
  • About
  • Camera User Groups
    • ARRI
      • User Videos
      • News & Deals
      • Related Posts
    • Blackmagic
      • User Videos
      • News & Deals
      • Related Posts
    • Canon
      • Canon Cinema EOS
        • User Videos
        • News & Deals
        • Related Posts
      • Canon 5D Mark III/IV
        • User Videos
        • News & Deals
        • Related Posts
      • Canon Rebel/70D/80D
        • User Videos
        • News & Deals
        • Related Posts
    • Panasonic
      • Panasonic GH5
        • User Videos
        • News & Deals
        • Related Posts
      • Panasonic GH4
        • User Videos
        • News & Deals
        • Related Posts
      • Panasonic GH3
        • User Videos
        • News & Deals
        • Related Posts
    • Sony
      • Sony a7-Series
        • User Videos
        • News & Deals
        • Related Posts
      • Sony CineAlta
        • User Videos
        • News & Deals
        • Related Posts
      • Sony PXW-FS7
        • User Videos
        • News & Deals
        • Related Posts
      • Sony PXW-FS5
        • User Videos
        • News & Deals
        • Related Posts
      • Sony NEX-FS700
        • User Videos
        • News & Deals
        • Related Posts
      • Sony NEX-FS100
        • User Videos
        • News & Deals
        • Related Posts
      • Sony NEX-VG10/20/30
        • User Videos
        • News & Deals
        • Related Posts
    • Z CAM
      • User Videos
      • News & Deals
      • Related Posts
    • RigShots
  • VR
    • Daily Digest
    • Videos IN VR
    • Videos ON VR
    • Latest Posts
    • News & Deals
  • DOCOFILM
    • Newsletter
    • Latest News
    • Featured Videos
  • Essays on Film
  • Adobe Premiere Tips
Menu
  • Blog
    • Latest Posts
    • News
    • Featured Videos
    • Deals
  • About
  • Camera User Groups
    • ARRI
      • User Videos
      • News & Deals
      • Related Posts
    • Blackmagic
      • User Videos
      • News & Deals
      • Related Posts
    • Canon
      • Canon Cinema EOS
        • User Videos
        • News & Deals
        • Related Posts
      • Canon 5D Mark III/IV
        • User Videos
        • News & Deals
        • Related Posts
      • Canon Rebel/70D/80D
        • User Videos
        • News & Deals
        • Related Posts
    • Panasonic
      • Panasonic GH5
        • User Videos
        • News & Deals
        • Related Posts
      • Panasonic GH4
        • User Videos
        • News & Deals
        • Related Posts
      • Panasonic GH3
        • User Videos
        • News & Deals
        • Related Posts
    • Sony
      • Sony a7-Series
        • User Videos
        • News & Deals
        • Related Posts
      • Sony CineAlta
        • User Videos
        • News & Deals
        • Related Posts
      • Sony PXW-FS7
        • User Videos
        • News & Deals
        • Related Posts
      • Sony PXW-FS5
        • User Videos
        • News & Deals
        • Related Posts
      • Sony NEX-FS700
        • User Videos
        • News & Deals
        • Related Posts
      • Sony NEX-FS100
        • User Videos
        • News & Deals
        • Related Posts
      • Sony NEX-VG10/20/30
        • User Videos
        • News & Deals
        • Related Posts
    • Z CAM
      • User Videos
      • News & Deals
      • Related Posts
    • RigShots
  • VR
    • Daily Digest
    • Videos IN VR
    • Videos ON VR
    • Latest Posts
    • News & Deals
  • DOCOFILM
    • Newsletter
    • Latest News
    • Featured Videos
  • Essays on Film
  • Adobe Premiere Tips

Category: FocusPulling Original

19 October 2018

Blackmagic Pocket Cinema Camera 4K: Interactive Guide to Menus & Features / Sample Clips / Review

Written by Paul Moon

The headlining video for this page runs over 2¼ hours. It is the most comprehensive guide anywhere to the Blackmagic Pocket Cinema Camera 4K’s menus and features. For your convenience, the below interactive guide breaks this video down into organized sections, taking you directly to a discrete explanation of whatever menu page or feature you’re interested in. Just click it, and a video will play back with a detailed explanation. Use the top index to skip around between menu tabs and pages.

I got inspired to throw this together after creating a menu guide for the Sony a7R III, after lessons learned from an ongoing trans-media creative project of mine (at www.95thesesfilm.com/concordance), and a full test run using the BMPCC4K to create my film America premiering tomorrow at the Rabbit Heart Poetry Film Festival. So, I’ve combined sample footage from that project, with comments about the camera (triggered by explaining its menus and features), resulting in a hybrid resource of: complete product tutorial, review, and footage samples.

Previously here, I wrote up a deep dive into lingering niche technical questions, that the other blogs/vlogs were skipping or getting wrong, in the weeks leading up to the camera’s release. When Blackmagic gave me direct answers, and I got my paws on the camera early, I typed it all up, and it’s still worth checking out if you haven’t: www.focuspulling.com/bmpcc4k-learning

The BMPCC4K is shipping now via B&H, Adorama, and CVP for a revolutionary low of $1,295, just like the last time around when Blackmagic’s original Pocket changed the world (or at least, rocked mine). You’ve got to admit, it’s an empowering price point for independent filmmakers and film students. And I’m looking forward to watching what you’ll make with it: please share to the Facebook page and the Twitter feed @BMCCusers via joining, and then properly tagging your videos and adding them, to the Vimeo User Group.


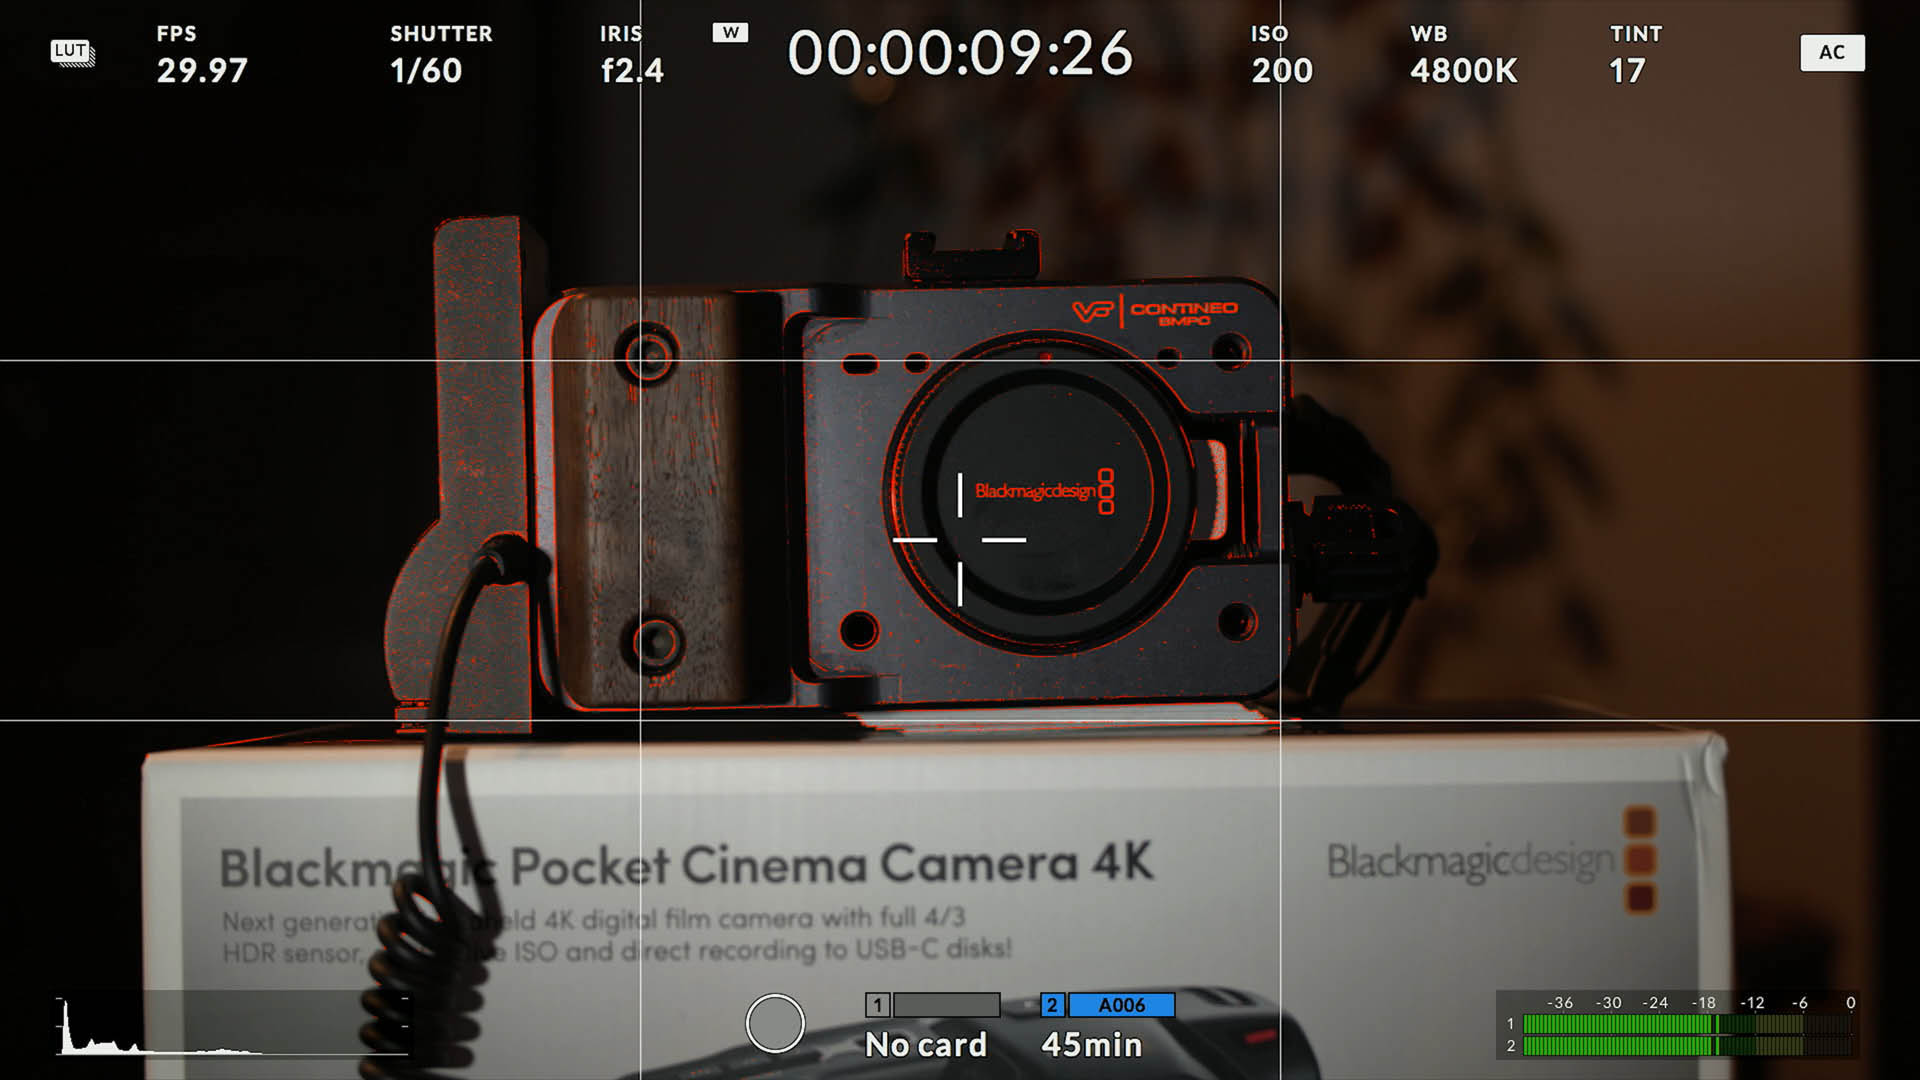
00:00:00 – INTRODUCTION
00:01:16 – SAMPLE CLIPS/TESTS: highlight roll-off, holding the camera steady, internal microphones, rolling shutter, slow-motion
00:04:15 – TUTORIAL SETUP: an a7 III shooting the BMPCC4K that’s shooting the original BMPCC while feeding an Atomos Shogun
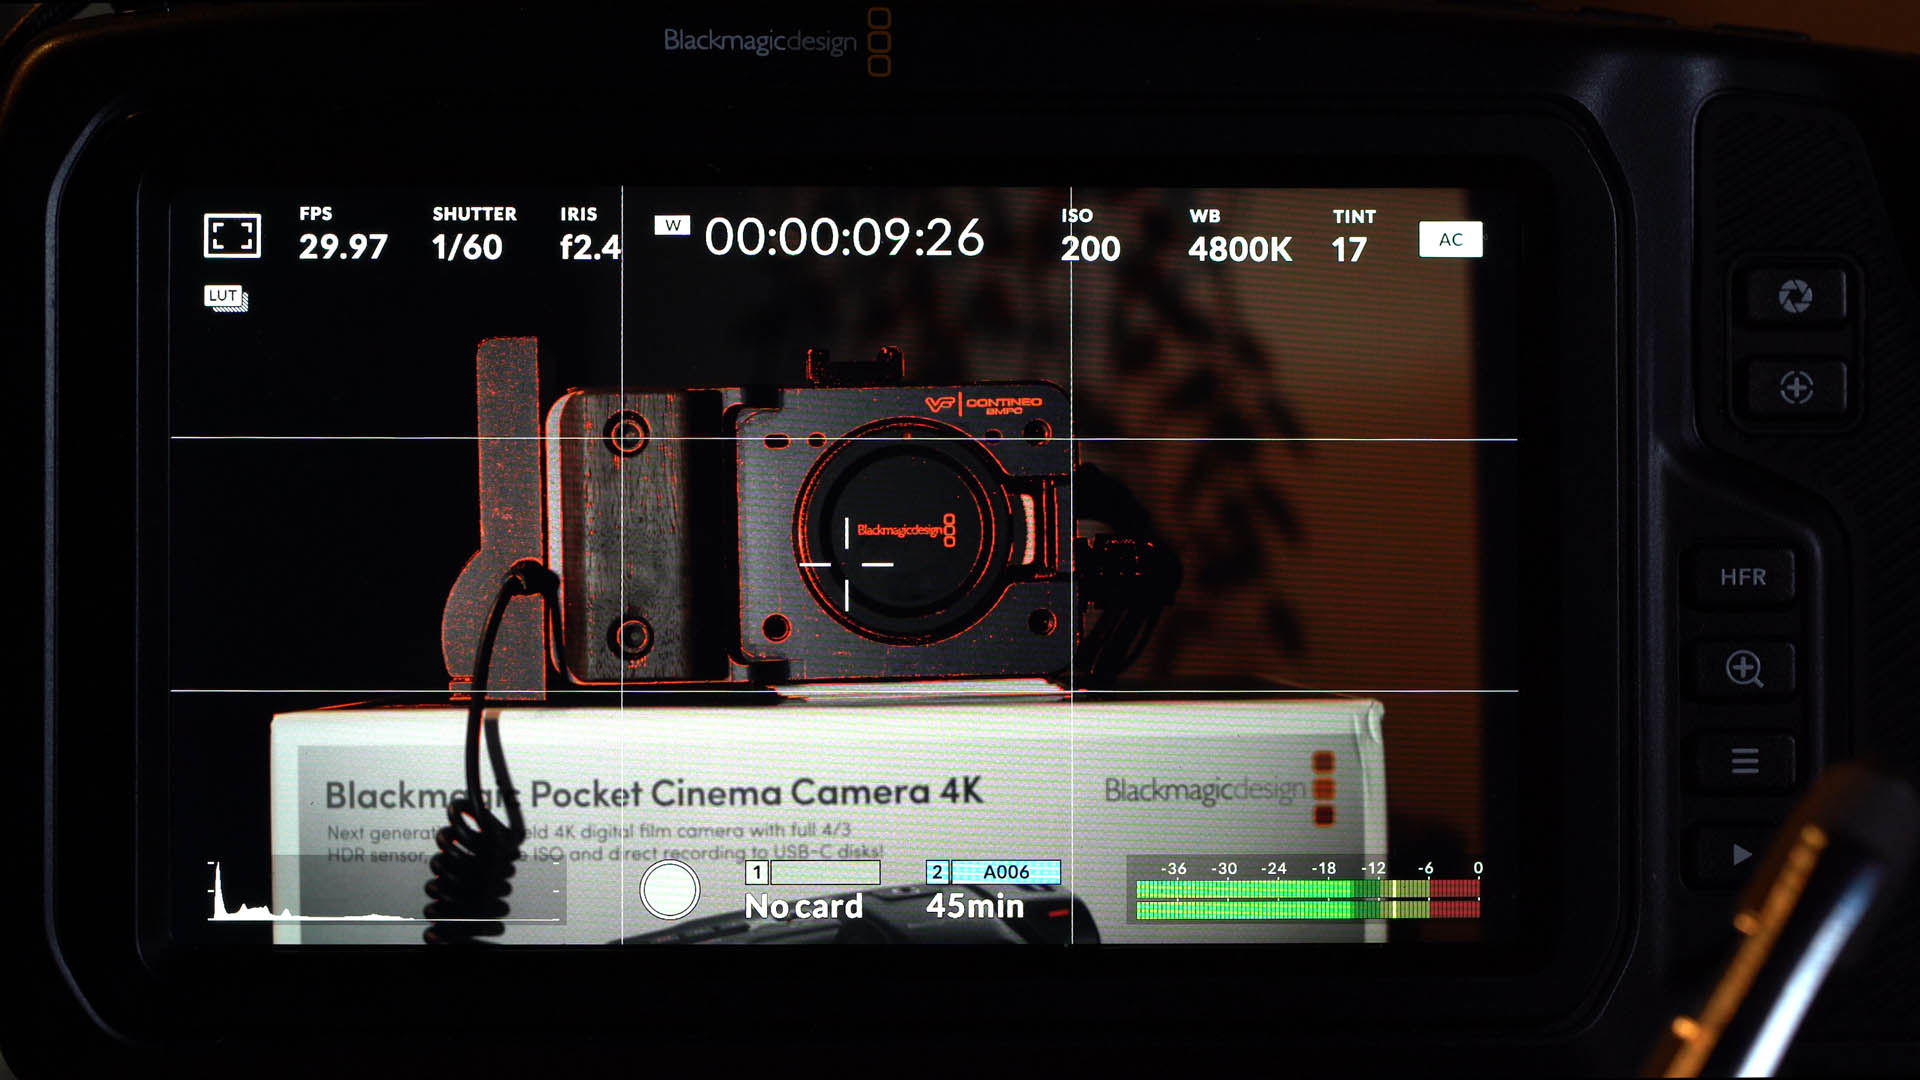
00:06:32 – TOUCHSCREEN CONTROLS: button-free, menu-free adjustment of most shooting parameters on the touchscreen
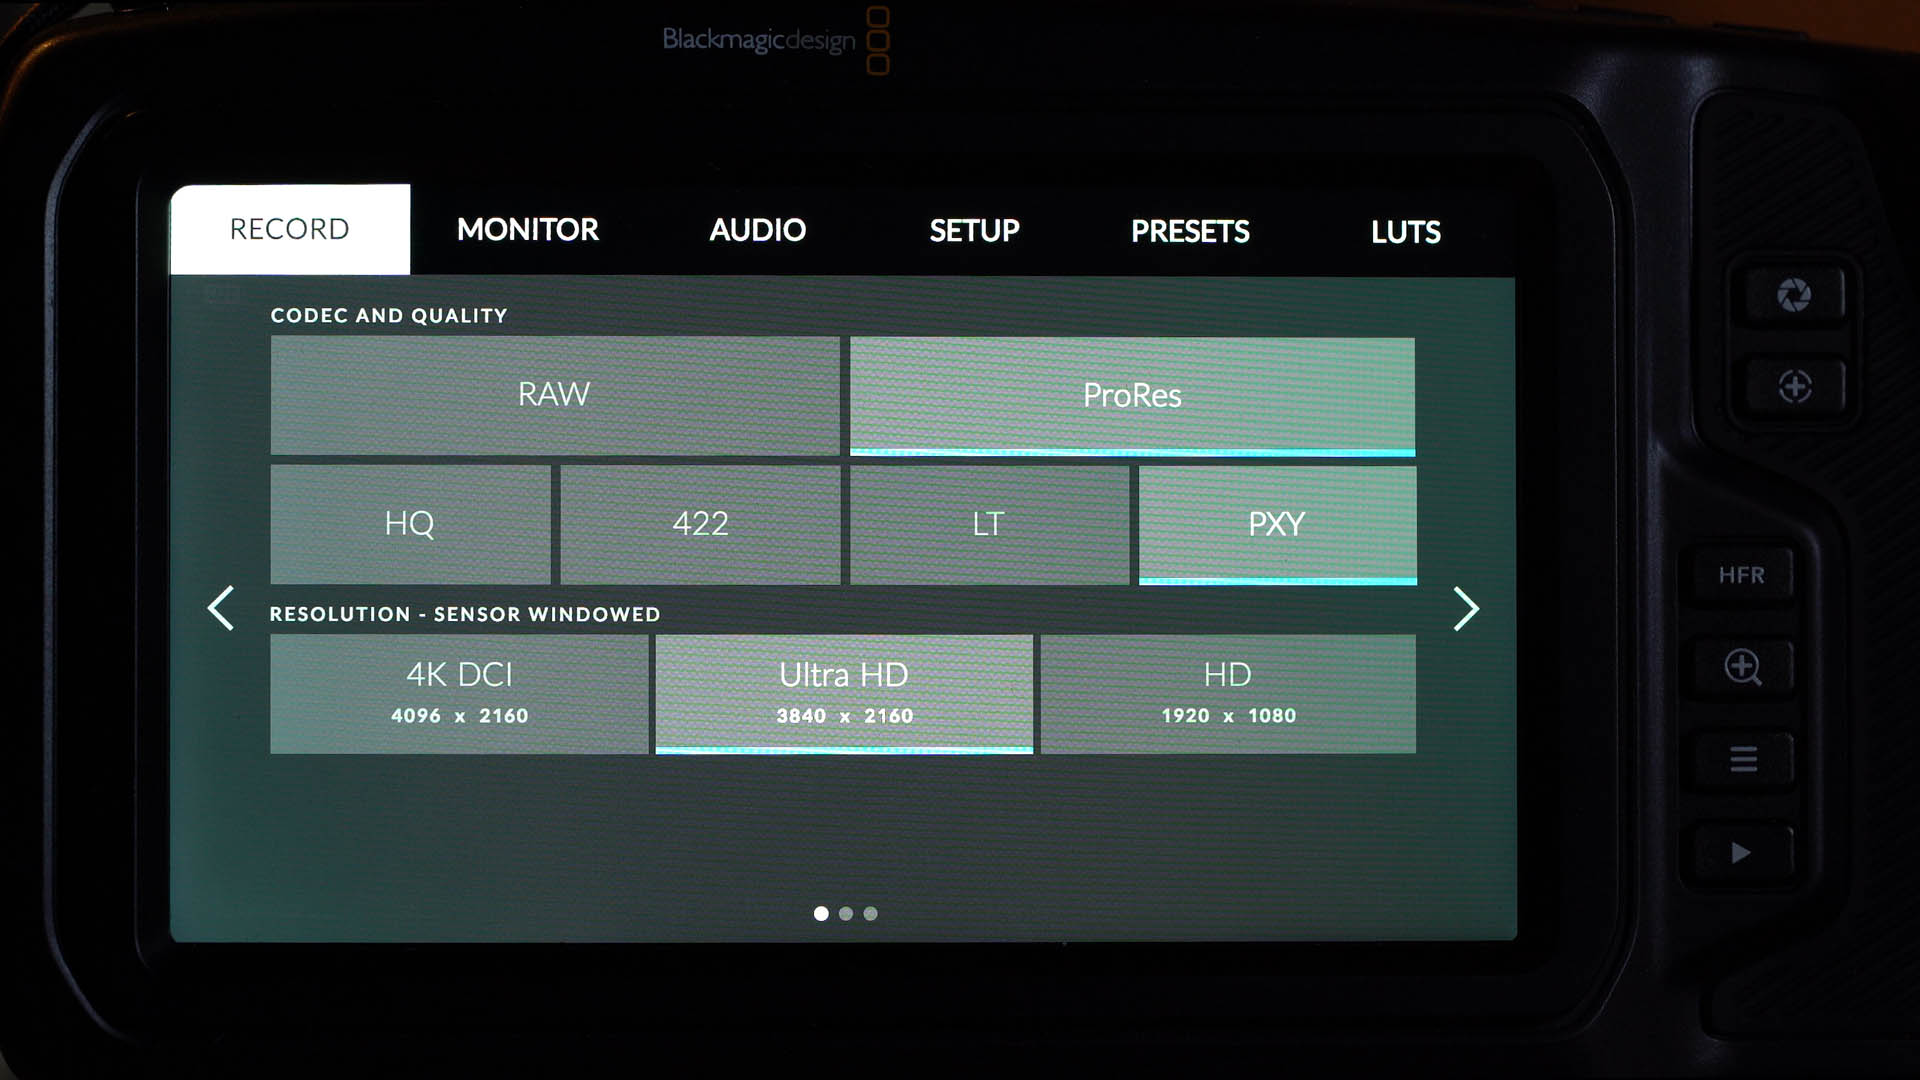
00:39:28 – RECORD 1: ProRes and RAW, 4K DCI vs. UHD vs. HD
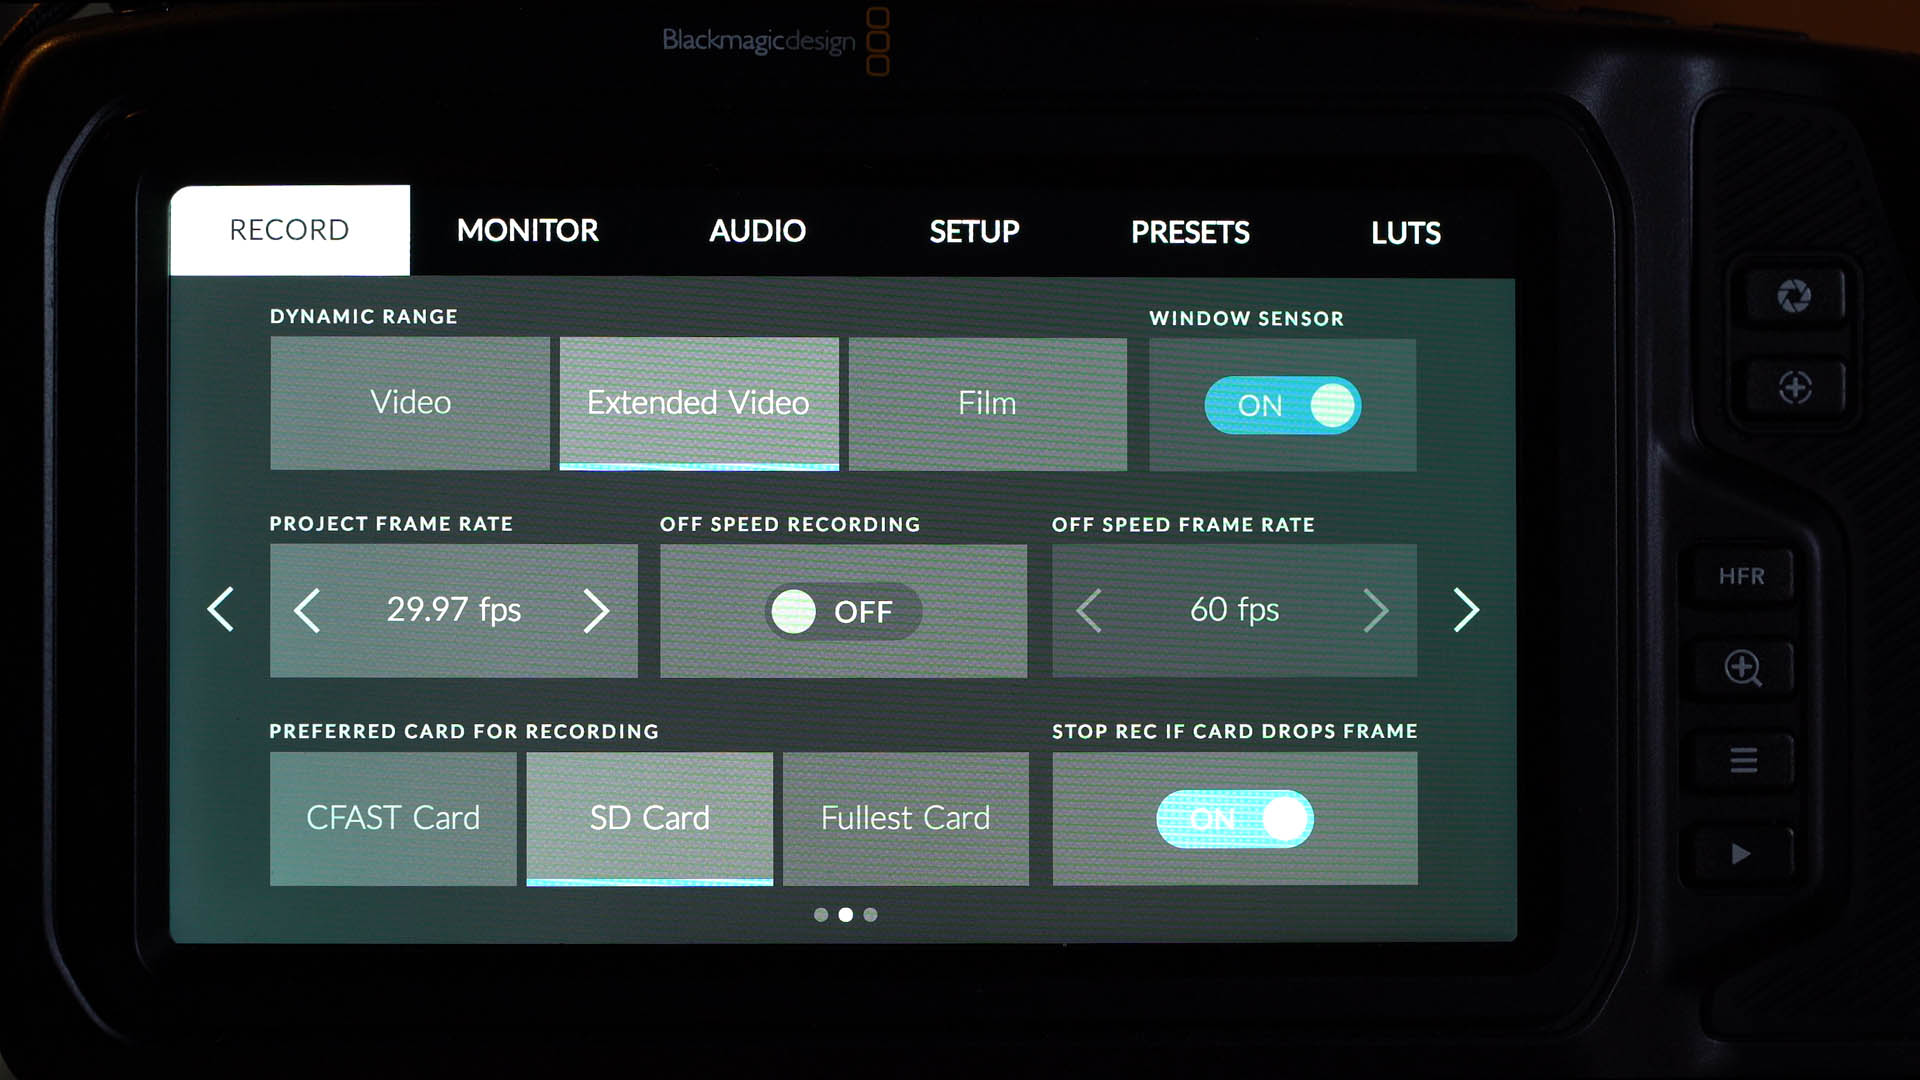
00:47:41 – RECORD 2: Dynamic Range, Window Sensor, Project Frame Rate, Off-Speed Recording, Dual Card Slots, Dropped Frames
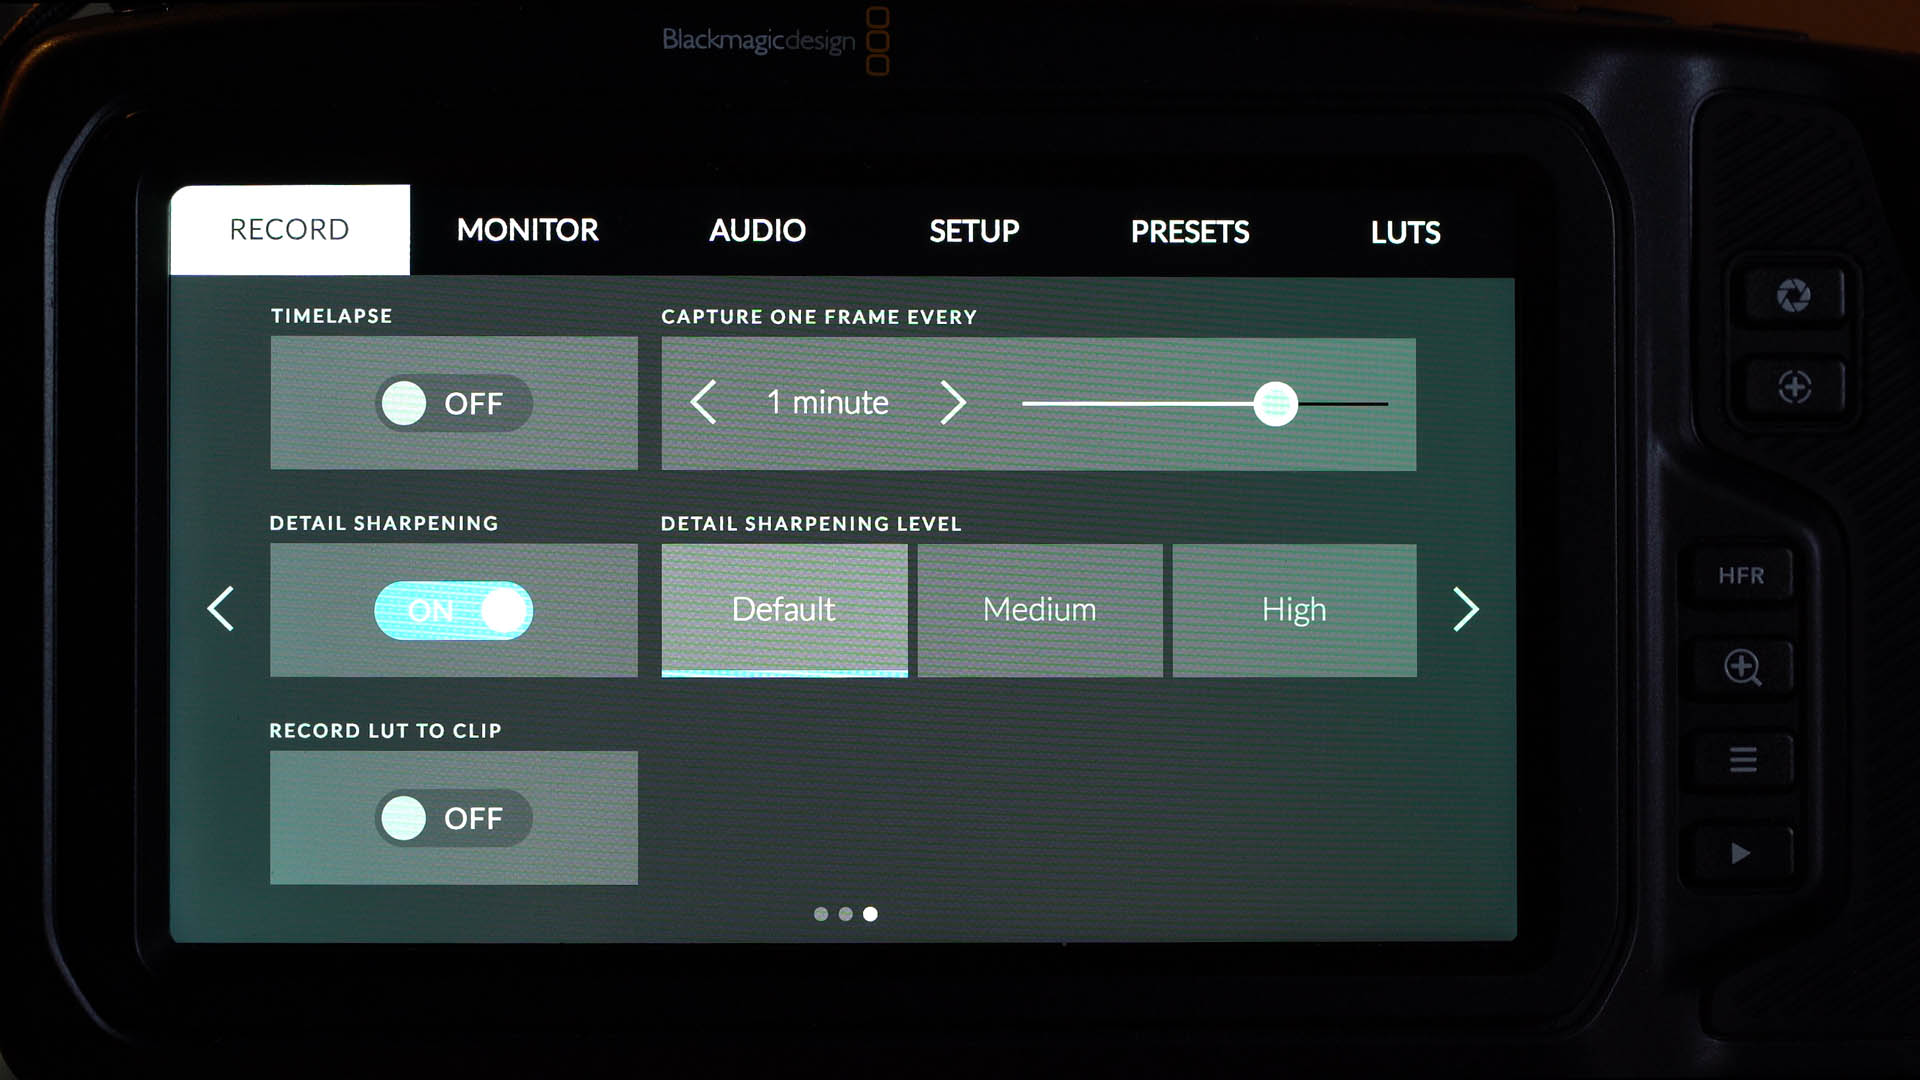
00:58:19 – RECORD 3: Timelapse, Sharpening, Record LUT to Clip
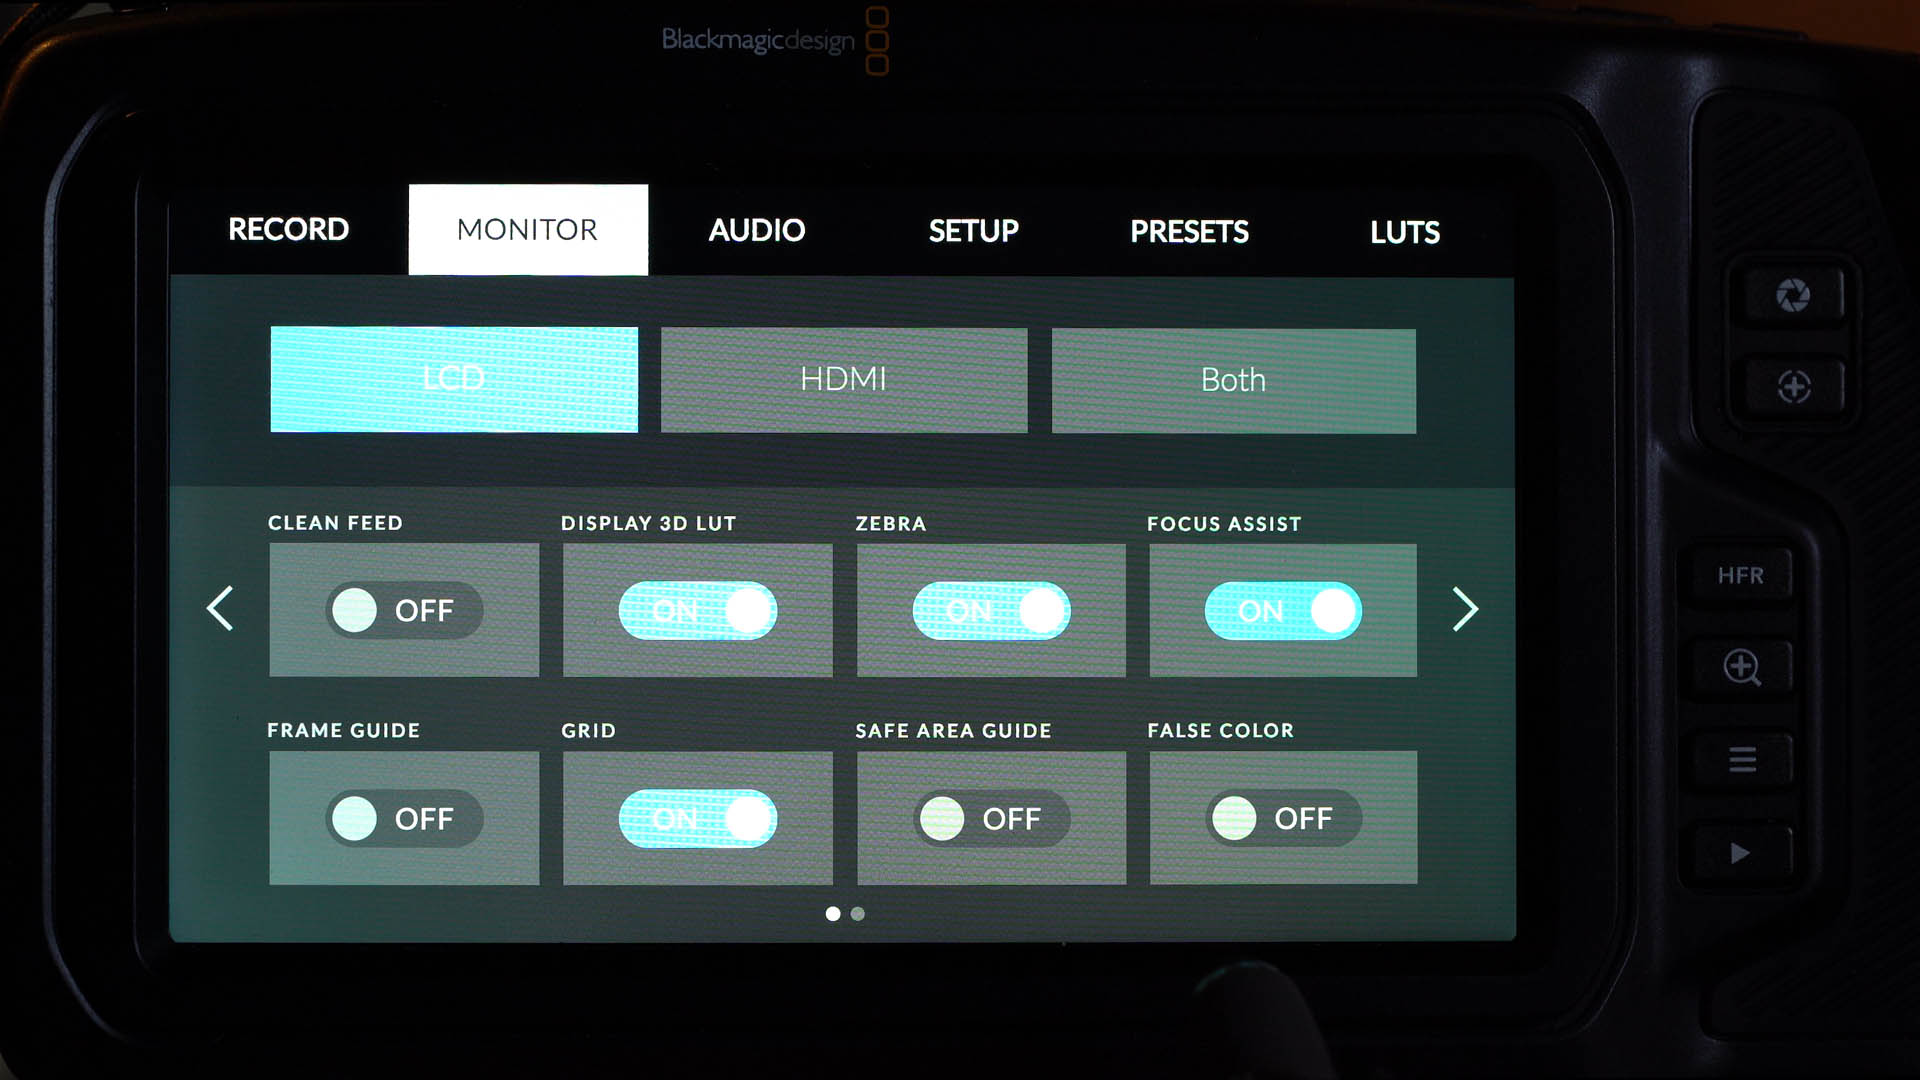
01:03:12 – MONITOR 1: LCD Clean Feed, Display 3D LUT, Zebras, Focus Assist, Frame Guide, Grid, Safe Area Guide, False Color
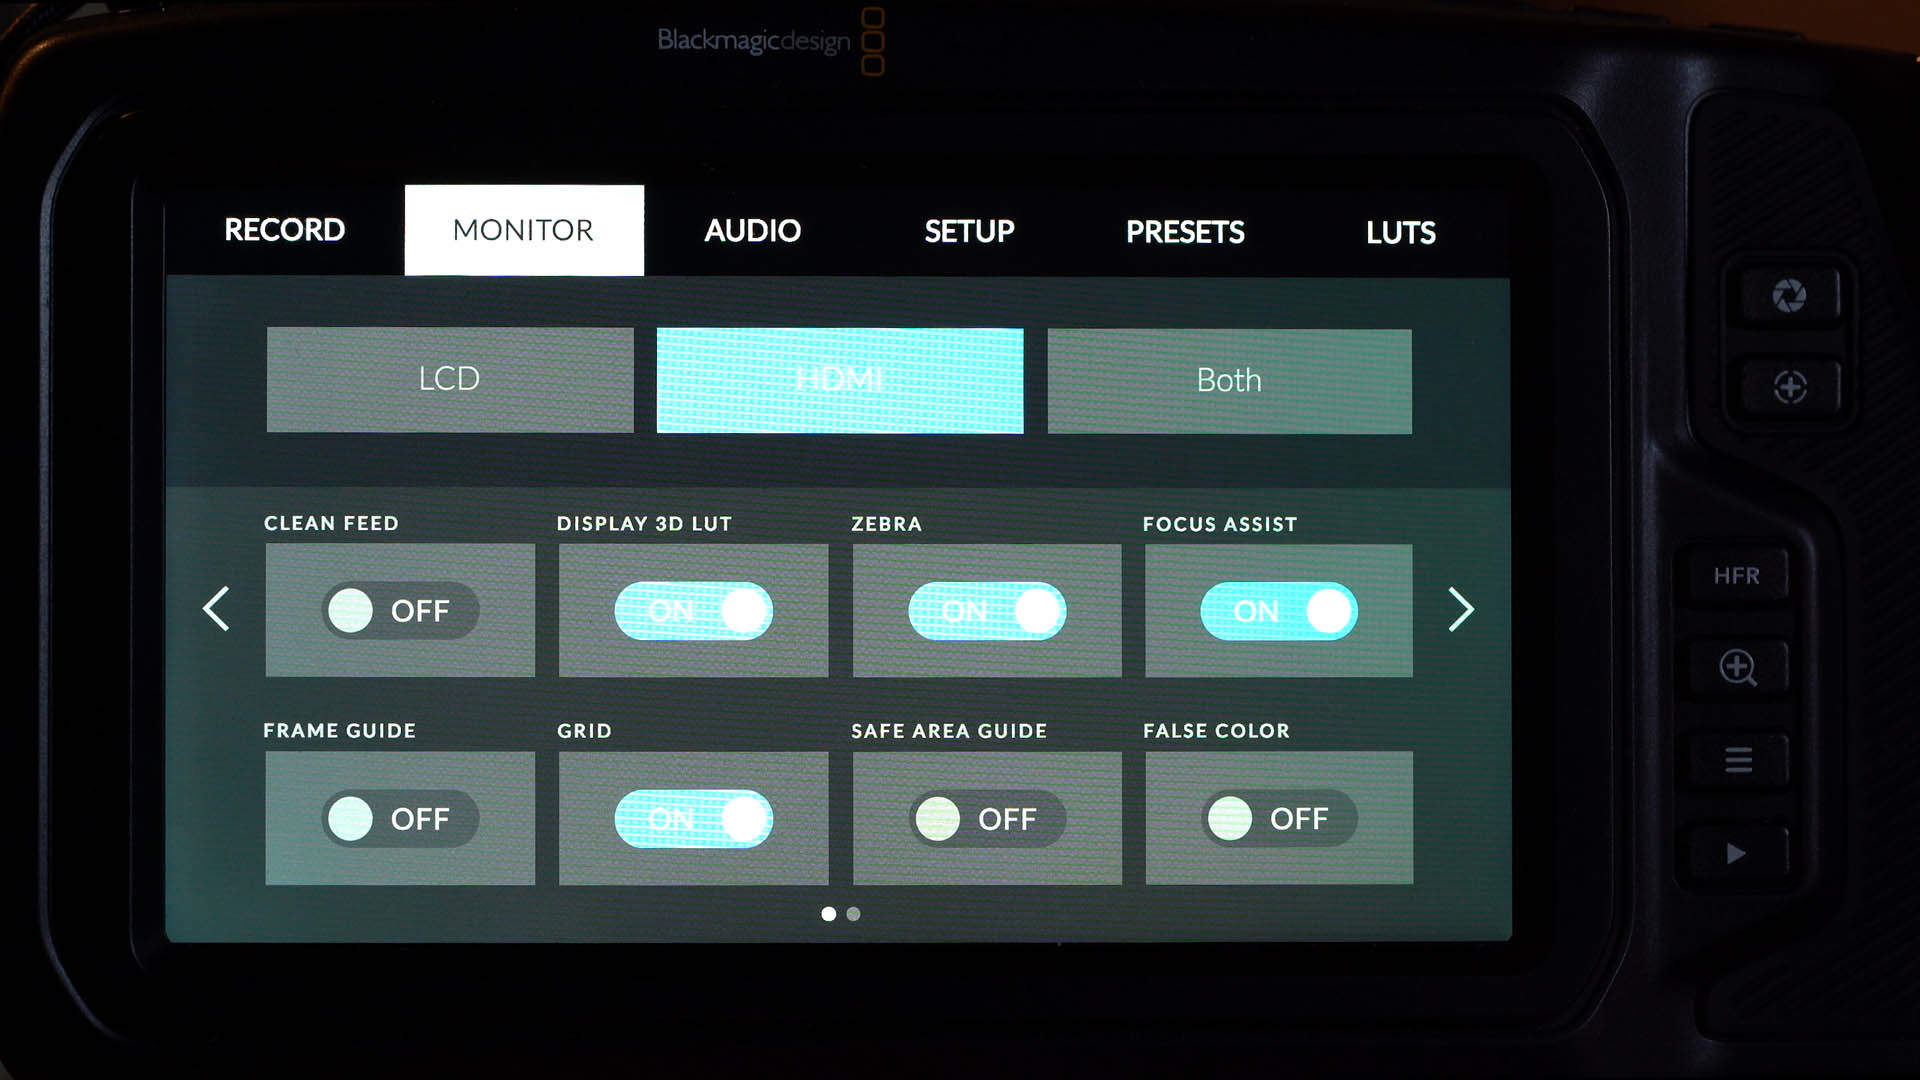
01:06:52 – MONITOR 2A: HDMI Clean Feed, Display 3D LUT, Zebras, Focus Assist, Frame Guide, Grid, Safe Area Guide, False Color
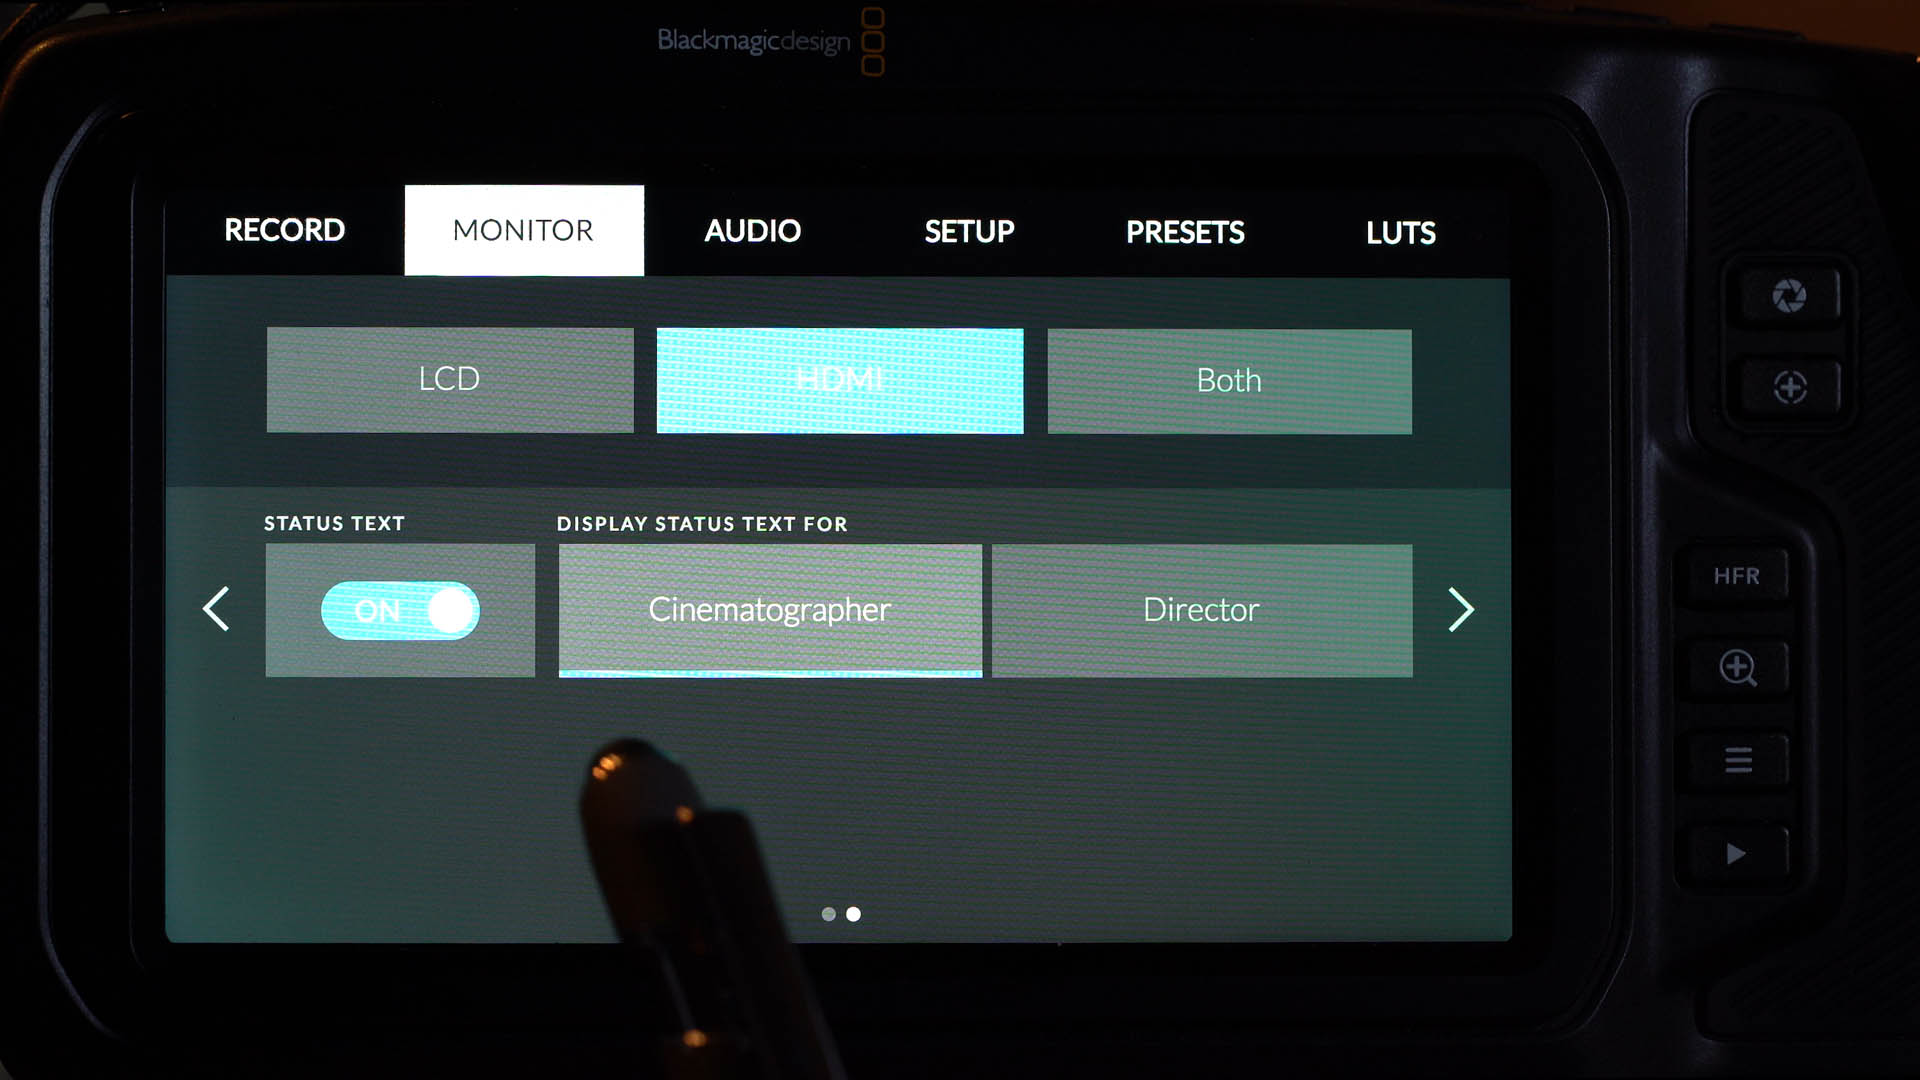
01:14:55 – MONITOR 2B: HDMI Status Text
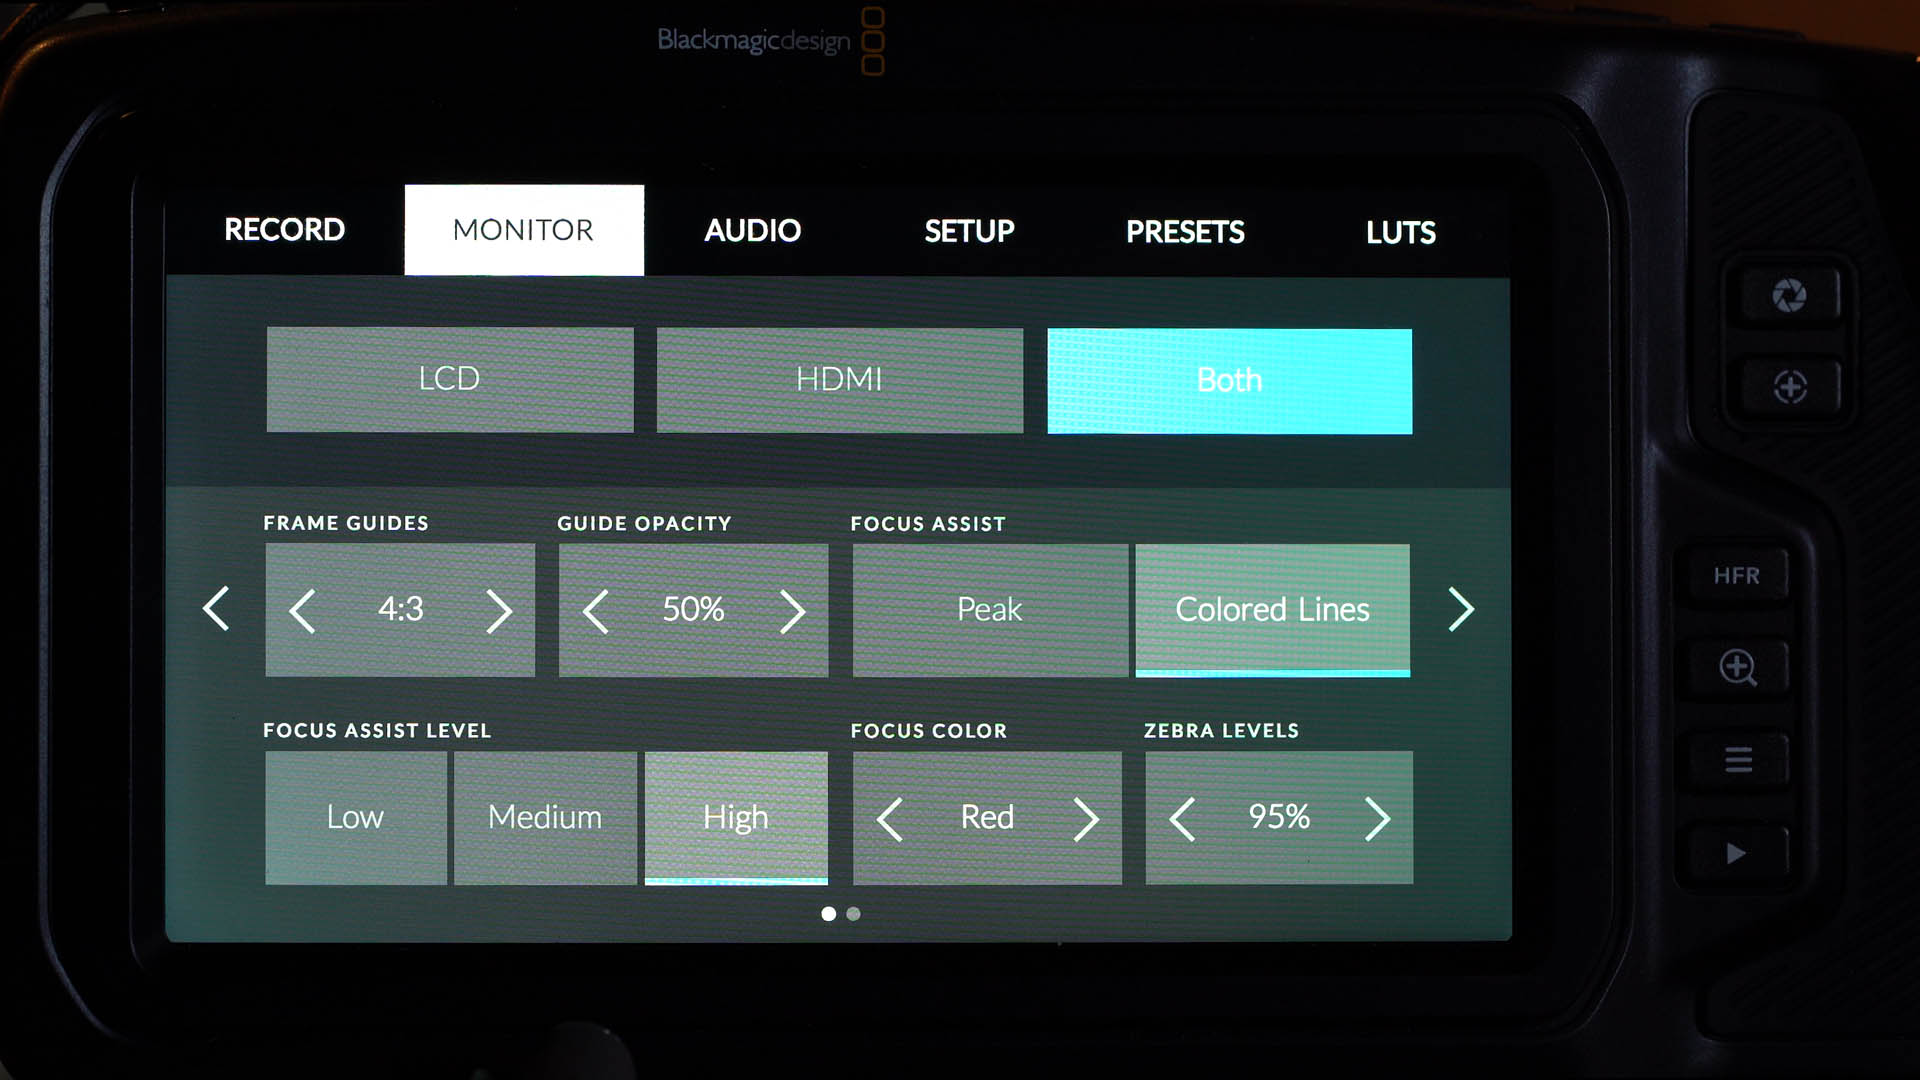
01:17:14 – MONITOR 3A: LCD & HDMI Frame Guides and Opacity, Focus Assist type/level/color, Zebra level
01:24:23 – MONITOR 3B: LCD & HDMI Grids (Thirds/Crosshairs/Center Dot), Safe Area Guide
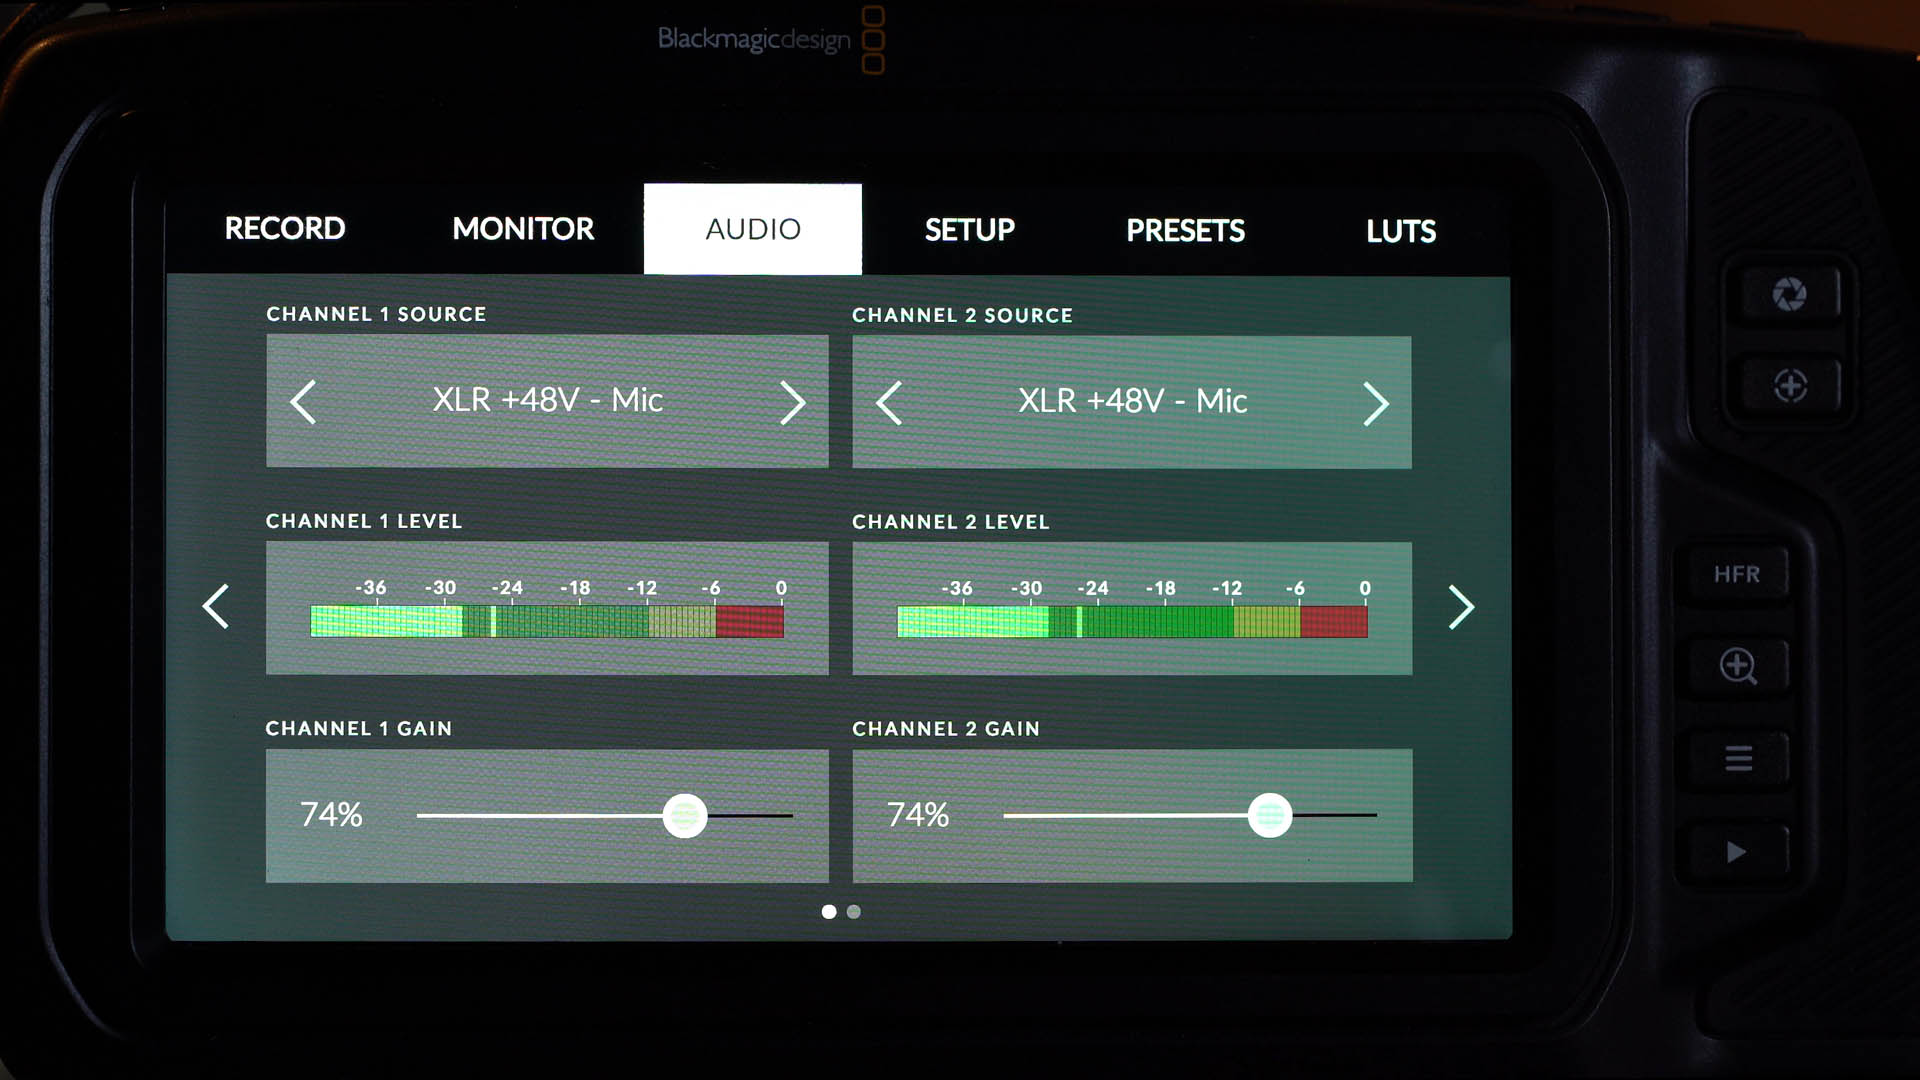
01:26:30 – AUDIO 1: Channel 1 & 2 Source Selection, Level and Gain
01:29:23 – AUDIO 2: Headphones and Speaker Volume, XLR Phantom Power
01:32:08 – SETUP 1: Date/Time, Language, Shutter Measurement type, Flicker Free Shutter, Image Stabilization, Timecode Drop Frame
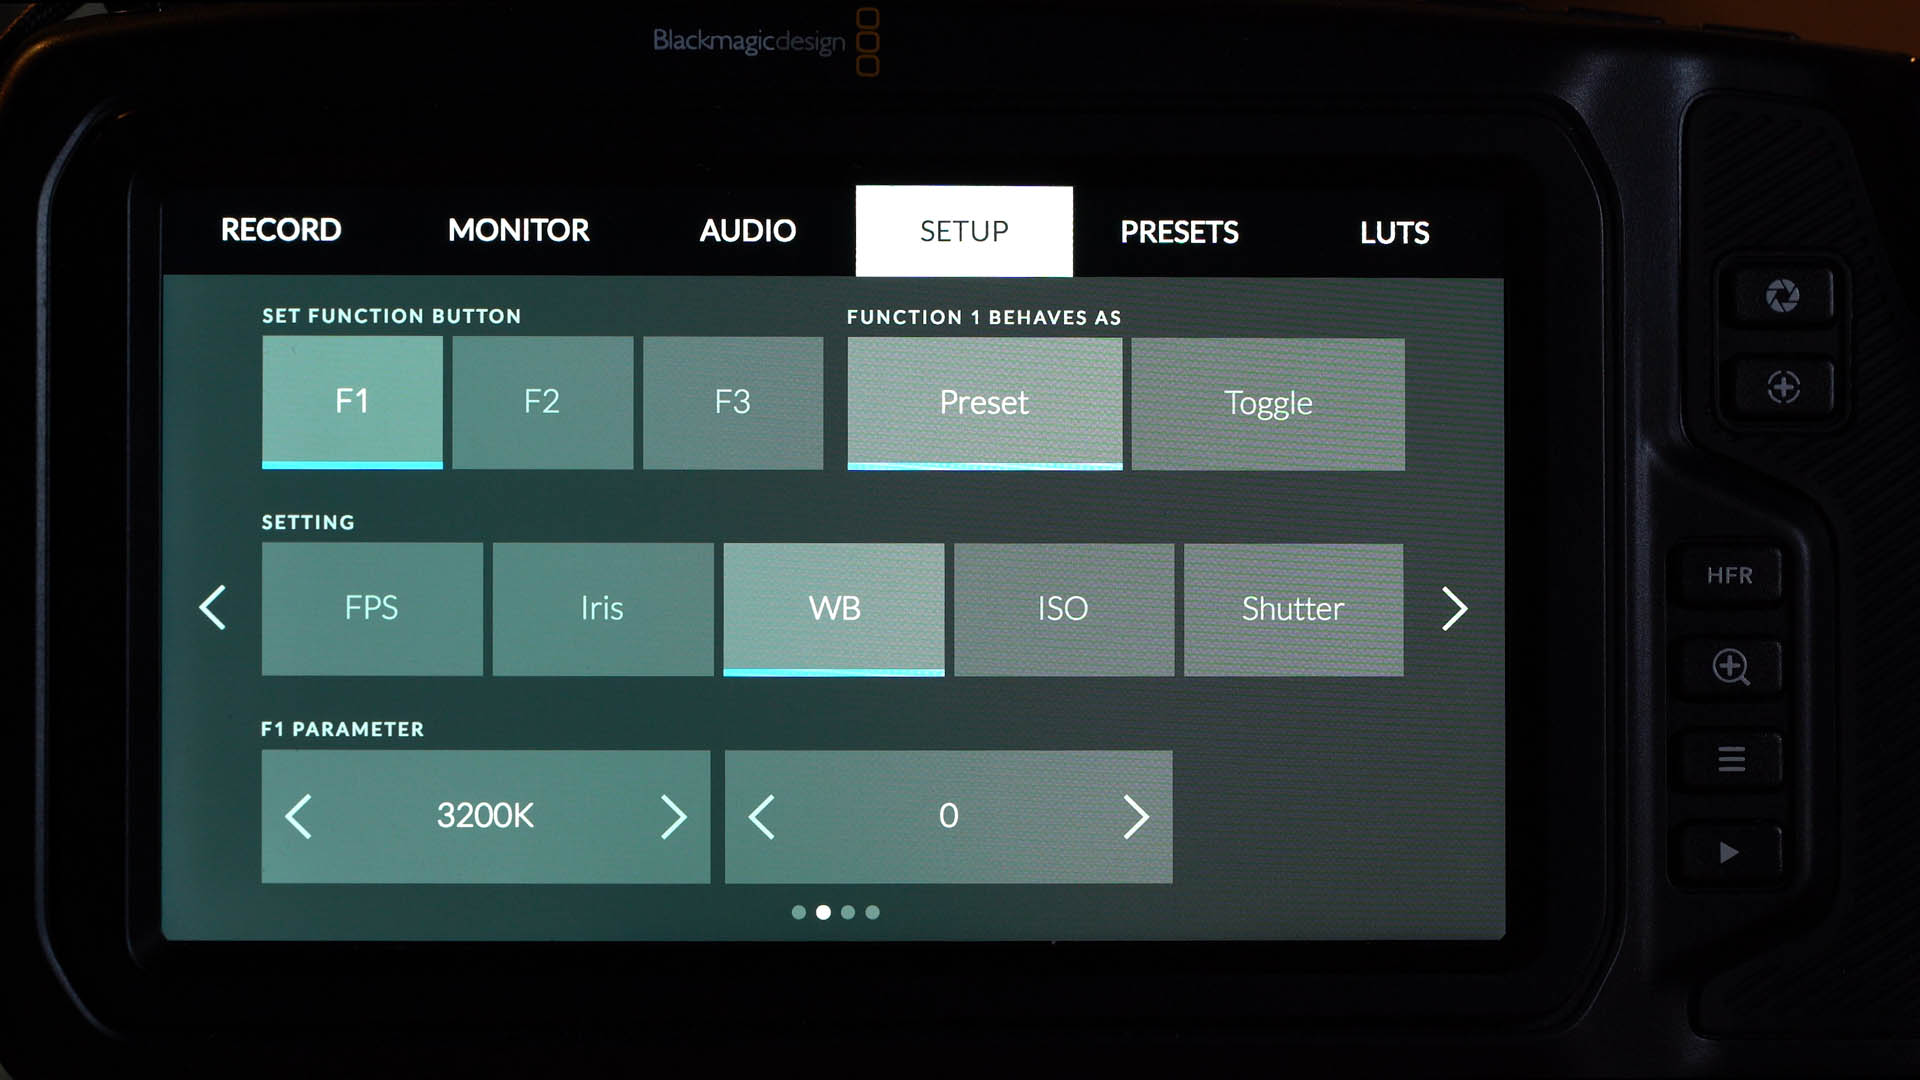
01:40:15 – SETUP 2: Function Buttons
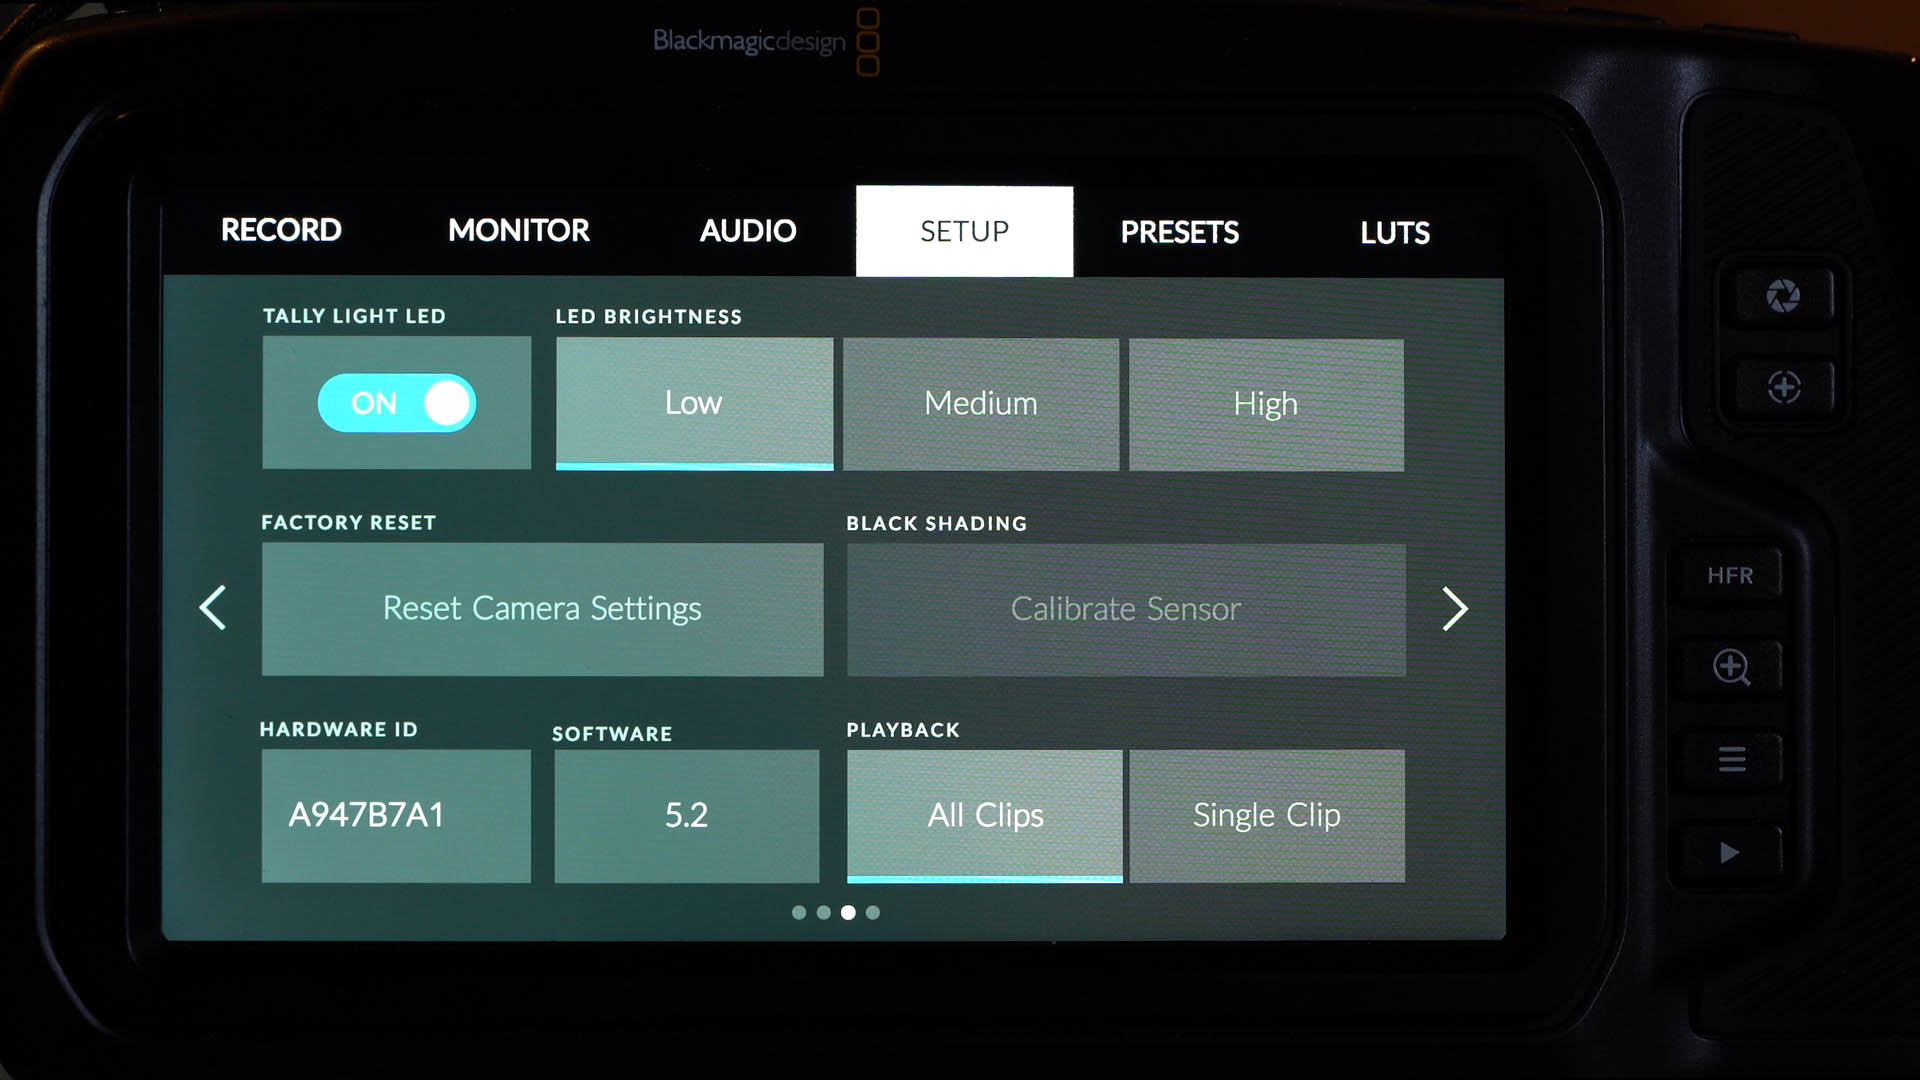
01:45:29 – SETUP 3: Tally Light LED/Brightness, Factory Reset, Sensor Calibration, Hardware ID, Software version number, Playback All/Single Clips
01:48:29 – SETUP 4: Bluetooth/remote control
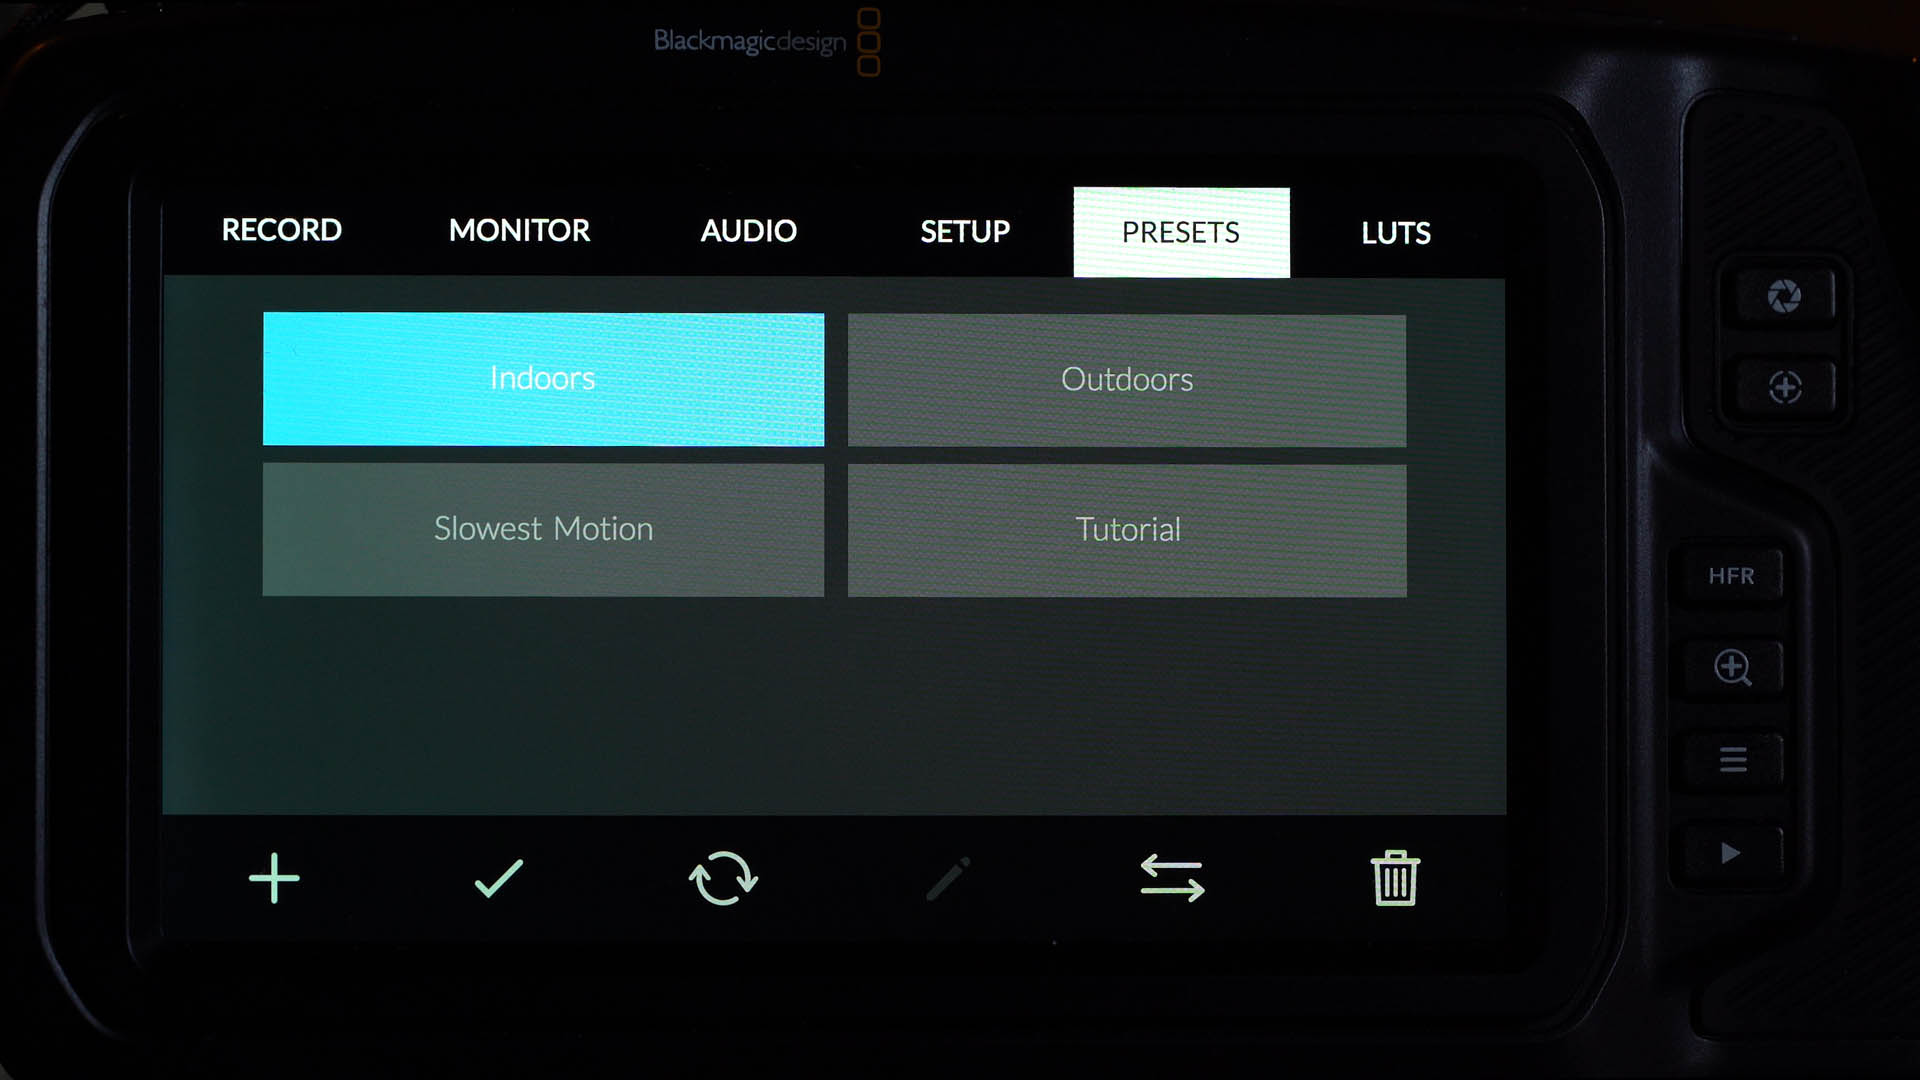
01:49:24 – PRESETS: adding, confirming, updating, importing/exporting, deleting
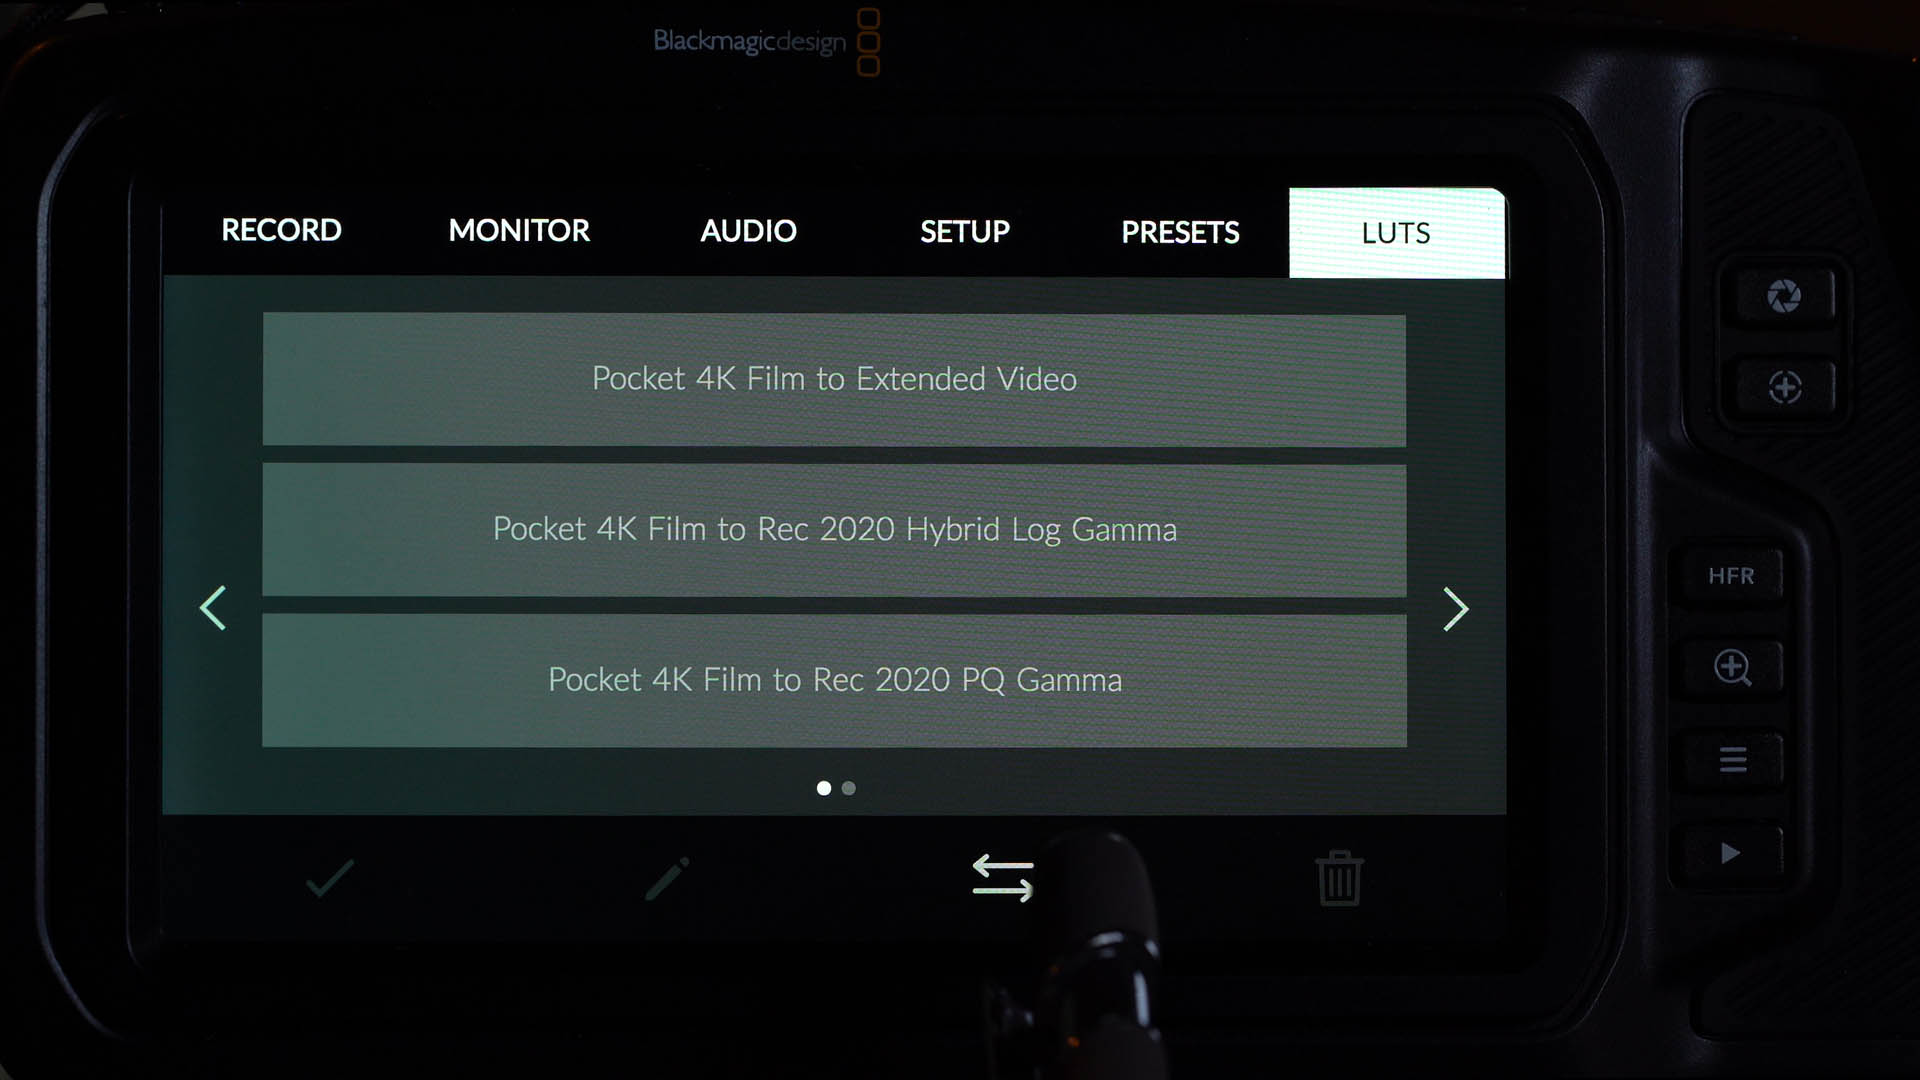
01:55:49 – LUTs: film log to extended video, REC.2020 and REC.709
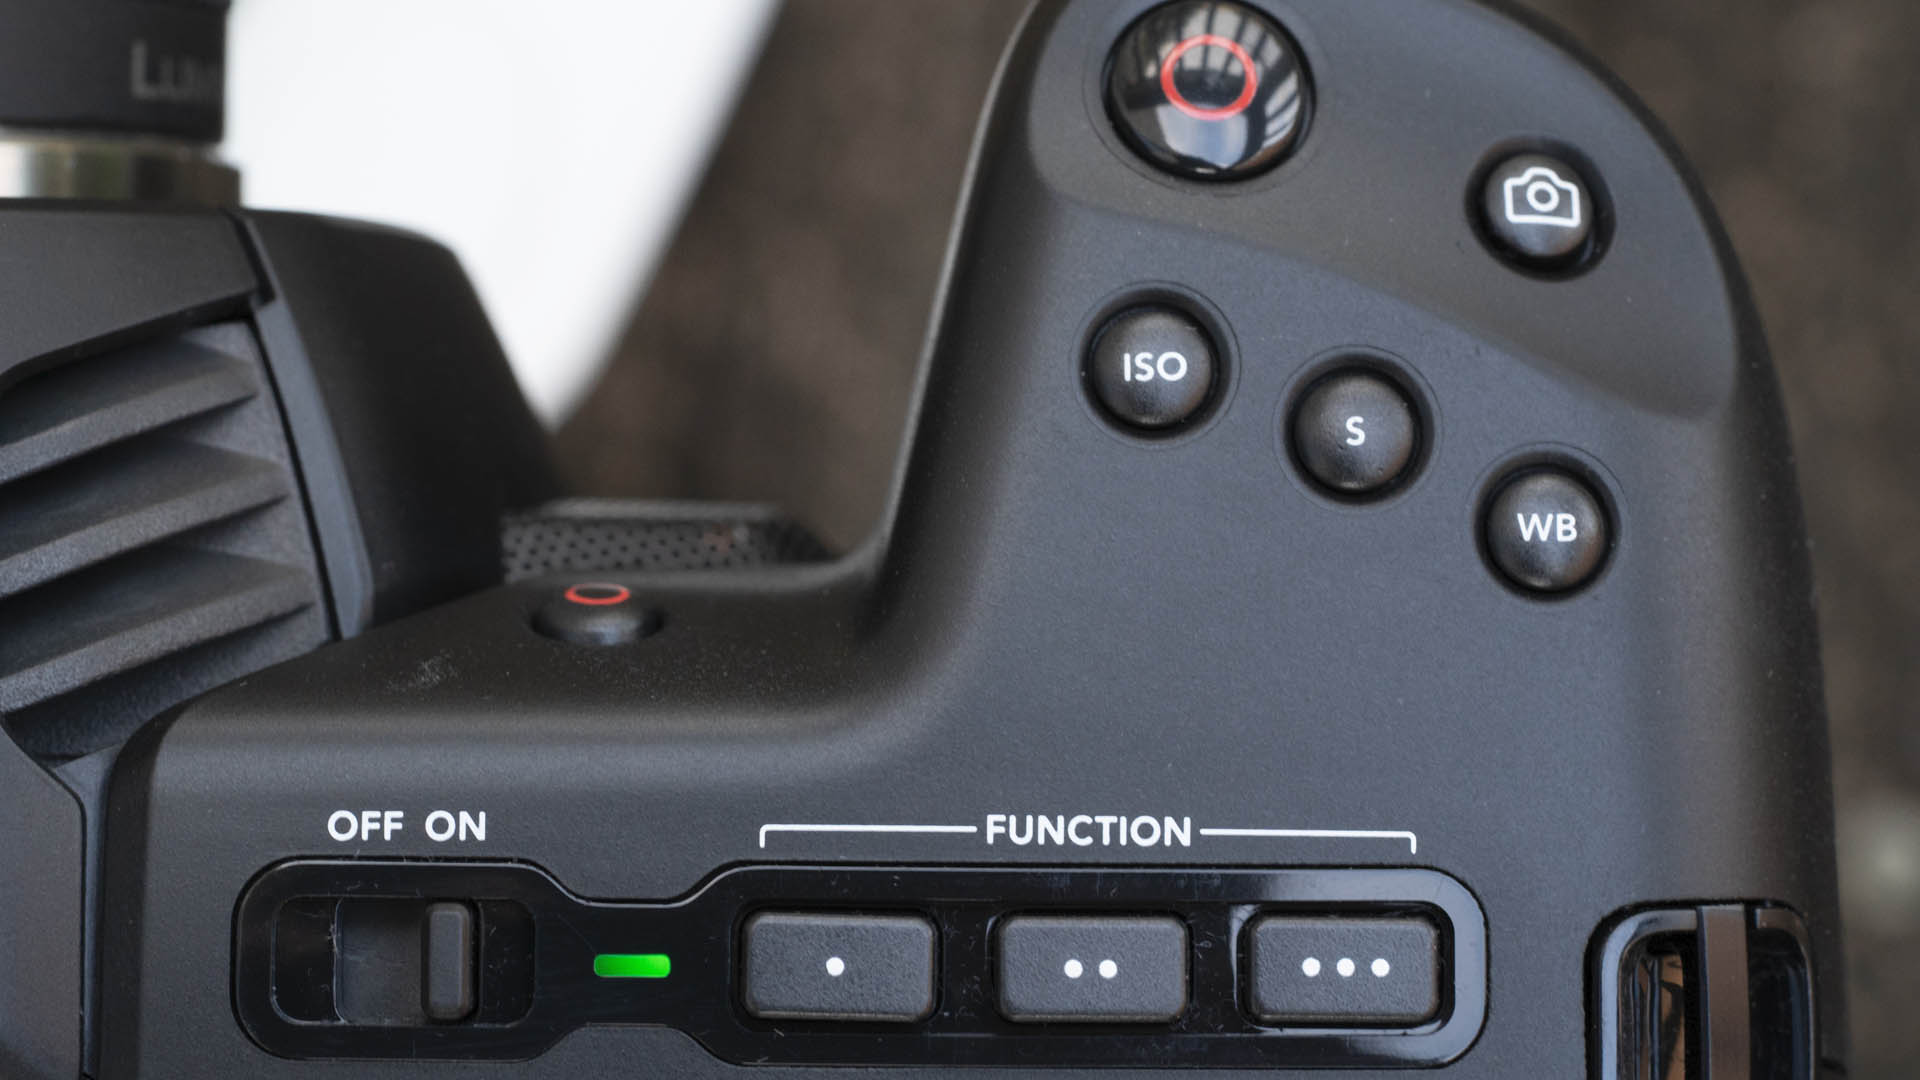
02:02:50 – CAMERA BUTTONS: ISO, shutter speed, white balance, record, power
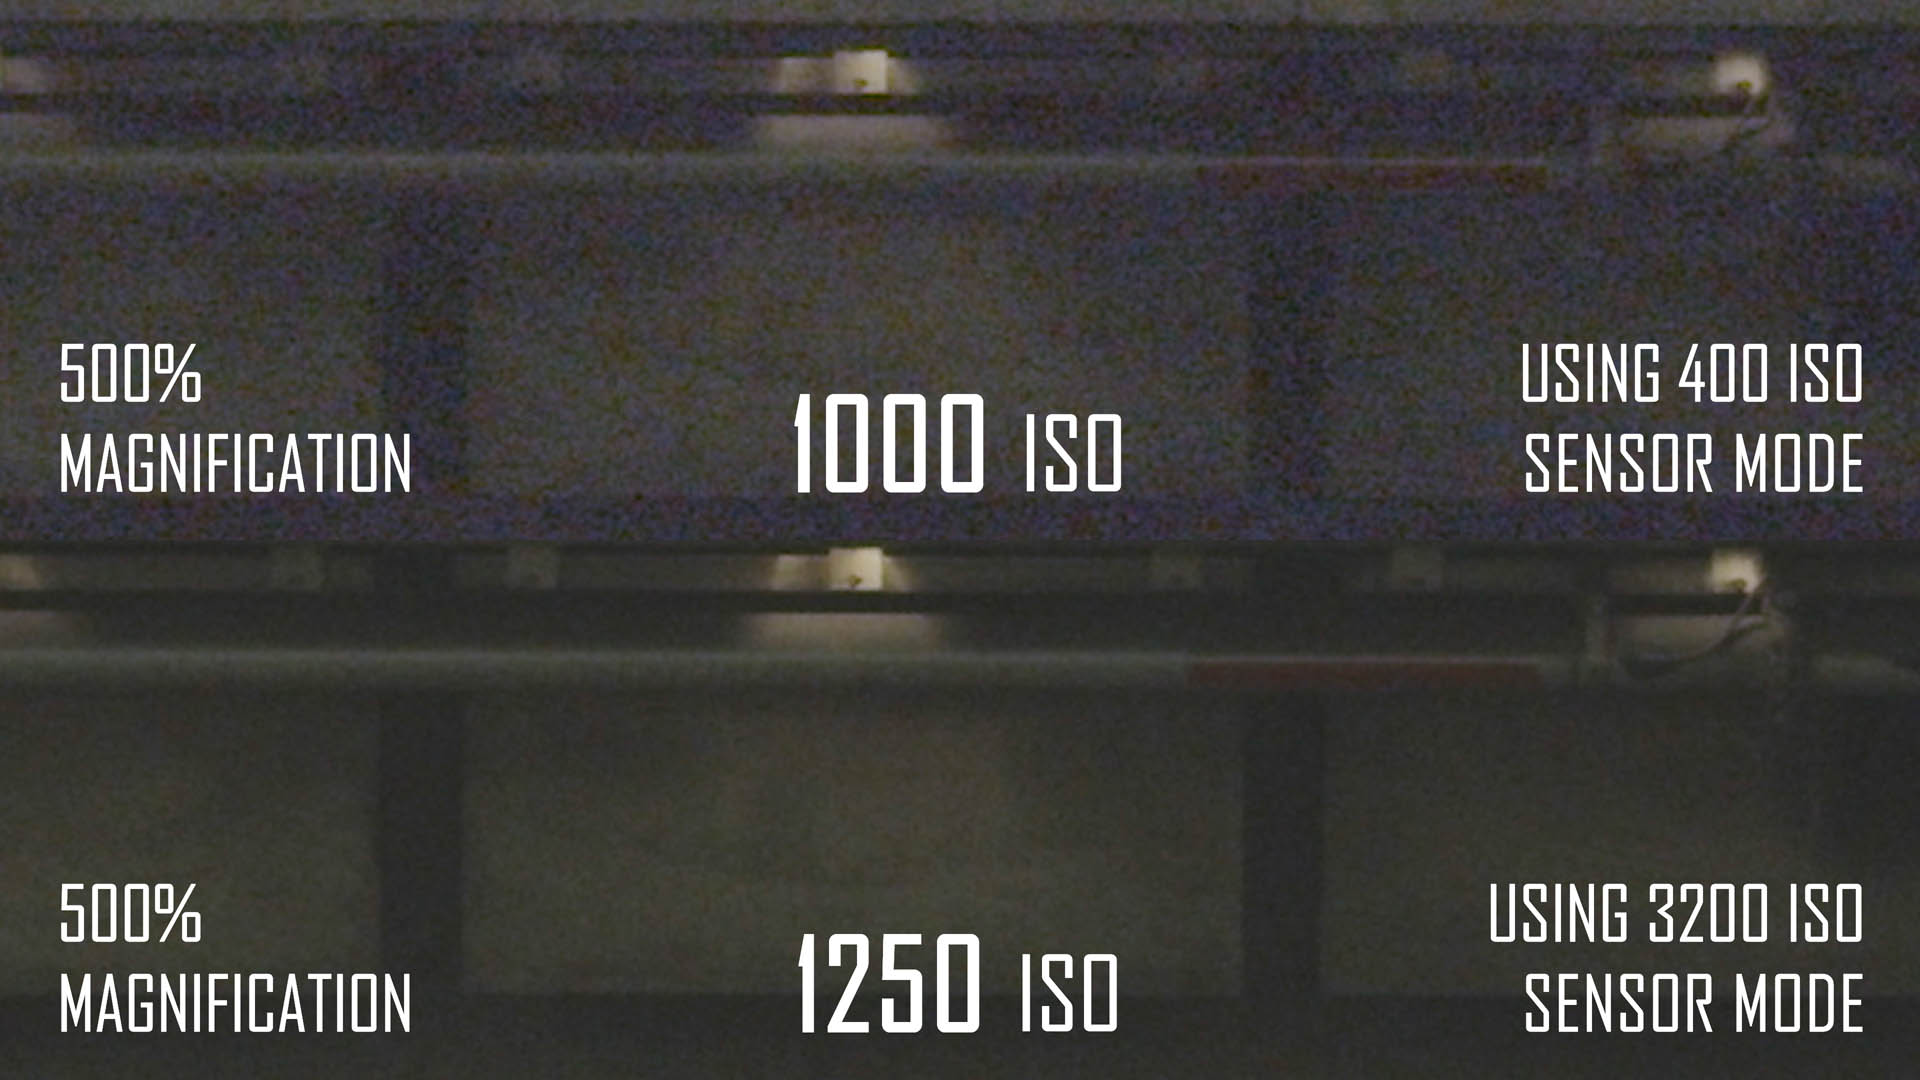
02:04:17 – DUAL NATIVE ISO: tests, comparison between 400 ISO mode and 3200 ISO mode
02:11:25 – CONCLUSION

INTRODUCTION

video
play-sharp-fill
02:13:21
video
play-sharp-fill
02:13:21

SAMPLE CLIPS/TESTS: highlight roll-off, holding the camera steady, internal microphones, rolling shutter, slow-motion

video
play-sharp-fill
02:13:21
video
play-sharp-fill
02:13:21

TUTORIAL SETUP: an a7 III shooting the BMPCC4K that’s shooting the original BMPCC while feeding an Atomos Shogun

video
play-sharp-fill
02:13:21
video
play-sharp-fill
02:13:21

TOUCHSCREEN CONTROLS: button-free, menu-free adjustment of most shooting parameters on the touchscreen

video
play-sharp-fill
02:13:21
video
play-sharp-fill
02:13:21

RECORD 1: ProRes and RAW, 4K DCI vs. UHD vs. HD

video
play-sharp-fill
02:13:21
video
play-sharp-fill
02:13:21

RECORD 2: Dynamic Range, Window Sensor, Project Frame Rate, Off-Speed Recording, Dual Card Slots, Dropped Frames

video
play-sharp-fill
02:13:21
video
play-sharp-fill
02:13:21

RECORD 3: Timelapse, Sharpening, Record LUT to Clip

video
play-sharp-fill
02:13:21
video
play-sharp-fill
02:13:21

MONITOR 1: LCD Clean Feed, Display 3D LUT, Zebras, Focus Assist, Frame Guide, Grid, Safe Area Guide, False Color

video
play-sharp-fill
02:13:21
video
play-sharp-fill
02:13:21

MONITOR 2A: HDMI Clean Feed, Display 3D LUT, Zebras, Focus Assist, Frame Guide, Grid, Safe Area Guide, False Color

video
play-sharp-fill
02:13:21
video
play-sharp-fill
02:13:21

MONITOR 2B: HDMI Status Text

video
play-sharp-fill
02:13:21
video
play-sharp-fill
02:13:21

MONITOR 3A: LCD & HDMI Frame Guides and Opacity, Focus Assist type/level/color, Zebra level

video
play-sharp-fill
02:13:21
video
play-sharp-fill
02:13:21

MONITOR 3B: LCD & HDMI Grids (Thirds/Crosshairs/Center Dot), Safe Area Guide %

video
play-sharp-fill
02:13:21
video
play-sharp-fill
02:13:21

AUDIO 1: Channel 1 & 2 Source Selection, Level and Gain

video
play-sharp-fill
02:13:21
video
play-sharp-fill
02:13:21

AUDIO 2: Headphones and Speaker Volume, XLR Phantom Power

video
play-sharp-fill
02:13:21
video
play-sharp-fill
02:13:21

SETUP 1: Date/Time, Language, Shutter Measurement type, Flicker Free Shutter, Image Stabilization, Timecode Drop Frame

video
play-sharp-fill
02:13:21
video
play-sharp-fill
02:13:21

SETUP 2: Function Buttons

video
play-sharp-fill
02:13:21
video
play-sharp-fill
02:13:21

SETUP 3: Tally Light LED/Brightness, Factory Reset, Sensor Calibration, Hardware ID, Software version number, Playback All/Single Clips

video
play-sharp-fill
02:13:21
video
play-sharp-fill
02:13:21

SETUP 4: Bluetooth/remote control

video
play-sharp-fill
02:13:21
video
play-sharp-fill
02:13:21

PRESETS: adding, confirming, updating, importing/exporting, deleting

video
play-sharp-fill
02:13:21
video
play-sharp-fill
02:13:21

LUTs: film log to extended video, REC.2020 and REC.709

video
play-sharp-fill
02:13:21
video
play-sharp-fill
02:13:21

CAMERA BUTTONS: ISO, shutter speed, white balance, record, power

video
play-sharp-fill
02:13:21
video
play-sharp-fill
02:13:21

DUAL NATIVE ISO: tests, comparison between 400 ISO mode and 3200 ISO mode

video
play-sharp-fill
02:13:21
video
play-sharp-fill
02:13:21

CONCLUSION
video
play-sharp-fill
02:13:21
video
play-sharp-fill
02:13:21
October 19, 2018 Blackmagic Cinema Cameras, FocusPulling Original, FocusPulling Original Video 5 Comments
30 September 2018

Blackmagic Pocket Cinema Camera 4K: Hands-On, Down to the Details

Written by Paul Moon

There can’t be much debate on this:  the Blackmagic Pocket Cinema Camera 4K is the most hotly anticipated product of 2018, across the full range of filmmakers, from young indies to shouldercam production boutiques (as I wrote about here previously).  Not just a toy, though costing only $1.3k, it promises to frankly humiliate cameras costing many times more, outperforming them with some key specs that include:  10-bit 4:2:2 UHD-4K internal recording, gigantic touchscreen display, robust audio inputs, portable SSD recording bus, and best of all (eventually), Blackmagic RAW.  Mainly, it means that plenty has been written about it by now:  so, no value here rehashing the spec sheet (like most blogs).  But recently I got the scarce occasion and good luck to get my hands onto one, and to ask a few trailing questions of Bob Caniglia of Blackmagic Design who kindly gave answers the best he could, while the product is heading to market (and I audio-recorded our conversation to ensure accuracy, when I quote him here).

Power, USB-C Connector and Portable SSD Compatibility

As an early adopter of the original Blackmagic Pocket Cinema Camera (should we call that “HD” now?), I struggled with dropped frames using certain SD cards whose demonstrated write speeds were clearly faster than what the camera could even send to the cards.  Blackmagic ended up publishing an “officially supported” list of SD cards, and it basically identified the most expensive one on the market at the time, SanDisk’s Extreme Pro (not just Extreme, not even Plus) capable of writing at up to 95 megabytes per second (MB/s).  It solved the dropped frames, even when shooting at, say, 1080p/30 in ProRes 422 which is way lower at 18.4 MB/s.

Fast forward to now, and we’re in the world of UHS-II SD cards, and CFast 2.0.  The former is mandatory for ProRes at UHD-4K, but you can get away with UHS-I at 1080p.  CFast 2.0 (still an overpriced luxury) is only necessary for CinemaDNG raw which needs up to 272 MB/s (but as discussed later here, soon Blackmagic RAW may become available in a firmware update, with much lower write speeds for dramatically smaller file sizes).  For now, I’m settling with a makeshift 64gb to get started, while I’m grabbing quick shots on the run, using this Transcend UHS-II card at a so-called “V90” speed rating for about $65.  Notably, UHS-II alone does not ensure sufficient write speed.  V90 as a further speed class, does (enlarge the specs at right for a better view).

Bob cautioned that an official list of supported storage media is forthcoming, but another great option to buying expensive new-gen flash cards (with their current low capacities) is to directly connect a portable, bus-powered solid state drive (SSD) to the new BMPCC4K’s USB-C port. There, it’s a safe bet that Samsung’s rather toy-looking shiny blue T5 series will work well, because that’s what Blackmagic is testing with. Personally, I went with the SanDisk Extreme SSD — I like its form factor and weather proofing better. At left, you can see the test results that I ran.  Should be fine!  But Bob cautions, “There are compression schemes that certain [SSD] manufacturers are using to boost their overall capacity, that did not jive with our recording video — because it’s not just data, it’s video, even though it’s captured as data.”  My tests show that there’s a hell of a lot of headroom, but I’ll update here when I’ve confirmed that it works with a sampling of blank media.

Speaking of that USB-C port, a bit of background seems helpful, especially these days since everyone’s getting it wrong!  Something not widely known (because it’s a little embarrassing to the USB standards group), is that USB 3.0 actually got retired — poof, it doesn’t exist anymore!  Now, USB 3.1 Generation 1 is what we used to call USB 3.0, and its maximum throughput is still 5 gigabits per second (Gbps).  The upgrade to that is USB 3.1 Generation 2, doubling the speed to 10 Gbps.  To begin with, most SSDs today can’t even max out Generation 1, and most computers don’t even have a Generation 2 port.  And there’s where it gets confusing:  USB-C, the new rounded connector that (finally!) doesn’t care what’s up and what’s down, just plugs in firmly, compared to Micro-USB and its variants which were dangerously weak.  But just because it’s USB-C, doesn’t mean it’s faster, if it’s carrying USB 3.1 Generation 1 or worse.  That said, my SanDisk Extreme (and the Samsung T5) SSD are compatible with Generation 2 via the USB-C port, so even though the BMPCC4K doesn’t end up surpassing the 5 Gbps mid-point, any computer can offload (or edit from) the SSD at very high speeds using a compatible Generation 2 bus.

And there’s just one more thing about USB-C:  it also doesn’t guarantee any particular power level, even though we’re starting to see USB-C power supplies at 45 watts and even 90 watts for laptop computers.  Thus, the typical USB 5 volts that’s usually in the zone of milliamps (and occasionally an amp or two) isn’t enough to power the BMPCC4K that requires 12-20 volts of DC power.  Bob confirmed later that actually the BMPCC4K’s USB-C port, aside from being a media storage bus, also can accept USB power — but only to charge the battery (and the Canon LP-E6 standard is closer to home at 7.2 volts).  But, get this:  the world is quickly moving to yet another USB standard, called PD (which stands for Power Delivery) and when spec’ed correctly, it handshakes to ascertain which voltage to send, straight on up from 5 to 12 to 20 volts.  I recommend that Blackmagic consider adding USB PD compatibility, using its inherent handshake to ensure that powering the camera directly (not just charging the battery) is enabled whenever provided a proper high-power USB PD source, albeit disabled from a non-PD source.  Until then, for alternative power options, we will need to send 12-20 volts using the BMPCC4K’s proprietary 2-pin LEMO-like connector (for which Blackmagic sells adapters, including a D-Tap and also 2.5mm barrel connector).

Audio XLR and Plug Inputs Mixed with Four-Microphone Array

The original Pocket had a jack for 1/8″ stereo plugs, and its preamp was quite noisy, combining a high noise floor with internal electrical interference.  The 4K upgrade improves upon this dramatically, and the XLR input port is just the tip of the iceberg.  What’s more important, is that an XLR input also usually delivers “balanced” audio using a third conductor, carrying an additional copy of the signal with its polarity reversed until arriving at the destination, thereby accommodating longer cable runs with less interference/noise.  Another implicit feature of most XLR inputs is the delivery of phantom power (usually 48 VDC), so that condenser and other non-dynamic microphones can operate without a dedicated battery.  It’s notable that in order to maintain portability, the Pocket 4K uses a so-called “mini-XLR” port:  it’s very uncommon so far, and it requires extra caution.  For example, my lavalier microphone of choice for years has been the excellent Audio Technica AT899, which terminates in a mini-XLR plug and requires phantom power.  But it’s meant to be plugged into its own proprietary power pack — and if it went straight into the Pocket 4K, it would get fried!  (Same goes for many Sennheiser lav cables meant for wireless packs.)  Meantime, my favorite on-camera stereo mic is the Rode Stereo VideoMic X (that I’ve reviewed here), and its mini-XLR ports gladly accept phantom power as an alternative to a built-in 9VDC battery.  All told, buyers of the Pocket 4K will definitely be scouring for adapters, and there aren’t many.  But to start with, here’s a safe bet for a cable (these are oddly very hard to find), and here’s a shortest version.  Read your specs carefully!

One of the least explained features on the new Pocket 4K is its four-array microphones designed for paired stereo sound capture. It’s not quite Ambisonic audio, but that’s a good place to start for understanding it; another point of reference is a typical Amazon Alexa that uses more than one microphone to isolate unwanted noises and improve clarity.  Bob noted that “Resolve has the tools in the Fairlight section to be able to create [something similar to selective Ambisonic audio], and [the four microphones] give you a better starting point because you have the wider capture, for lack of a better term.”  It won’t quite be necessary to use Resolve’s Fairlight audio tools for processing the recorded stereo audio, but the versatility of honing in the sound from this arrayed metadata, will be a unique function.

And more good news, is that the camera’s operating system is very versatile in letting you mix just about every combination of audio sources onto the camera’s two multiplexed audio channels.  For example, you can designate the recorded left channel to receive the XLR input but the right channel to receive the internal microphones monaurally; you can have the recorded left and right channels receive the 1/8″ stereo input (sorry, no plug-in power), or receive the full microphone array; and so on.  The only limitation is that it’s not capable of a full mixdown — i.e., you can’t record the complete stereo array from the camera microphones, mixed together with the XLR input.  You’ve got to choose one source for each of the two recorded channels.

There is no built-in audio limiter, but there is a “pad” switch to toggle attenuation of the audio level for each of the XLR and camera microphones.  There is also a low-cut filter, which is commonly used to reduce the booming effects of wind noise and hum (though you’re better off adding that in post-production anyway, with the ability to hone in the cutoff frequency).

Bluetooth Remote Control

Unfortunately, Bluetooth is not able to relay a live audio feed of what the camera is capturing, according to Bob.  (I’m keen to that function these days, after writing here about the new Roland R-07.)  It’s solely for remote control, and the iOS app for iPads and iPhones is the same as the one recently launched for the URSA Mini Pro.  (Android is out of luck, which always baffles me given its 88% market share worldwide.  Apple elitism = Darth Vader.)   Bob also noted, “We released the SDK so that people can create their own,” mentioning that there could be a need, different from the iOS Blackmagic app, to prevent anyone on-set from being able to access important/vulnerable functions like the record button.  This is another example of Blackmagic opening up their systems to let the free market determine what’s best for user experiences.  Compare that to the paranoid behavior of Sony, for example, whose “PlayMemories” protocol stubbornly blocks focus control for important situations like gimbal stabilizers (e.g., Ronin S and Crane 2) — Panasonic meanwhile has begun opening up focus control, with its GH5 and GH5S, and Canon always allows it.  If Blackmagic can, I expect they will.

Power Switch (not a button!)

Among the many infuriating product quirks on the original Pocket, was its power switch.  With one quick tap (e.g., a bump while inside a case or, indeed, a pocket), it would turn on and drain the already tiny battery, without you knowing.  And, it would take a long-press to turn it off, which is what you really wanted to prevent it from turning on at the wrong times.  No more here:  it’s a solid boolean switch.  But, Bob warns, there’s no automatic sleep function:  it will burn until the battery’s dead, when it’s on.

Sharpening and Extended Video

The Blackmagic Pocket Cinema Camera 4K inherits two unique features that were introduced after the URSA Mini Pro, into the URSA Broadcast camera.  Both of them, true to the broadcast ready-made notion itself, anticipate the option to “bake into” the recorded footage certain things that you might otherwise have time to fine-tune in post.  First, there’s Sharpening, which speaks for itself:  Default, Medium, High.  (Notably, all camera sensor processing applies some amount of sharpening, distinct from raw, but this function increases sharpening past the norm.)  Second, there’s Extended Video, which has been widely misunderstood by bloggers/vloggers:  it doesn’t extend the dynamic range any farther than the mode named Film, and it doesn’t “extend” the colorspace to Hybrid Log Gamma or REC.2020 HDR.  Rather, it simply captures video in the flatter log curve of Film mode, then on-the-fly converts it back to REC.709 for the final recorded version.  It’s a quick and dirty way to get more dynamic range, and a “film” look, without fiddling if you’re in a pinch for time.  Essentially, it bakes in the official Blackmagic LUT.  To those who claim they lack the time to simply drop a LUT onto log footage, I hope they’ll at least pick Extended Video instead of Video without hesitation (blown highlights be damned).

Dual ISO at 400 and 3200

This is a feature that people are just coming around to appreciate, after its introduction to a mass audience with the Panasonic GH5S.  (Bob insists that the Pocket 4K’s sensor is not the same manufacturing part as the one in the GH5S.)  But there’s still a lot of misunderstanding about what it means, and this will result in worse footage unless it’s used properly.

To begin with, there has always been a sort of golden rule when it comes to ISO:  the lower the better!  Since ISO is basically like a volume control on the sensor, and noise levels (that ugly digital kind of static noise) only increasing with more ISO, you wanted to always start low, then nudge up only as necessary after exhausting the other factors of aperture and shutter speed (the latter usually locked according to the 180-degree shutter rule, and more on that below).  Thinking back again to the original Pocket, over time shooters began to realize that the image quality actually got worse below 800.  This was because the native ISO of that HD sensor was 800 itself, and nudging beneath that value would cripple the dynamic range of your footage — especially accounting for the Film log curve that’s optimized for a native ISO.  Still, that didn’t stop me from oftentimes sinking down below 800, whether because I didn’t have an ND filter handy, or even so, it got just too damn bright with a wide-open aperture for shallow depth-of-field.

The lesson being:  you want to dwell at the native ISO, and go higher (but not lower) only if necessary.  When you add dual ISO into the mix, that principle gets interesting.  The native ISOs of the new Pocket 4K are 400 and 3200.  (Don’t forget that these numbers don’t mean anything in comparison to other camera models — it’s apples to oranges, so the original Pocket’s native 800 doesn’t necessarily “look brighter” than the Pocket 4K’s native 400.)  This means that there are two ISO categories:  200 to 1000, and 1250 to 25,600.  Bob advises that once you start getting close to 1000, you’re better off bumping up to 1250 straightaway.  Isn’t that ironic?  It means that the image will simply look noisier with worse color at 1000 ISO, compared to 1250 ISO which is activating the native 3200 ISO.  As for me, I’ll probably be treating 800 ISO as the ceiling for most of my shoots at the lower native ISO, and then bumping up to 1250 ISO when any more exposure is called for.  These are decisions you’ll make, by the way, from simply selecting the ISO number:  there’s no additional step required to switch between the native ISOs.  It happens because of the number you choose.

Shutter Angle vs. Shutter Speed

One of the frequently violated disciplines of cinematography is the 180-degree shutter rule, which ensures proper motion blur on each frame.  (It’s not edgy or badass to “break the rule,” it’s just amateur.  The strobe-y look of the beach combat in Saving Private Ryan caused by Janusz Kamiński’s high shutter speed represents 0.0000000000000001% of running times throughout cinema history.)  As with the original, the new Pocket 4K lets you simply set the shutter speed to 180 degrees and then let it adjust the actual value depending upon your current frame rate.  But after some digging into the menus, we found that it’s also possible to set things the old fashioned way, using proper fractions (a ratio, so that the denominator is double the frame rate).

HFR and Window Sensor

You’ll notice a little physical button on the back-right that says HFR, for High Frame Rate.  It’s notable that a related function in the menus, Window Sensor, deals with the fact that the 120 frames per second of HFR mode cannot handle a full UHD capture, and it stores the resulting file in 1080p HD resolution.  Most cameras (e.g., my Sony a7 III) give you one choice, to crop the image down so that the framing gets zoomed in.  Here, Blackmagic gives you the option to let the full sensor downscale the image to HD, so that there’s no cropping.  However, for best image quality, you can leave off the Window Sensor option so that there is no downscaling, and the HD capture is happening in the center portion of the sensor:  this results in a further 2x crop factor (i.e., then 4x against the benchmark of a full-frame sensor).

An interesting side note, purely academic, that I discussed with Bob is the way that the total sensor area (in this case, generally Micro Four Thirds) is actually divided into active pixels that you see in your footage, and “ring pixels” around that, used for other things like exposure, white balance, etc.  Remember how Panasonic got cornered by their decision not to include internal image stabilization with their GH5S, in comparison to the GH5?  That’s because the GH5S (in order to acquire more light with larger photosites) maximized the active pixels to such an extent that the sensor couldn’t bob around off-axis to compensate for motion, without revealing inactive pixels.  These are behind-the-scenes trade-offs that camera designers make, adding a layer of complexity to the vanilla concept of “sensor size.”

I learned a few more things, including the fact that the Pocket 4K’s operating system is actually already found in the Hyperdeck Studio Mini, given the same lasting Blackmagic strategy to make all OS’s deploy together and look the same.  I also confirmed that the still picture function is really just a straight frame grab (rather than any higher-resolution, pre-binned image that you’d get from a hybrid camera like Sony’s Alpha series).  Thus you’ll be getting 8.8 megapixels stills, which is simply 4096 x 2160 (4KDCI) resolution.

I really like the form factor, and how it felt when gripped in both hands — but the simple fact is, there’s no eyepiece.  Without that third point of contact, we’re going to be seeing a ton of poorly shot, shaky footage with this thing.  The camera has no internal image stabilization, and for most of its lenses, Panasonic is very skimpy about including Power O.I.S., even though what we used to call “wide-angle” at, say, 25mm is actually telephoto at 50mm after the 2x crop factor.  And of course, Olympus and everyone else completely leaves out optical image stabilization from their MFT lenses.  Self-proclaimed “pro” shooters always harp that ARRI and RED cameras don’t use stabilized lenses either, but this little thing is called a Pocket Cinema Camera.  It’s begging for sloppy operation, without stabilization to compensate for that.  And the camera body’s wide berth will present a balancing challenge to most motorized gimbal stabilizers.  (You’ll still see footage shot on gimbals, but not fully balanced right, and thus visibly struggling if you look closely.)

These things are arriving widely in the next few days.  In the United States, the two biggest dealers are closed for a religious holiday until October 3, even though boxes are sitting in warehouses ready to ship.  But once it arrives with me, I’ll post more results here, including a full menu guide (in the style of my previous one for the a7R III).  If you’re not in line already, pre-orders are backing up into November now, so be sure to lock-in at the usual places:  Adorama, B&H, CVP and Amazon.  And, to hold you over, here’s the direct link to Blackmagic’s lengthy manual for the Pocket 4K.  It’ll keep you plenty busy while waiting…

September 30, 2018 Blackmagic Cinema Cameras, FocusPulling Original 7 Comments
22 August 2018

DJI Phantom 4 Pro V2.0: Review and Comparison with Mavic 2 Pro (+UAVcine lift-off)

Written by Paul Moon

With DJI’s Mavic 2 announcements out of the way, as the blind buying hysteria begins, let’s take inventory of what we’ve already got, and how it compares with the new siblings on the block.

But first: while FocusPulling remains un-ambitious (creative work still dominates my time), it keeps growing little-by-little — and the newest child is:

Please “Like” the Facebook page, and follow on Twitter @UAVcine, while also submitting your own drone films for your increased exposure all-around via the Vimeo User Group. Looking forward to sharing your work, combined with sharing daily news about Unmanned Aerial Vehicles (UAV) for cinema.
DJI Phantom 4 Pro V2.0: Three Most Important Added Features (Mostly Ignored)

Version 2.0 of this best-in-class “prosumer” drone arrived just three months ago, but didn’t get much love — mostly because it looked the same and barely changed, at least according to common blogs that run down spec sheets like advertisements. Infrared obstacle avoidance sensors did get added, and the wireless controller transmission technology changed from one standard to another, mostly for promoting a DJI Goggles product that amounts to an unproductive toy for most of us (OcuSync did not increase range, but did increase resolution to 1080p from 720p which is a needless refinement for small-screen monitoring). The propellers got a slight re-design to tone down the screaming loud noise, but you could buy them as accessories for your pre-V2.0 Phantom 4 drone anyway.

However, three very important but under-reported new features in V2.0, are some specs to look closely at in comparison with the new Mavic 2 Pro:

  1. Mechanical shutter: pre-V2.0, the Phantom 4 Pro has a rolling shutter camera, which results in wobbly distortion during quick motion — and when it comes to drones, motion is what it’s all about, even though smoothness is the benchmark. I have personally compared results and seen a noticeable improvement from the V2.0 camera non-rolling shutter when even if the drone is moving smoothly, for example, something passes by quickly in the foreground.
  2. Better lens, with a variable (not a fixed) aperture: the glass is improved, with 8 elements in 7 groups, which is critically important being sandwiched between the world and a tiny sensor — and even though a 1-inch sensor is considered large for drones, it’s pathetically inadequate for serious filmmaking (e.g., smaller than Micro 4/3, way smaller than Super 35mm, and dwarfed by full-frame sensors), thus lenses are extremely important when focusing onto a tiny surface.
  3. H.265 UHD video encoding at 100 Mbps: this new feature is brutally under-reported, mostly because bloggers/vloggers are scared of its resource demands, and/or don’t understand it. H.265 is typically perceived as a way to deliver files even smaller than H.264, but with V2.0 here, the critical fact is that it records at the same 100 Mbps maximum bitrate as in H.264, while into the greater “storage capacity” of H.265 — it simply stores more detail. The problem with every comparison I’ve seen, is that they make an amateur mistake of using frozen screen grabs, and then pixel-peeping side-by-side. That’s not the relevant issue for such an especially motion-driven product like a drone, because the real challenge for compression is intraframe and interframe — the erosion of footage going from one moving frame to the next, inside and between. H.265 at 100 Mbps does have a breaking point once you’re flying a drone over thousands of fluttering tree leaves, for example. You can still see that compression problem in my video fronting this article, acquired using the new H.265 (more later on that), but with H.264 (pre-V2.0) it’s worse and unacceptable if you’re serious about integrating drone footage with cinema-quality footage on the ground. And while there’s a lot of moaning about how H.265 is difficult to edit, that’s how technology marches on, right? Creating proxy files (e.g., in Adobe Premiere) has never been easier.

Review and Case Study

Getting one thing out of the way:  before raving about how great this product is, it must be said that the DJI Store is a total mess:  specifically, their customer service is horrible.  It took forever to get this thing, and they kept screwing it up.  There’s a big difference between DJI having a bad reputation because customers get frustrated when their drones crash, versus DJI customer service simply failing to honor commitments, communicating vaguely, and ignoring everything you tell them.  Enough said; but this: buy direct from DJI only if you have to.  (The only reason I did, is that you can get a big student/educator discount there, meanwhile DJI bullies all retailers from ever having the ability to offer discounts, and this behavior by DJI is barely permitted by law.)
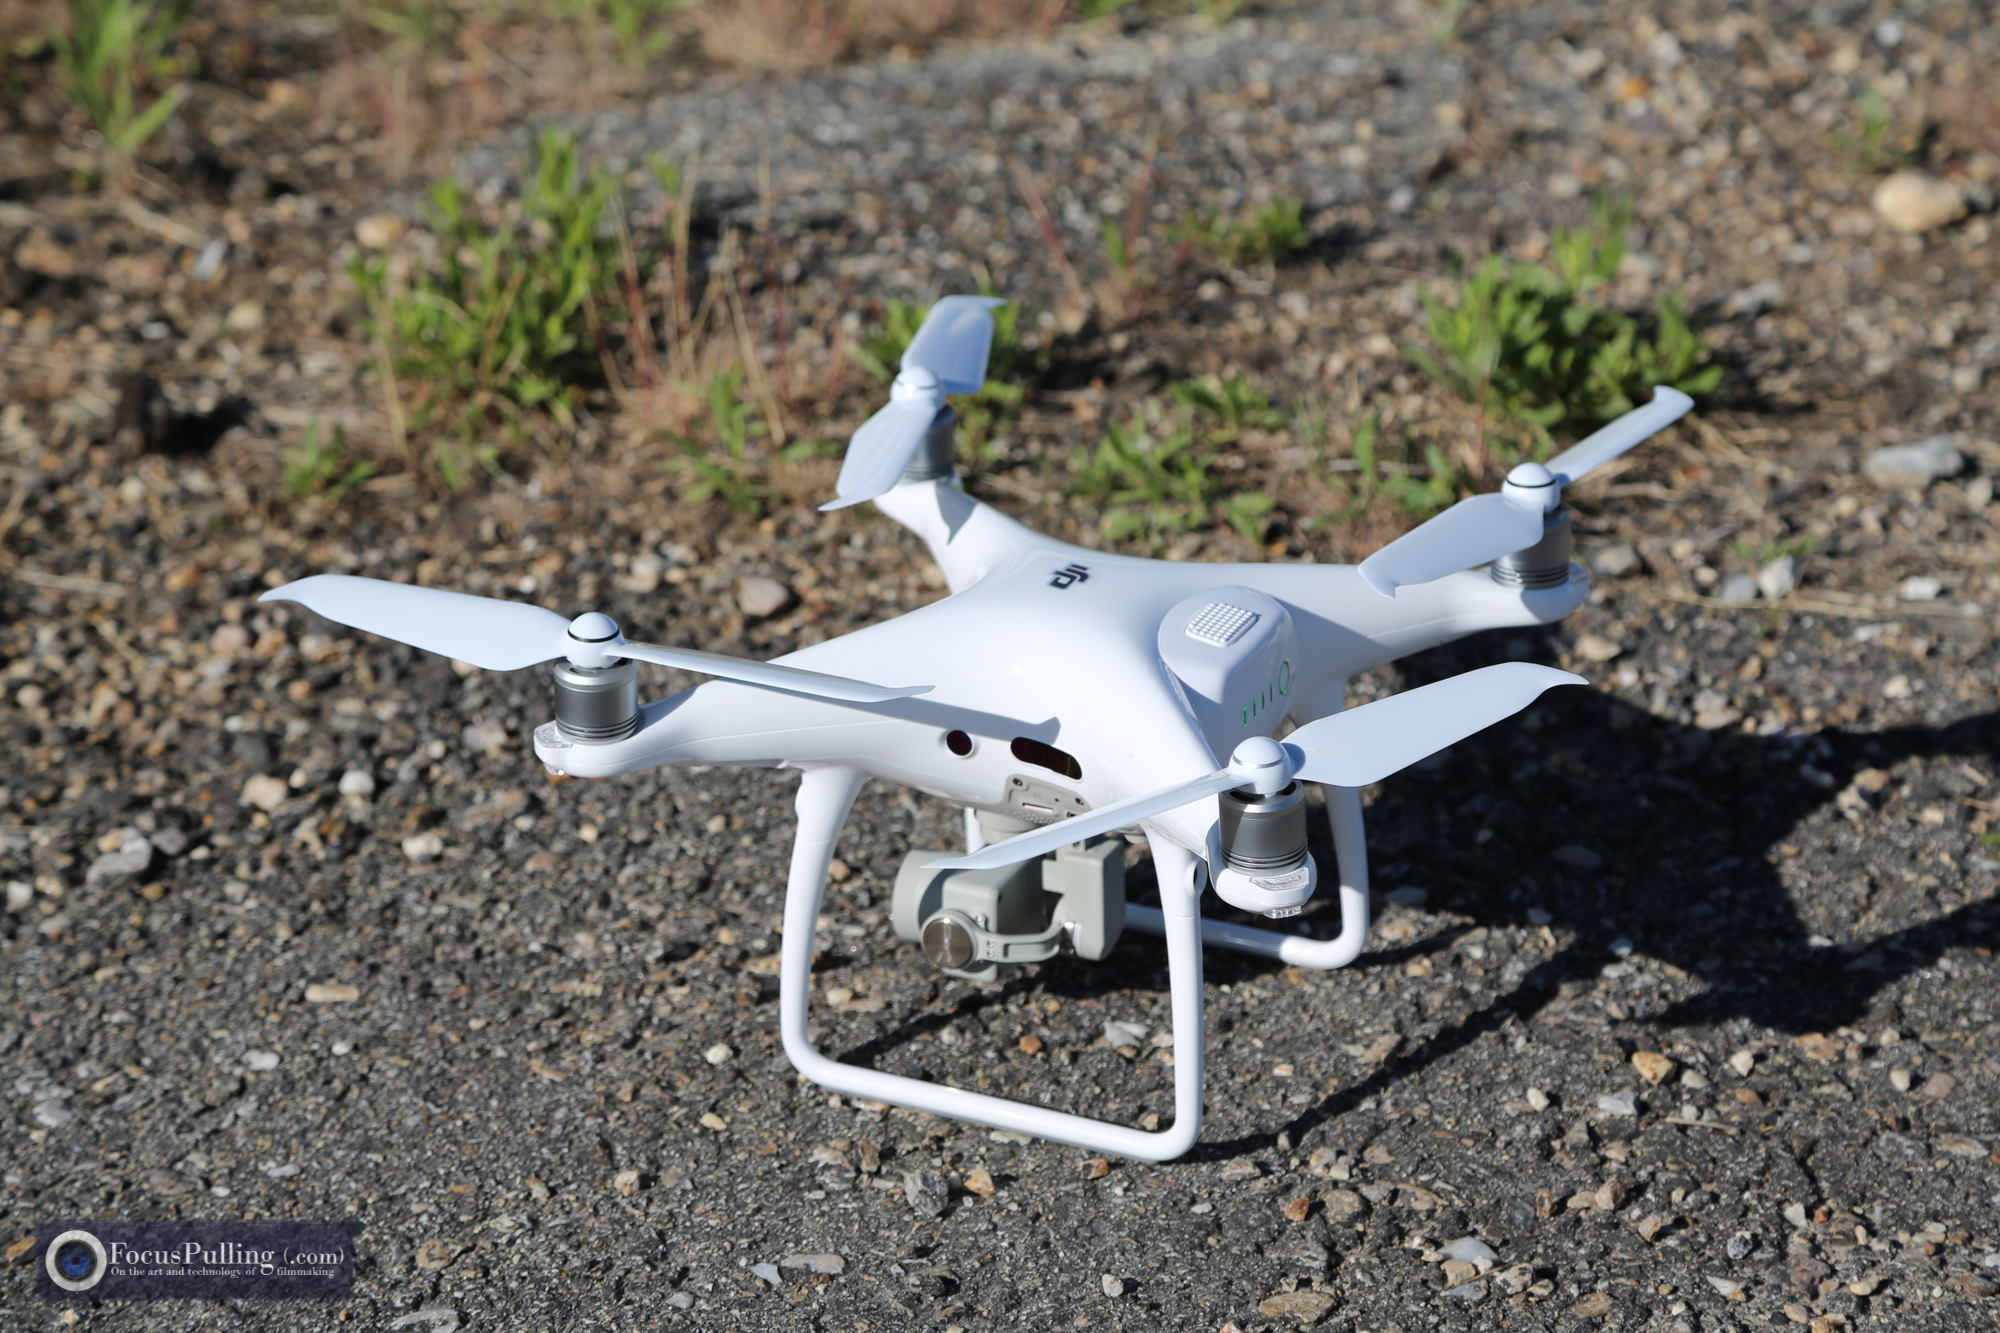
The elephant in the room is two-fold:  that the Phantom body shape is iconic by now for drones; but also, it’s not foldable and portable the way that the Mavic Pro and Air and Spark are.  Is it worth the bulk?  The general consensus is that you get better flight stability using any Phantom 4 Pro in comparison to the smaller drones, setting aside weight and distance specs.

Another huge factor, and I think this is the biggest one:  the Phantom 4 Pro V2.0 (and its predecessor) has a variable aperture.  The importance of this feature is vastly underestimated.  If the Mavic 2 Pro didn’t have a variable aperture, that would have been a deal-killer for anyone creating quality video content (and why bother making anything less?).  The first line of defense you’ll hear is:  just use an ND filter.  But that simply won’t be enough.  Let’s (hopefully) agree that the easiest thing to spot in poorly shot drone footage, is a fast shutter speed that makes the motion look jittery (because it violates the “180-degree shutter rule,” which preserves proper motion blur intra-frame).  Let’s also (hopefully) agree that the only video mode worth shooting in is D-Log, which in turn imposes a minimum ISO gain value of 500, which is really bright!  When I went casting about for ND filters, the usual Polar Pro recommendations kept coming my way, but I settled upon DJI’s own ND16 filter since it screws directly onto the camera without changing its form factor at all (simply replacing the original IR filter, and the only way to keep using the original gimbal bracket).  Its optical quality is visibly indifferent to any supposed higher-grade ND filter, and ND16 is the right catch-all neutral density value for this combination of settings.

Why should we all be shooting in D-Log?  It’s a debate not worth re-hashing, but at the top of the list is one inevitability for almost any drone run:  the range between bright sun and dark shadows simply demands a log color profile to protect highlights, and it’s utterly easy to convert D-Log back to REC.709 in post anyway.  (DJI is unfriendly about giving you or even helping you find a LUT, though, but I use FilmConvert which has a profile specific for this drone.)

So, you’re shooting in D-Log at 500 ISO with your ND16 filter screwed on, and your drone is already in the air, and of course the number one stress about flying a drone is scarce battery life — every second counts.  And if you’re behaving professionally (!), of course you’ll never break the 180-degree rule:  so at 30 frames per second, the shutter speed is 1/60, and that’s that.  Any higher, and the motion begins looking cheap.  Aerial cinematography is all about smooth motion, right?

This means that when you need to adjust exposure down, to avoid blown-out highlights (that would kill any shot), you’re still stuck at 500 ISO, and of course, the ND filter is fixed and not variable.  The only tool left — as a basic principle of photography/cinematography — is aperture.  The Mavic Pro and Mavic Air use fixed apertures, at their widest-open.  So they’re screwed.

And then, what if you need to raise the exposure while you’re already flying, because what you’re shooting at is momentarily too dark?  500 ISO is arguably very noisy to begin with, on a 1-inch sensor (again: that’s still very tiny, even if DJI thinks it’s “The Big Picture”), so raising the ISO is a death sentence on the quality of your footage — not to mention, a continuity killer.  Part of your shoot will look grainy, another part clean.  Bad choice.

What’s the only choice left?  Again, variable aperture.  This is how any drone qualifies as a flying video camera.  The Phantom 4 Pro series has it, and the Mavic series so far doesn’t.

And what about compression?  As mentioned earlier, H.265 is unpopular mostly because it freaks out any slow-performing computer:  it’s a highly compressed codec and consumes lots of CPU power that’s already being taxed by UHD resolution.  But that doesn’t change the importance of getting the highest possible quality at the acquisition stage, and managing post issues with tactics like proxy files (or just getting a faster computer).  The Phantom 4 Pro V2.0 deals with motion artifacts from highly detailed landscapes (e.g., thousands of fluttering leaves on trees) much, much better when shooting in H.265.  Caveat:  it doesn’t function at 60 frames per second.  That’s a separate argument, but reasonable artists will agree that slow-motion is reaching overflow levels of cliché!  It still strangely drives a lion’s share of camera industry innovation, with each manufacturer tunneling ahead trying to jam the highest frame rates possible into tiny boxes.  I frankly don’t get it (perhaps bridezillas demand slow-motion sequences set to elevator musak, and wedding videographers outnumber filmmakers?), but technology is always a matter of balancing compromises:  in the Phantom 4 Pro V2.0, if you want the best quality footage, you’re using H.265 at a maximum frame rate of 30, and 100 megabits per second.

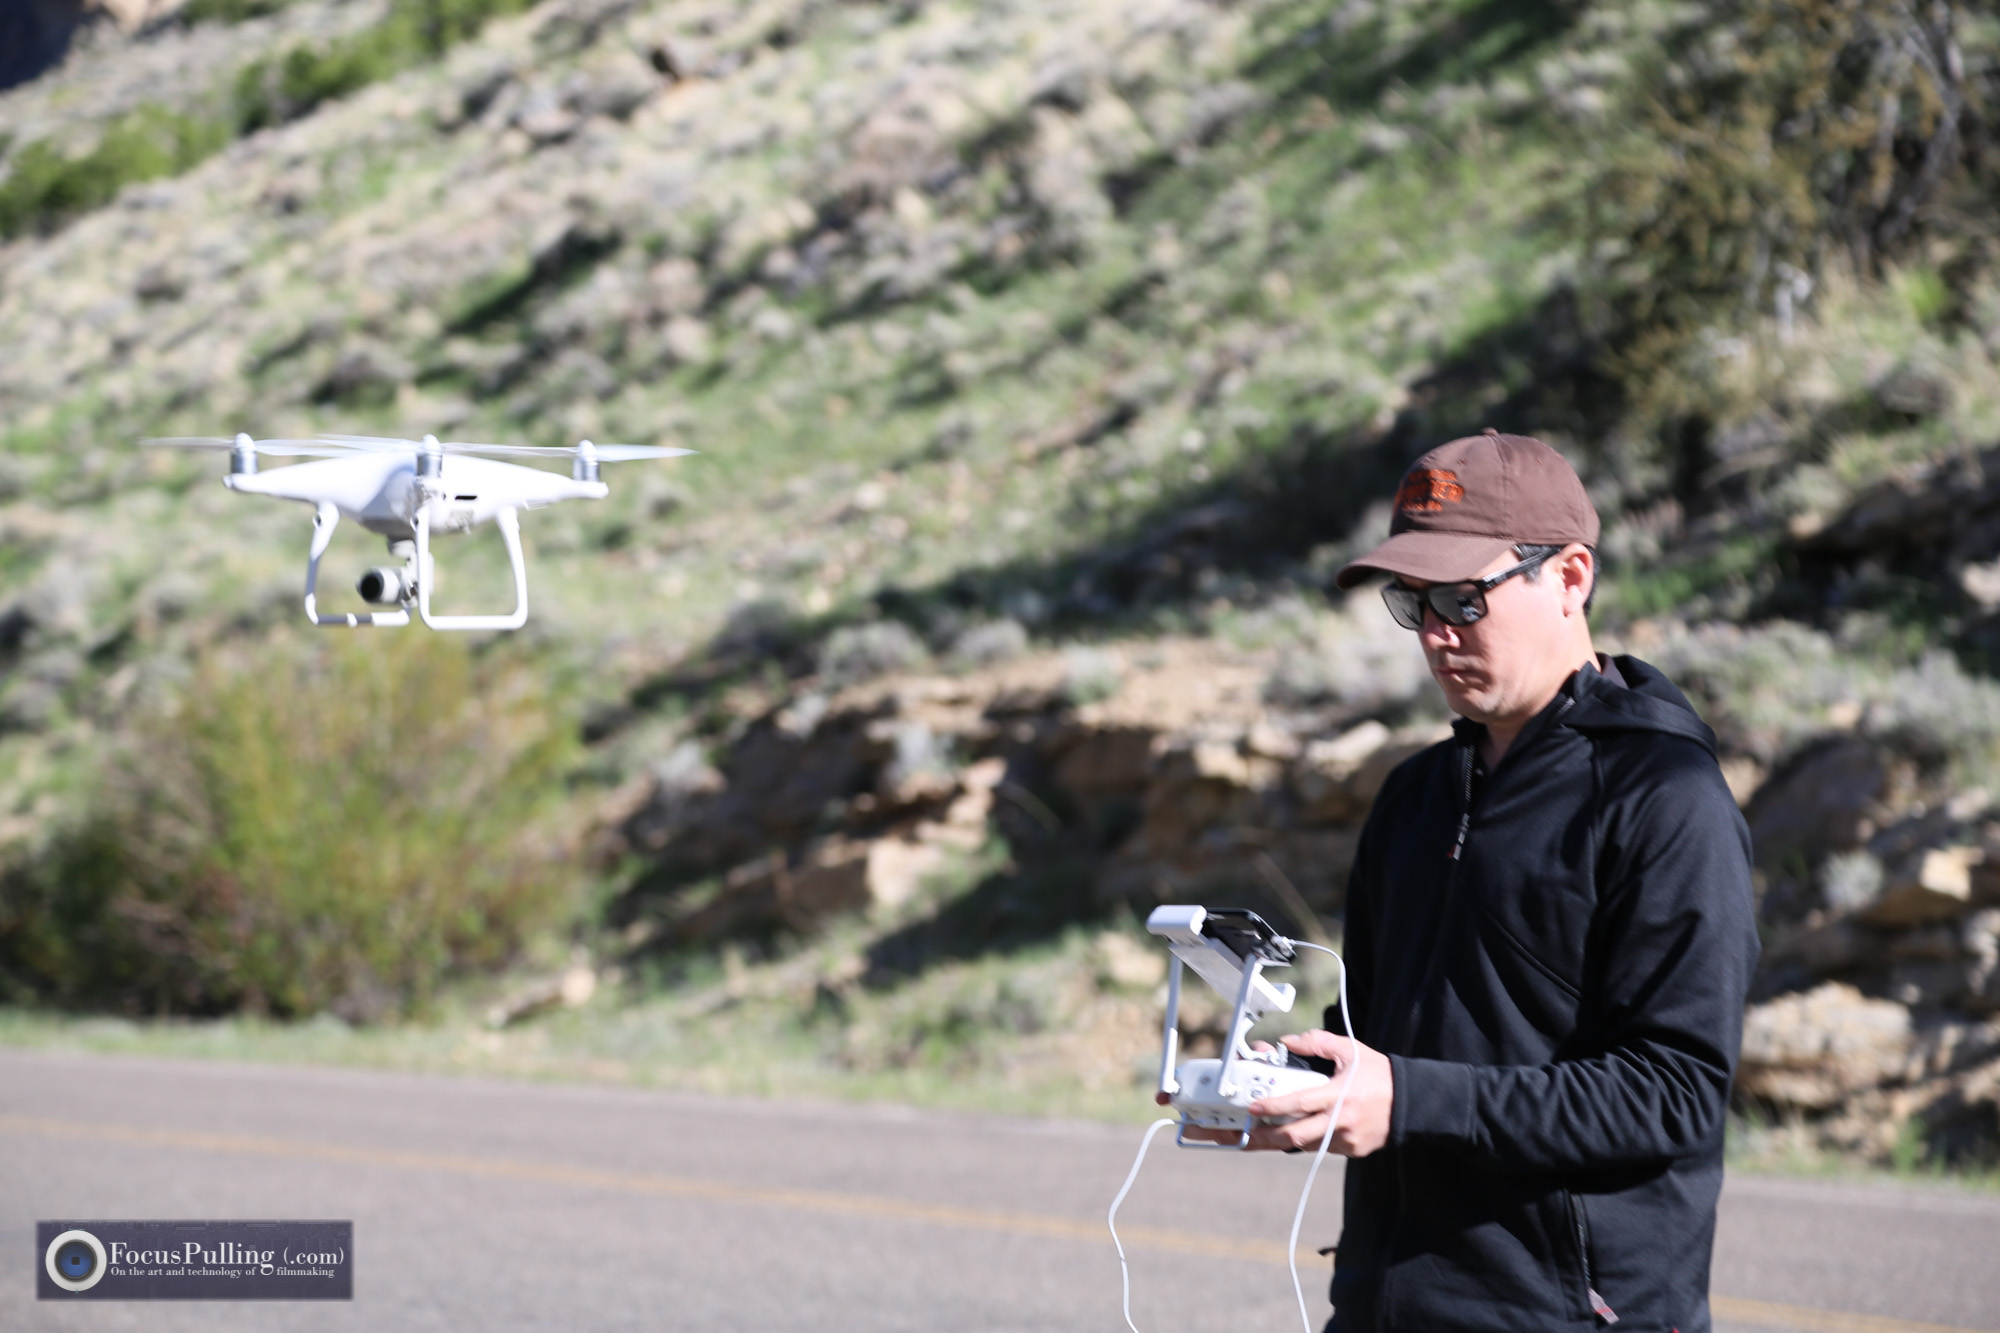
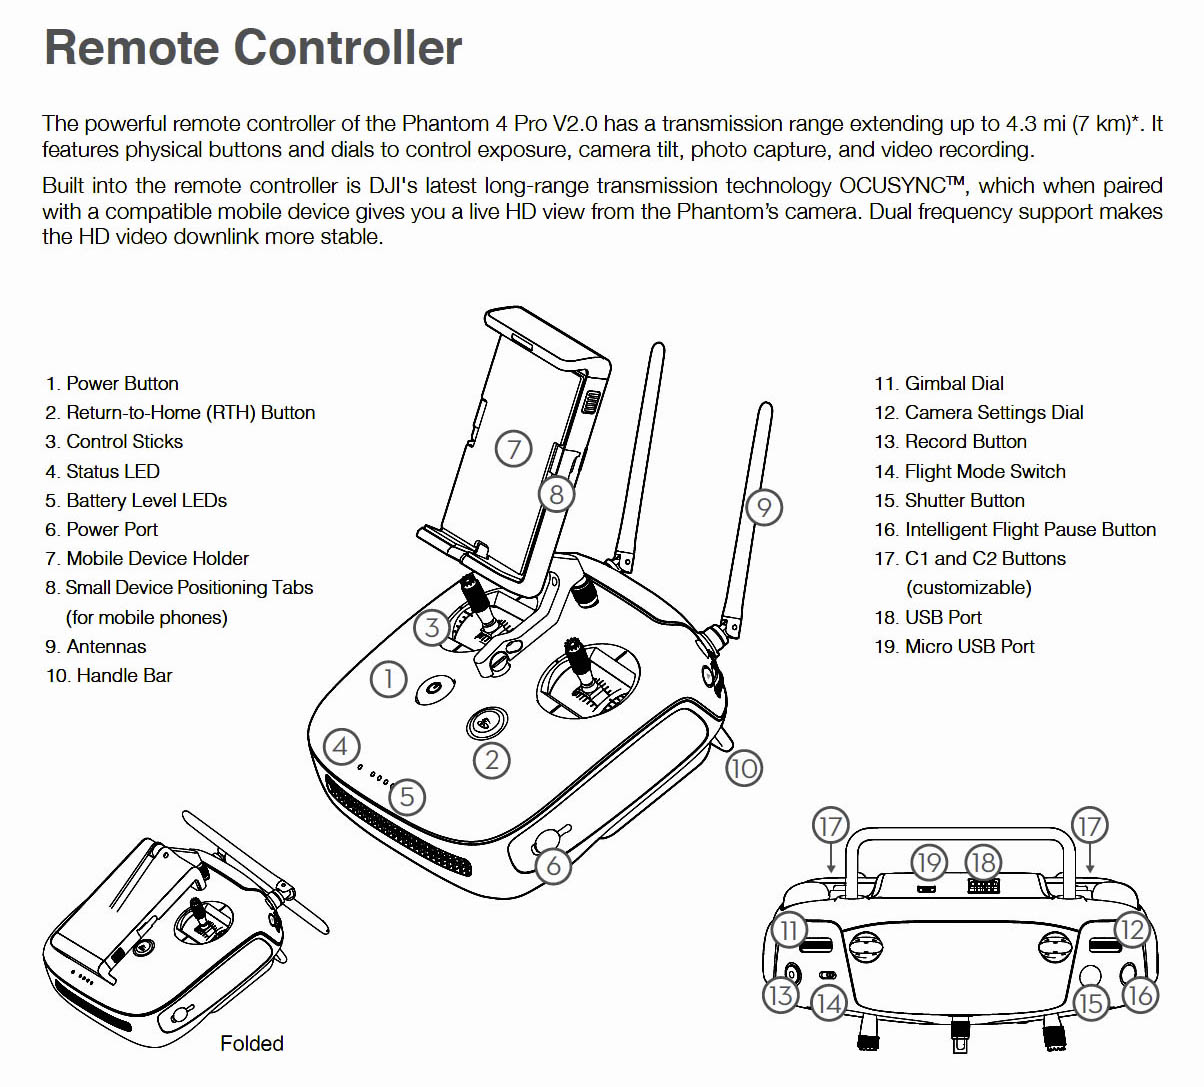
Something also worth mentioning is that the controller is superior ergonomically, whereas portable drones compromise in this area. Size is important, because the more latitude you have over control using small finger movements on limited axes, the better.  Even so, I found a dramatic improvement in the cinematic quality of my footage upon changing from the default settings in the DJI Go 4 app, as described for example by users such as this (old advice still applies to the new model).  And Tripod Mode is a surprisingly valuable usage for a drone, even though we usually think of flying high.  It achieves a steadiness and safe access over varying terrain that’s impossible to produce when walking on the ground with a hand-held gimbal.

When it comes to range and safety, I’m frankly amazed by this (but, may feel different when I lose this thing, or crash hard).  The combination of GPS and GLONASS, as well as the further V2.0 addition of Vision Positioning (using the camera itself as a visual backup to satellite-delivered geolocation), pretty much ensures you won’t lose this thing. “Return To Home” is your happy button, and it always works — also ensuring that you’ve got enough battery left for the trip home.  I mean, as you can barely see it in the picture below (just above the middle cloud), there’s always a moment pretty soon into your flight when you simply lose track of where it is.  DJI is unparalleled in the drone industry for reliable Return To Home functionality, and that’s super important.

Where’s Waldo?

These pictures, by the way, show the location of my first test run video, seen here.  It’s called the Ruby Mountains in northeast Nevada, and it’s one of the very few U.S. National Forests that feature such majestic snow-capped peaks that you usually only find in U.S. National Parks.  There’s a huge different for UAVcine operators:  the former is under the jurisdiction of the U.S. Department of Agriculture which allows drones, while the latter is the Department of the Interior which bans them completely.

My film starts out with hand-held footage shot on a Sony a7 III in S-Gamut3.Cine/S-Log3.  I did that for proper shot diversity between ground and air, but also to test the most important thing for a drone, to blend with non-drone footage.  I think it worked out alright — D-Log was a necessary starting point — but it required a lot of fiddling with color, and secondaries.  The compression artifacts and macroblocking from the 8-bit drone are right at the edge of breaking apart, especially in comparison to the Sony despite its own 8-bit XAVC.

It’s worth noting that during fast transitions, including gusts of wind requiring the drone to reposition, the propellers actually might show up in the video frame:  you’ll see how that looks for just a few seconds at the top-left of the screen at 01:48.  It rarely happened, but it can.  Another thing that always factors into UAVcine practice is the self-evident reality that there’s no sound up there!  So it’s important to create a subtle but reflective drop-in sound design to mimic where you’re flying, even if there’s a layer of music in the background.

Another tip:  buried deep in the DJI Go 4 controller app menus, you can exempt the camera from only pointing straight forward but never higher; you’ll always be at risk of catching those propellers, but the app does allow you to tilt the camera an extra 30 degrees up.  That can get really important when you’re flying low, such as in a canyon or among mountains (and this is the one feature of the Parrot Anafi, which can orient its camera pointing straight up, that’s enviable despite its poor image quality).

The Phantom 4 Pro V2.0, with or without an included remote control display, is available (by now) at the usual places including Adorama, B&H, and (as a last resort) from the DJI Store.  The best way to protect and transport it around, is the Lowepro DroneGuard BP 450 AW that’s currently half off at Adorama.

Does the Mavic 2 Pro Make the Phantom 4 Pro V2.0 Outdated?

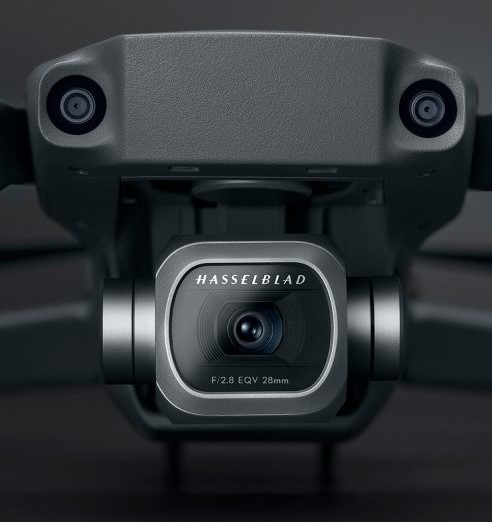
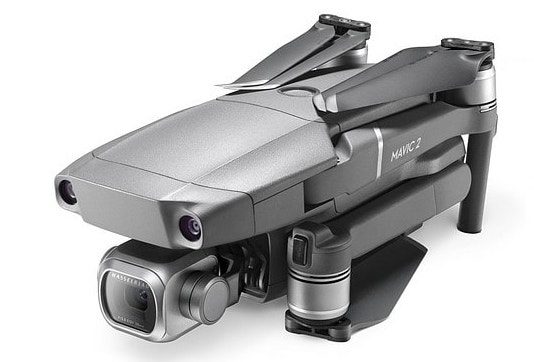
In a word, no!  It’s a near-hilarity that DJI bought out the Hasselblad brand name for its “new” camera. Pretty much like Trump Steaks or Trump University, it literally doesn’t mean anything besides a trademark transaction.  Hasselblad built its brand reputation via gigantic-sensor/format cameras, but sold their name to the Chinese corporation from prior glory as a celebrity in the global camera industry.  The Mavic 2 Pro might or might not have a different sensor and glass, but one inch is still one inch — tiny, even in comparison to the DJI Inspire 2 paired with a Zenmuse X5R/S, adding a high noise floor.  Even though it includes aperture control at a minimum, it needs at least as many lens elements and groups, and a mechanical shutter.  (The zoom version with smaller sensor isn’t even in contention, whose dorky calling card is its Dolly Zoom effect that presumes the world wants to see a Hitchcock cliché that worked once or twice, now in an endless loop.)

Stability in flight remains critical in all weather conditions, and there, the Phantom 4 Pro series has an edge too.  And the latest rumor, that the Phantom 5 is delayed until 2019, seems to settle the question, “what’s the best UAV for video that I can get today, short of a six-figure Inspire?”  Looks to me like this is the safest bet.  The only edge that the Mavic 2 Pro has, is 10-bit acquisition which can reduce macroblocking artifacts commonly seen (especially from a drone) in fine gradations like the sky.  That’s a really important feature, but doesn’t moot the other comparisons — and cramming 10-bit color into H.264 at 100 Mbps is a losing proposition (e.g., the GH5 barely gets by storing 10-bit video at 150 Mbps, while offering 400 Mbps as an option).  Then, as expressed earlier, the fact that the new flyer lacks 60p at full UHD in comparison to the Phantom that does, hardly matters when you’re shooting footage at proper 30p in formal real time with accurate motion blur.

UPDATE: Mavic 2 Pro Image Quality is Inferior

Now that the hype has settled down, Cliff Totten created this incredibly insightful video, offering extremely probable speculation about why the Mavic 2 Pro’s image quality is inferior to the Phantom 4 Pro V2.0.  He reminds us about the eternal truth of sensor specs:  that what really matters is how the sensor readout translates into the images we see.  He speculates that DJI’s high-visibility cancellation of its launch event, and delay of the product launch, was due to overheating.  This makes perfect sense to me; the camera is jammed into a tiny cube, with more to do (10-bit acquisition, HDR), and we all know that heat is also the principal reason for noisy video image quality.  It’s a simple and common solution against such engineering obstacles, for manufacturers to change how the sensor acquires images, using tactics like line-skipping as opposed to full-sensor readout.  They can still boast about the core spec (e.g., that it’s a one-inch sensor), but the image quality suffers.  Cliff’s video proves this beyond any shadow of doubt.  Sadly, this means we have to wait until a Mavic 3 Pro, for the camera tech to finally rise to standards set by the Phantom 4 Pro V2.0, which includes a mechanical shutter as opposed to the new kid’s jello shutter.

August 22, 2018 FocusPulling Original, UAVcine dji, drone, mavic 2, phantom 4, uav 2 Comments
← Older posts
Newer posts →

Recent Posts

  • PGYTECH OneGo 2 Backpack Review
  • DJI Osmo 360 | touring Washington DC
  • PGYTECH OneMo 2: this might be your ultimate backpack
  • DJI RS 3: Essential accessories for the best all-around gimbal stabilizer
15,288Fans
2,939Followers
51Followers
333Followers
6,170Subscribers
588Followers
54Subscribers
722Subscribers

Subscribe to Receive New Posts (Low-Traffic)

Check your inbox or spam folder to confirm your subscription.

START HERE TO GET YOUR GEAR AT THE B&H STORE

B&H Search Banner Small
B&H Photo - Video - Pro Audio

Advertisement
  • RECENT REVIEWS AT FOCUSPULLING

The Latest from Your RigShots

Follow FocusPulling (.com)'s board RigShots on Pinterest.
© Copyright 2015 by Zen Violence Films LLC, all rights reserved. To read the site privacy policy and ethics statement, click here.