The Sony a7 IV has finally arrived, after its announcement mid-October. It could have taken longer, given the vague (excu$e of?) manufacturing and shipping delays these days — and it could have felt revolutionary like last time, when Sony priced their a7 III for the masses. But Sony hasn’t felt the heat these days, and they want all your money. It’s still a damn great camera (I’m all-in for 10-bit 4:2:2 30p at 140Mbps). In my kit, it still can’t hold a candle to formal shooting in BRAW on my Pocket 4K and 6K Pro, but when I want to fly on a gimbal with auto-focus, there’s nothing better. And I was happy to spend one grand less than the overall inferior a7S III (always a hard pass for me).
CAGED UP
Time to rig up! That usually starts with a cage, and oddly enough, the world has boiled down to two close competitors: SmallRig and Tilta. SmallRig used to be the affordable option until they got greedy, and then Tilta came along, categorically besting SmallRig. Even if Tilta’s “Tactical” packaging has got that sexually insecure Oakley bro vibe, at least its logos are less obvio vis-à-vis SmallRig’s Sanrio.
What’s more, as seen in the above package contents, Tilta is simply more generous. Their new Sony a7 IV Full Cage at $69 includes a Manfrotto plate if you don’t prefer the cage’s integrated Arca-Swiss plate, along with a lens support bracket, additional adapters for anti-twist connections to a7S III and a9 bodies, and several extra screws and hex wrenches.

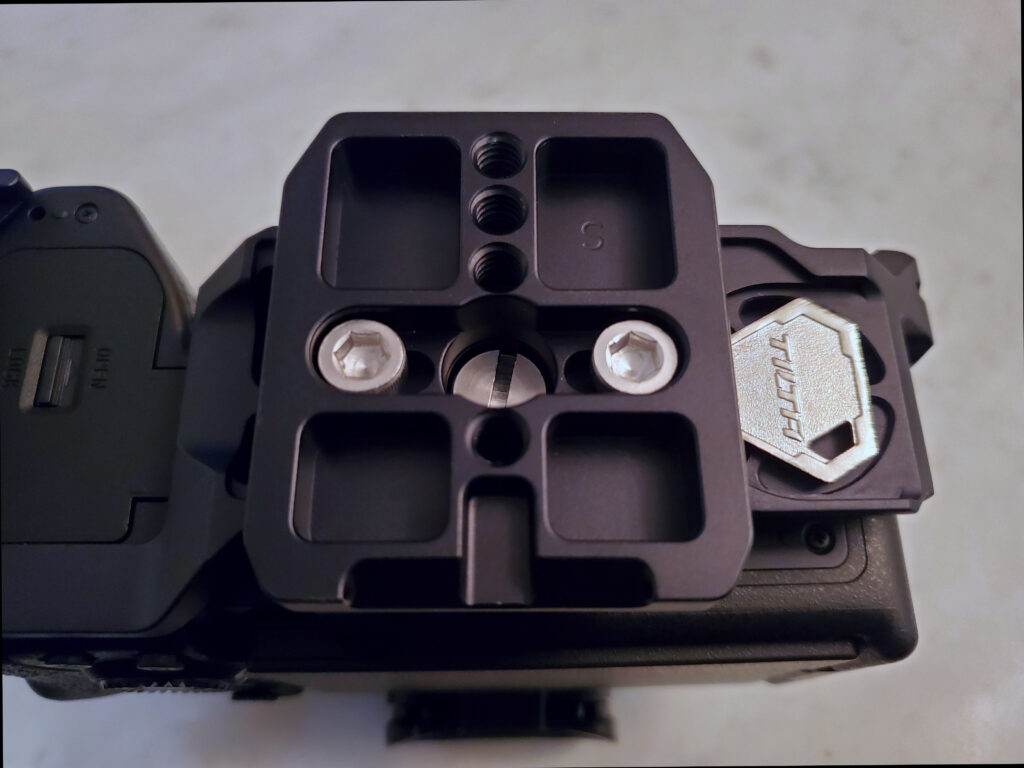
I love how the Manfrotto quick-release plate can stay permanently attached to the bottom of the cage, providing access through a middle opening to the screw that lets you remove the camera body from the cage at any time. Well, not so fast…
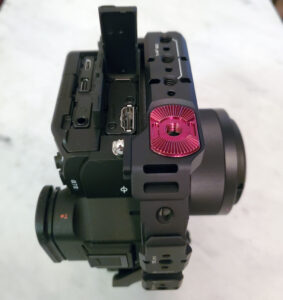
In the first of the above pictures, you can see Sony’s slightly improved neck strap lug. Lord knows, I’ve got tons of steadicam footage with the a7 III’s lugs audibly clanking around, but these stay stiff. However, don’t get used to it! The Tilta cage (SmallRig too) demands that you remove the left-side lug, to prevent the body from twisting inside the cage along its single bottom screw axis (this is something that CAME-TV always got wrong). In fact, you can’t install into the cage without this removal. It’s easy to do, as seen in the middle picture (just like a keyring), and then you need to screw Tilta’s included miniature hex bolt through the a7 IV’s bracket, locking the whole thing onto the cage through an upper bolt. As mentioned, Tilta also includes a bracket spaced for the a7S III, and for the a9 — so despite what the packaging says, this cage works for more than just the a7 IV.
But the good news ends there; if you ever need to take the camera body out of the cage (e.g., to fly on a gimbal without the weight of the cage), this is a huge hassle — and again, it’s not optional. If you don’t have that ultra-tiny hex wrench with you, you’re “screwed.” Tilta didn’t even create a molded magnetic seat at the bottom for the hex wrenches to always be handy, compared to other cages. And upon finally removing the camera from the cage, you also need to reattach lugs if you want to sling the camera from a shoulder strap.
I’m not a fan of the Multi Interface Shoe because its proprietary Sony accessories are overpriced and they underperform, so my preference would have been to further secure the camera through that camera body hotshoe — after all, you still get two more hotshoes on the cage itself, as seen above.
 But there’s still a lot to love about Tilta’s design, including side NATO rails as seen in this side view, along with clear access to the camera’s ports, and an ARRI-style rosette. In lieu of the shoulder strap lugs now removed, Tilta gives you slots on the cage for a shoulder strap (or, for most of us these days, Peak Design Anchor Links).
TOP HANDLE & EYECUP
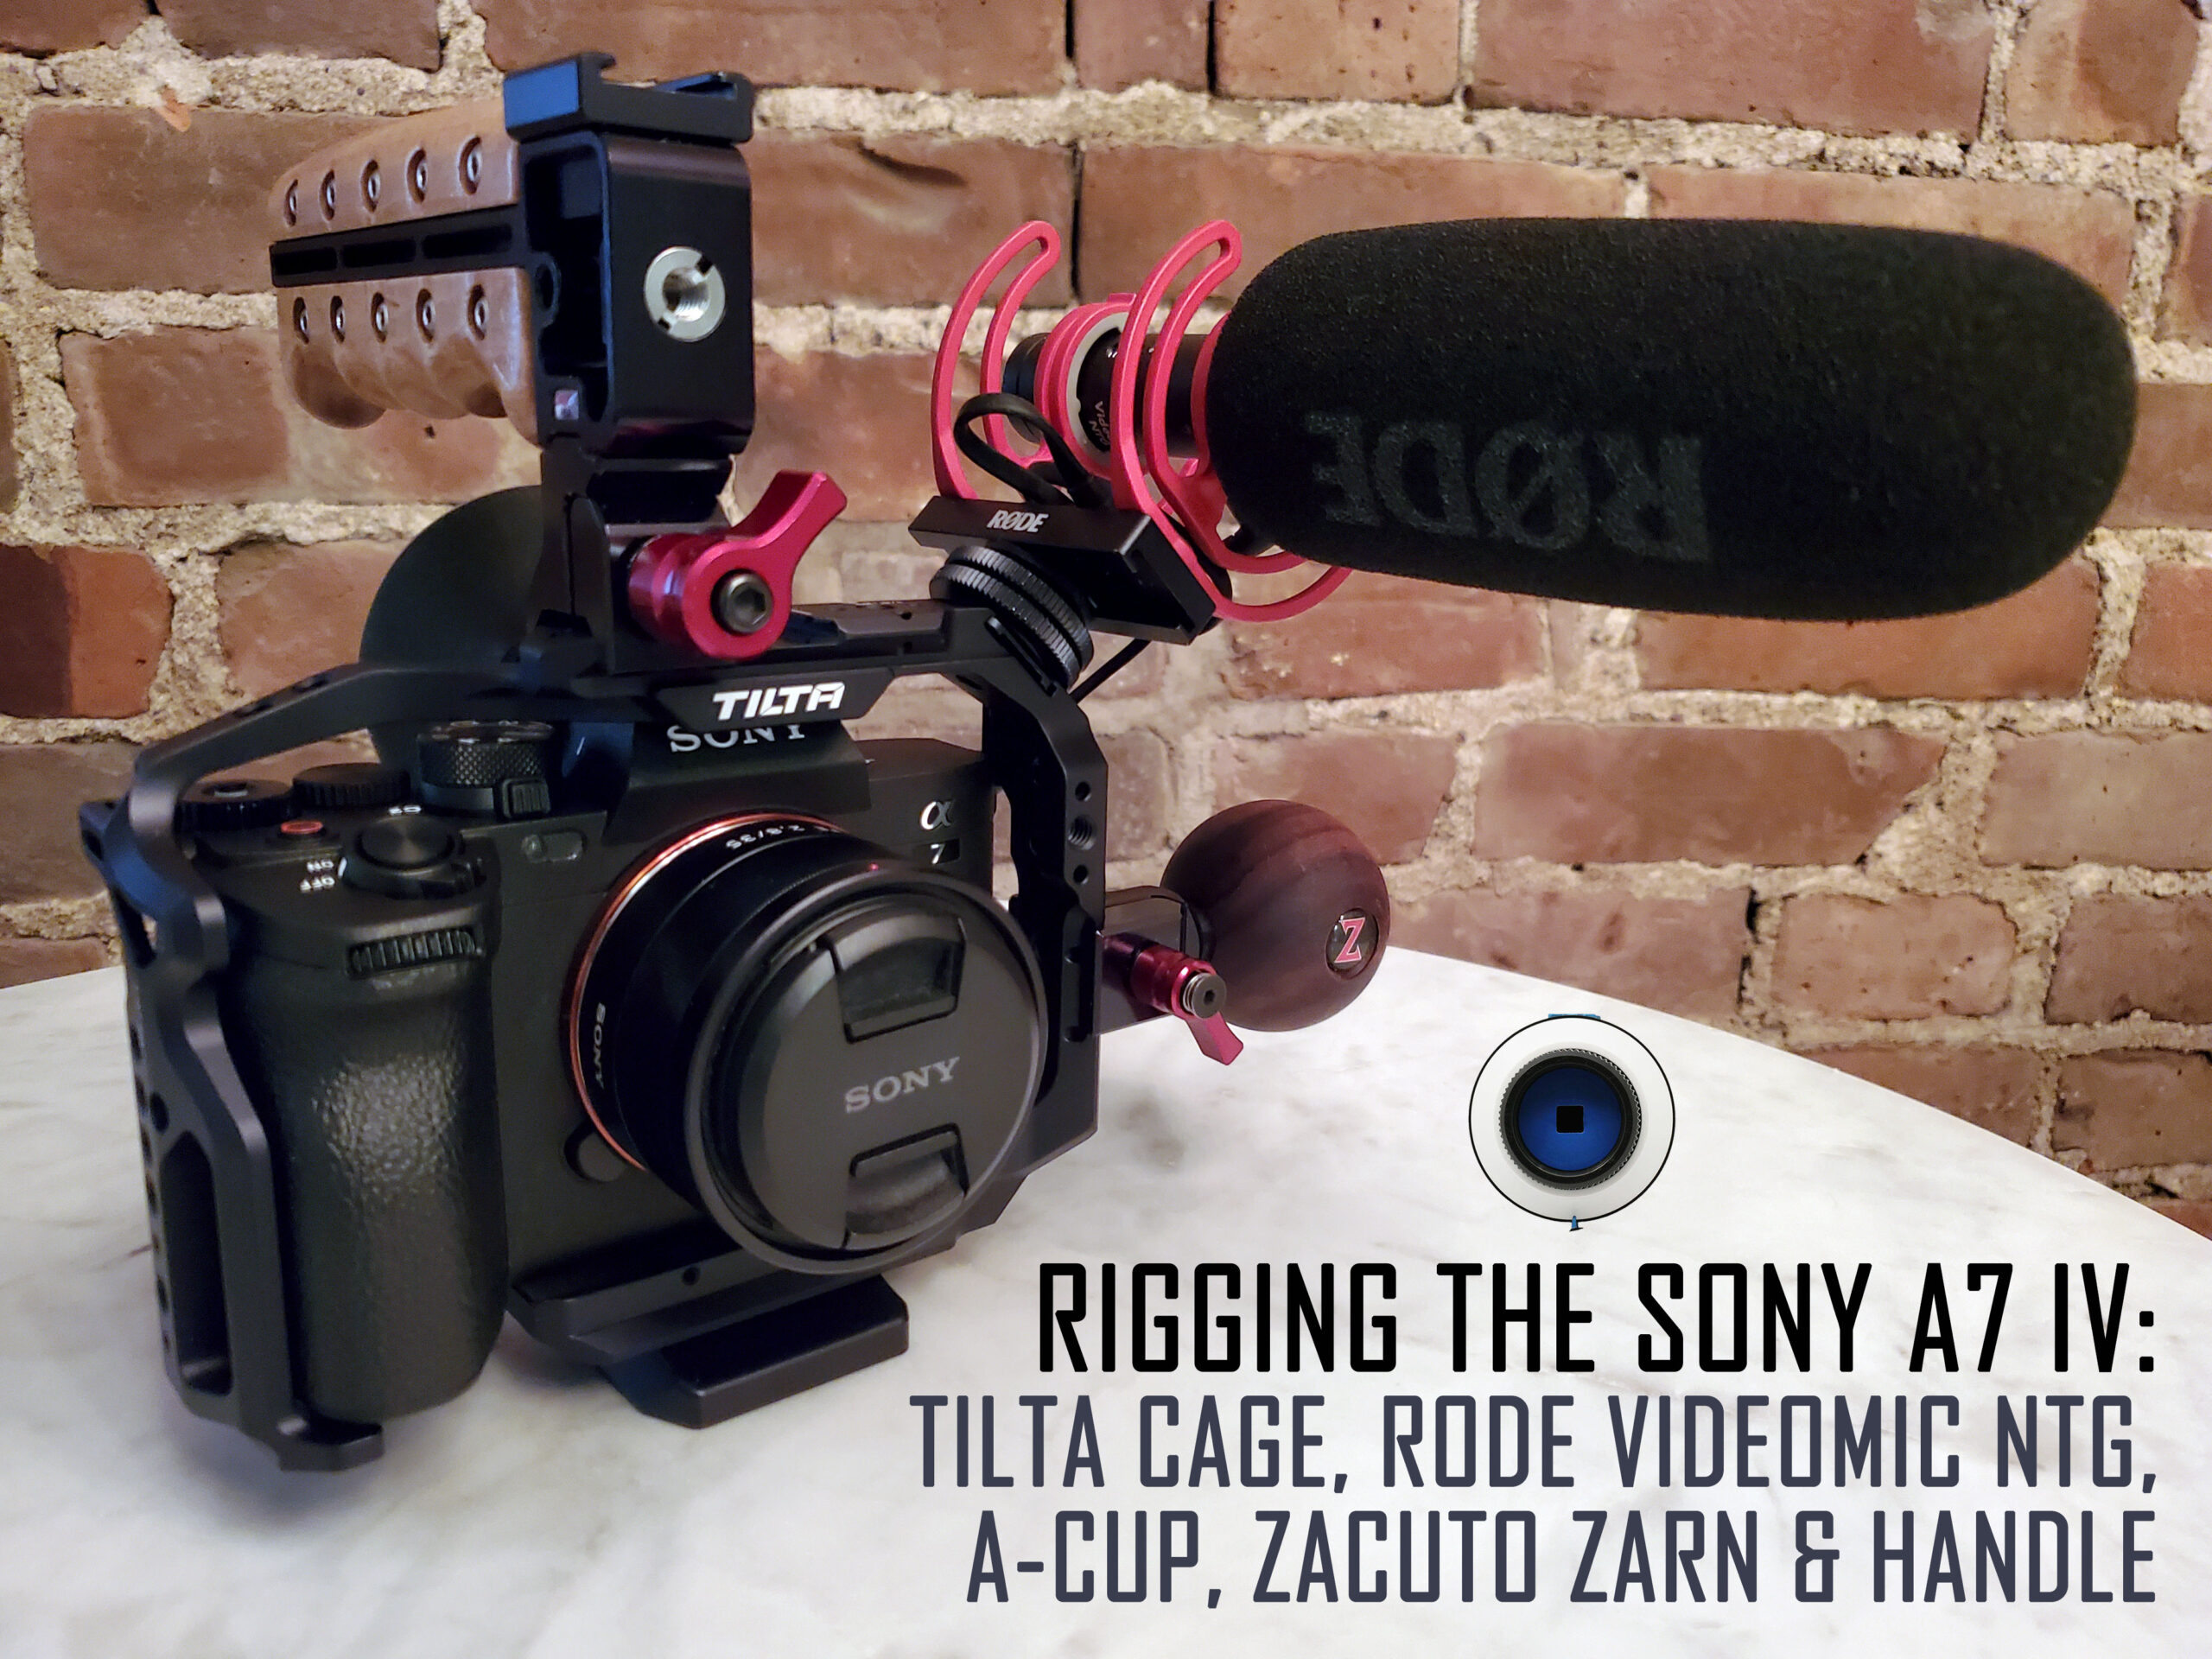
Some minor gripes include the fact that there are no 3/8″ screw holes, and that the dead-center hotshoe prevents a NATO top handle from taking that prime spot for secure center of gravity. On the other hand, as seen below, the center of gravity may get offset anyway once we rig it up, and so I’ve added my trusted Zacuto top handle onto the top NATO rail a bit off-center.
I’ve also added an underappreciated, extremely critical tool for adding a third point of contact with your face, via the indie product A-Cup by Miller & Schneider. There have been subsequent alternatives by Hoodman and Vello, but none of them are big enough to fully simulate a proper cinema camera eyepiece. However, since fitting onto your face is really subjective, it might be worth a try sampling a few options to see what works best for you. One drawback of the A-Cup is that it blocks the automatic presence sensor, shutting off the rear screen. On the other hand, Sony has improved the tight fight of the eyepiece bracket, adding confidence to taking off and re-mounting this bigger eyepiece whenever you need it.
ZARN SIDE HANDLE
Another must-have rigging accessory is this deceptively simple “Zarn” by Zacuto. Instead of the typical bulky, vertical rectangular handle, this little thing behaves like a ball joint in your arm, helping you elegantly twist and turn into stable positions across a shot. You’ll believe it when you try it, and you’ll never want to go back to a clunky grip. When you’ve got this wider berth of left-side/right-side grips, combined with the third point of contact from an eyecup, it’s an altogether stable rig for running-and-gunning.
SHOTGUN MIC
Finally, there’s one more must-have when you’re rigging up your Sony a7 IV: the Rode VideoMic NTG. The moment when this thing hit the market, it obliterated all other options. It combines the performance of Rode’s professional NTG shotgun lineup, with a strong pre-amp to feed the camera’s mediocre microphone-level input (recipe: set the Rode high, set the Sony low), with an excellent Rycote shock mount, and a versatile USB computer/smartphone connection option too. It also lets you record a safety track at lower amplitude to the other of the stereo recording tracks, in case of clipping.
OMISSIONS
Normally, a guide to rigging a new camera comes with tons of anxiety about battery power and storage media. For a few reasons, that just doesn’t apply here. Firstly, once the NP-FZ100 battery standard arrived (compared to the weakling NP-FW50 used in the a7S II), our power problems diminished. So long as you buy OEM (or third-party equivalents that have at least 2250 mAh capacity), a single battery gets you through a few hours, and when that runs out, you just toss in another. They’re cheap. Meantime, it doesn’t get better when you try to power from the USB-C bus, or even from a fragile “dummy” battery: that’s ironically worst-case for overheating into shut-down, since the camera holds out longest (given its high-temperature setting) from the internal battery, after the rear-panel LCD stays swung away from the body.
Sony also stubbornly refuses to allow external media storage via the USB-C port (compared to, e.g., the Blackmagic Pocket line of cameras), so it all comes down to internal SD cards. Ignore those overpriced CFexpress Type A cards, because you wouldn’t need them for anything but the creepiest Bridezilla mode (and please, stop obsessing over slow motion already). For maximum versatility, it’s gotten cheap to invest in V90 UHS-II SD cards, and my favorite so far is the Lexar gold label marked “2000x” (we all know that’s a fake number). But you can also get by with V60 for almost all of the recording modes — and anyway, you won’t want to shoot in the all-intra XAVC S-I, format because there’s no visible difference, and your editing program won’t notice the difference either.


Leave a Reply